
SGR-28 Application Guide

1. PRODUCT INFORMATION
1.1 Product description:
SGR-28 is a light-curable polymer-based resin designed for the fabrication of biocompatible, short-term use, removable dental appliances by 3D printing. It is intended for 3D printing dental implant accessories such as surgical guide models.
1.2 Intended use:
SGR-28 resin is a light-curable polymer-based resin designed for the fabrication of biocompatible, short-term use, removable dental appliances by 3D printing. It is intended for 3D printing dental implant accessories such as dental surgical guides.
1.3 Material associated warnings:
SGR-28 in its uncured state contains monomers that polymerize during 3D printing. Please read MSDS of SGR-28 material which is available at https://ameralabs.com/msds/ for hazards associated with liquid material.
The uncured liquid resin is not safe for contact with food, drinks, or the human body. In its liquid, uncured state, this resin is a hazardous chemical. Use protective gloves and glasses at all times when handling it. Provide adequate ventilation. Store resin at room temperature away from direct sunlight. Resins are classified as dangerous chemicals and must be disposed of properly in designated containers. Resin bottles, empty or full, must never be disposed of or poured into general waste.
2. REQUIREMENTS
2.1 Hardware
2.1.1 3D Printer
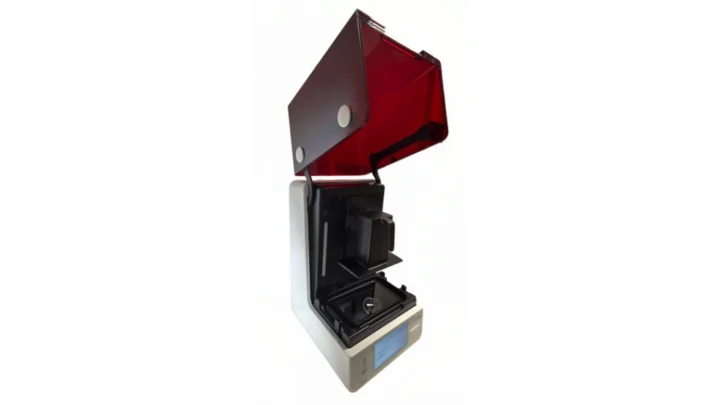
In order to print with SGR-28 3D printing material for surgical guide models, you need LCD/mSLA or DLP 3D printer with the light source of 385nm or 405nm. If your machine has recommended settings on our website, they should be a good starting point and fine-tuned according to your environment if needed. Usually, each machine and work environment is relatively unique, thus, some minor adjustments to printing settings may be needed. We keep 3D printings settings up to date on our website.
2.1.2 Resin tray and build platform
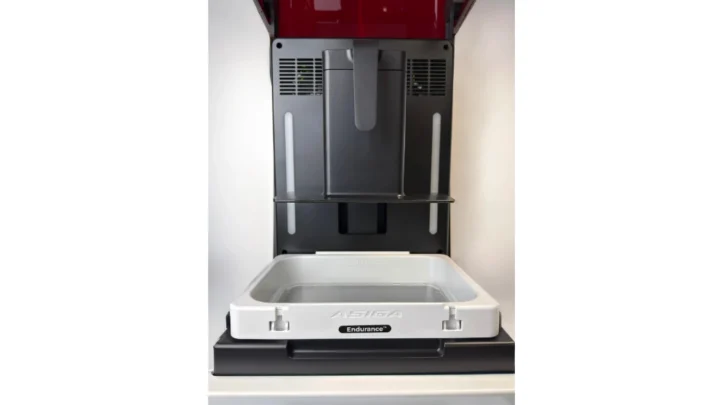
You also need a separate resin tank and build platform to ensure biocompatibility for products made with SGR-28 resin. In general, you should always use a separate resin tray and build platform for biocompatible products. If resin is mixed with another material, biocompatibility of a product could be compromised.
2.1.3 Washing equipment
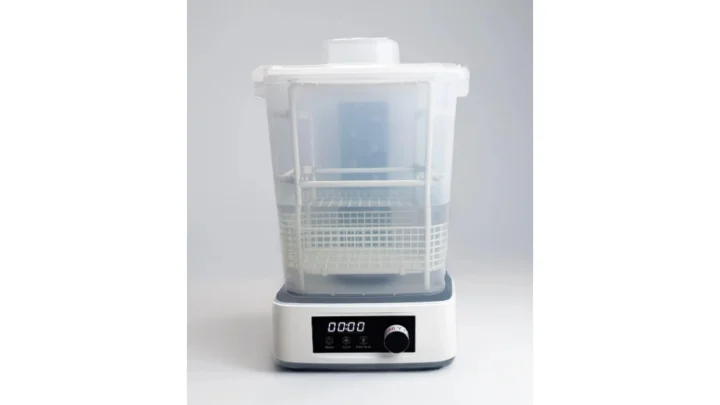
Regular washing station with magnetic stirring could be used. However, regular sealed containers could be used as well. It is important that washing stations are dedicated to biocompatible materials as using one washing station with other non-biocompatible resins will compromise biocompatibility.
2.1.4 Post-curing equipment
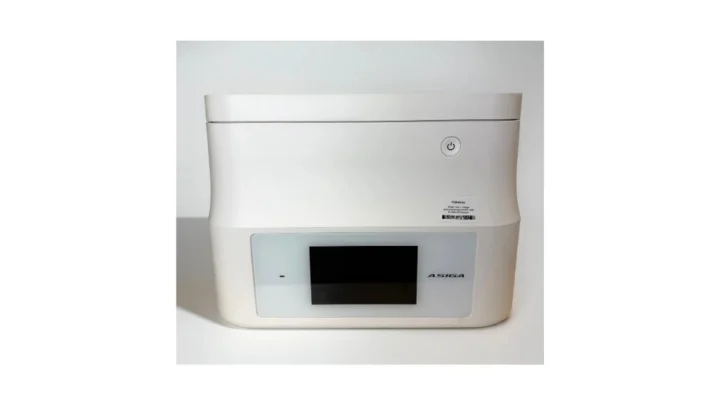
General post-curing equipment with 385nm, 395nm or/and 405nm light sources could be used.
2.2 Software
We do not have strict requirements for 3D printing software as it depends on your 3D printer. You could use any software you like as long as it fulfils your requirements and works best for you. In this usage guide we will be using Asiga Composer.
2.3 Materials
Apart from SGR-28 material for 3D printing, you will also need 99 % isopropyl alcohol (IPA) used for cleaning manufactured objects.
2.4 Safety equipment
In order to work safely, protective eyewear, nitrile gloves and laboratory clothing are required. Moreover, air ventilation is mandatory in the room with at least 4 times/hour air exchange. Otherwise do your work, including 3D printing, in the fume hood.
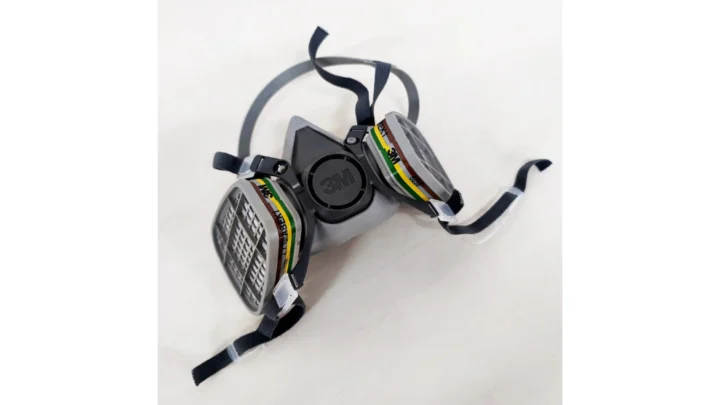
We also do recommend wearing half facepiece reusable respirator with gas and vapor filters.
3. SURGICAL GUIDE DESIGN
3.1 Recommended design parameters
Design of the surgical guide model may vary case-by-case and depending on the software package you use. Nonetheless, adjust design settings thoroughly and carefully to ensure precision, comfort and, most importantly, safety. We have prepared general guidelines that could be followed when designing surgical guide model. Modify these design settings according to your situation and experience.
| Setting | Recommendation |
| Wall thickness | We recommend setting it to at least 2mm. Too thin a wall could result in structural instabilities and weaker structures. Wall that is too thick, however, could cause printing issues due too large cross-sectional area and loss of precision due to higher material shrinkage. |
| Corner radius | We recommend adding fillets to corners. If possible, avoid sharp corners and use fillets to smooth out transitions. This will mitigate the chance of forming stress points and will lead to overall more resilient surgical guide. |
| Offset from teeth | We recommend a maximum of 0.07 mm. Having higher offset will make the surgical guide fit more loose, while too small of an offset can make it more difficult to put the surgical guide on the patient’s teeth. |
| Offset from sleeve | We recommend a maximum of 0.04 mm. It should be as low as possible while still being able to press in the metal guide sleeves. |
The exact step-by-step design varies by software package. For detailed advice on designing surgical guide, contact your software manufacturer.
4. 3D PRINTING
4.1 Defining printing parameters
Before importing actual 3D model into the software, we highly recommend setting up your software with appropriate 3D printing parameters, such as exposure times, lifting distances, and various speeds.
These parameters highly depend on the machine being used. The list of validated 3D printers and corresponding parameters can be found on https://ameralabs.com/3d-printing-settings/.
Depending on the desired surface finish of the surgical guide and the speed of printing, 50 or 100 µm layer height is recommended.
NOTE: The list of 3D printers on our website is not definitive. It represents our tested and validated set of machines. It is possible to use other 3D printers as long as correct exposure and other settings are obtained. Feel free to contact us if you need help determining the correct 3D printing parameters.
4.2 Importing models
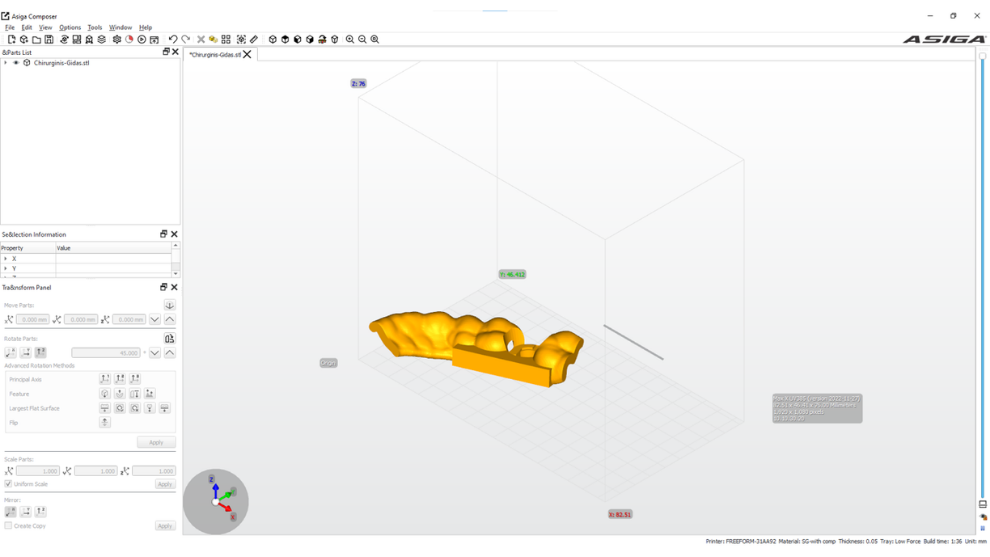
Open software package of your choice and import *.STL (or *.OBJ if supported) file.
4.3 Orient your model
Position surgical guide model at a slight angle.
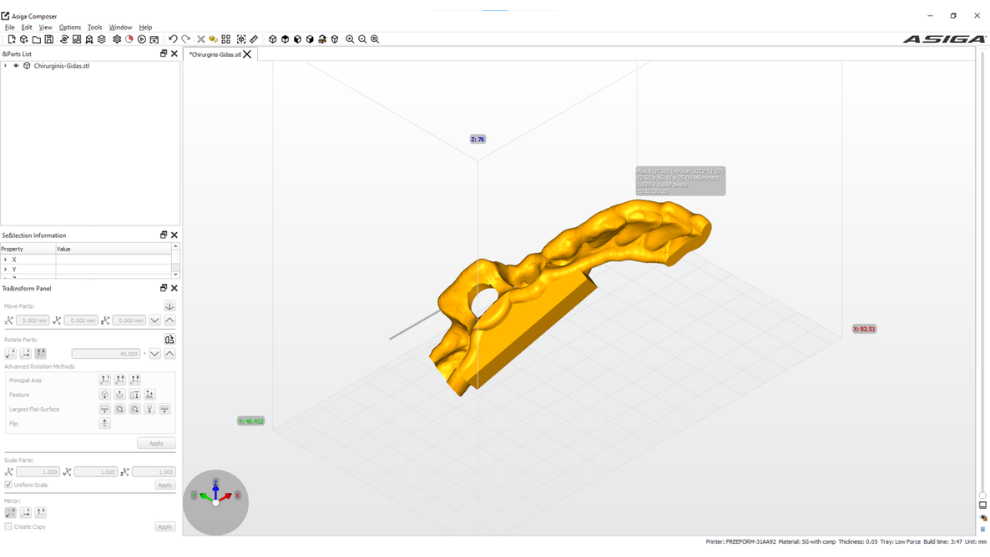
The surface that faces the build platform also highly depends on each case. Generally, the model should be oriented so that the critical surfaces that are going to be in contact with teeth and/or metal sleeves could be printed without placing supports on aforementioned surfaces. Furthermore, try to avoid orientations that would lead to suction cup areas with no way for the resin and air to move around. Lastly, to avoid horizontal defects orient the part so that cross section area of layers increase/decrease gradually.
4.4 Generate support structures
You can set up support structures based on the following table.
| Parameter | Value |
| Strut diameter, mm | 0.8 |
| Tip diameter, mm | 0.3 |
| Tip depth, mm | 0.1 |
| Density/Spacing, mm | High/2 |
| Raft thickness, mm | 0.2 |
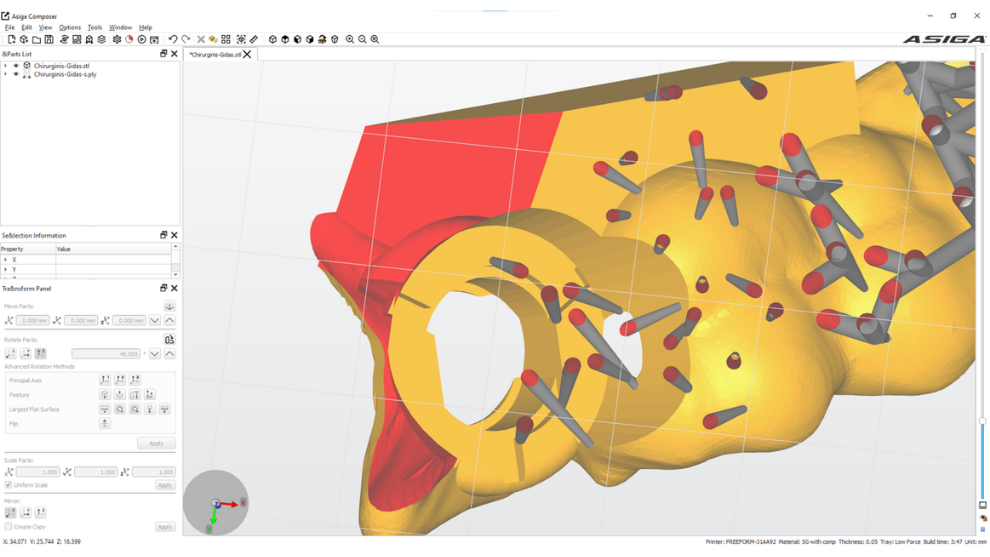
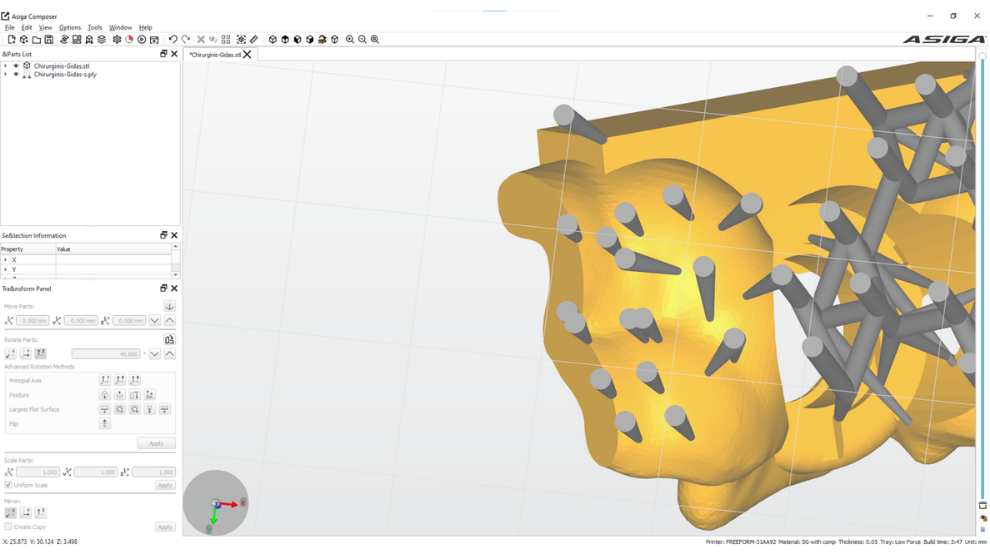
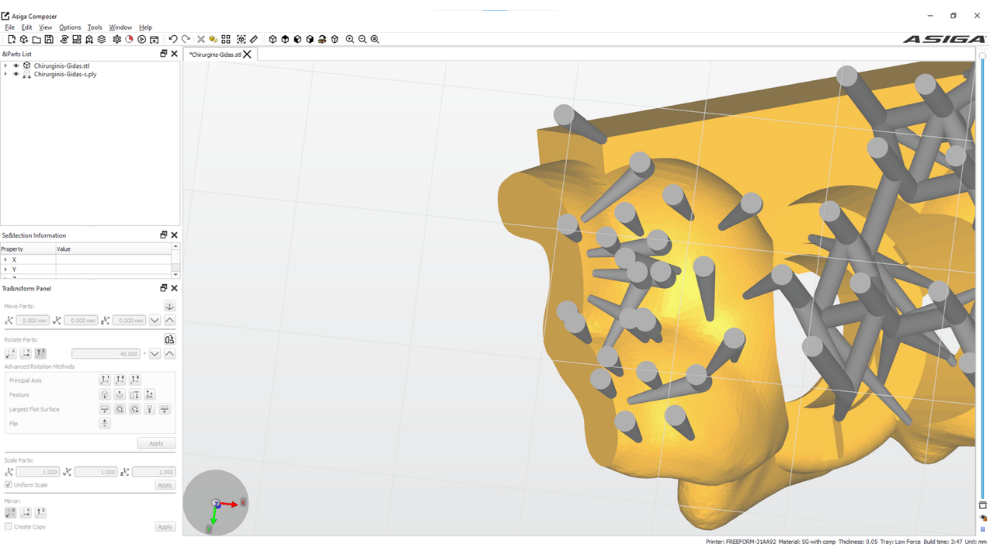
Generate initial support structures using auto-generation feature.
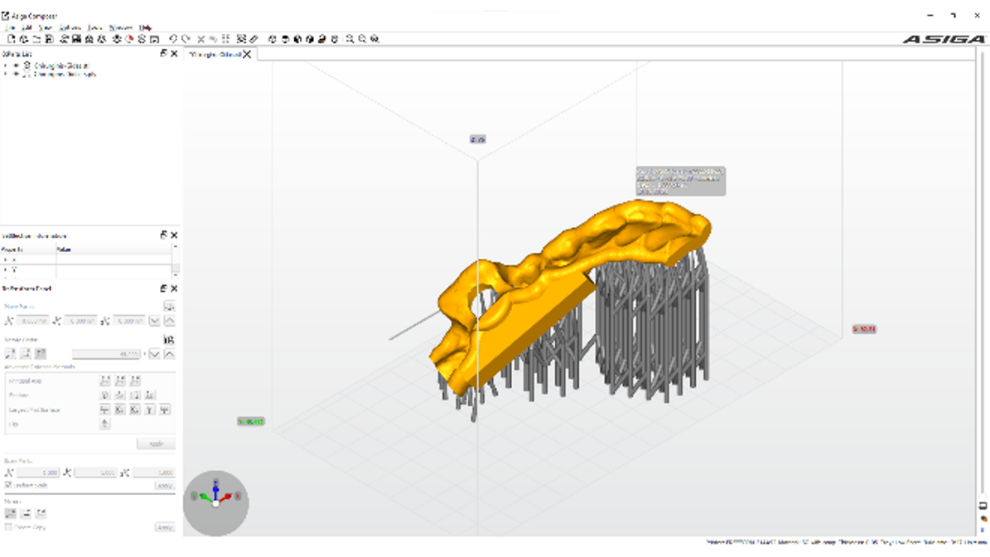
NOTE: As with pre-defined packages user must adjust auto-generated support structures evaluating it based on their expert knowledge.
RECOMMENDATIONS: Always protect critical surfaces from support structures and concentrate them on the perimeter edge of the model. Using this practice allows users to remove support structures from model surface more easily.
The most attention must be paid to parts closest to the building platform, where the highest support density should be. Don’t forget to densify support structures on protruding areas that can encounter failure due to low self-support.
4.5 Prepare the printer and resin
WARNING: When handling any 3D printing resin, make sure you wear nitrile gloves.
WARNING: 3D printing resins can cause damage to your eyes. Always wear protective eyewear when dealing with liquid resins.
WARNING: Make sure you are in well-ventilated area during the 3D printing and post-processing. Ventilation of at least 4 times/hour air exchange is recommended.
WARNING: Always wear appropriate clothing when working with resins to avoid skin contact.
RECOMMENDATION: We highly recommend wearing half facepiece reusable respirator with gas and vapor filters when working with liquid resin and staying in the room with open resin containers.
Prepare your 3D printer by inserting your dedicated SGR-28 resin tray and build platform.
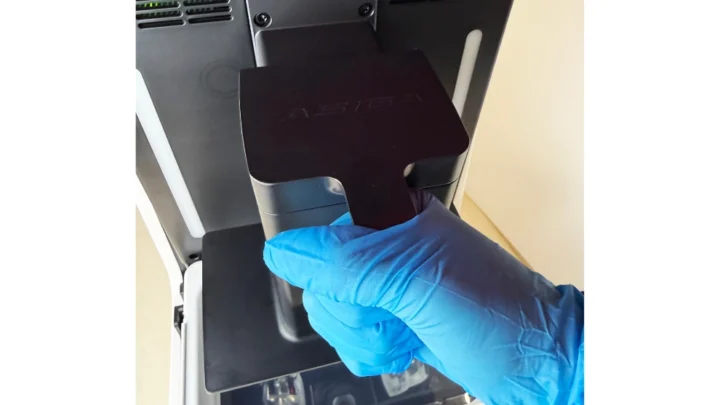
NOTE: Do not forget to use a dedicated resin tray and build platform to print biocompatible products.
NOTE: Make sure your printer build platform is well-leveled. Leveling procedure is different for each 3D printer. Contact your printer manufacturer for build platform leveling instructions.
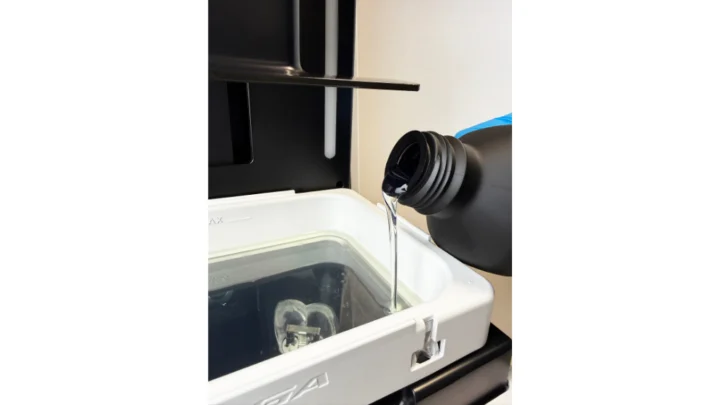
NOTE OR SHAKE ICON: Shake the resin bottle thoroughly before pouring it into the resin tray. It is hard to emphasize how critical it is to mix and shake the resin before printing.
Pour the well shaken resin into the resin tray to the desired level. Do not exceed the maximum marker on the resin tray.
4.6 Start print
When you are all set. Send the job to the 3D printer or export it to a memory card and load it to the machine or send it to the printer over your network.
NOTE: Be aware of the correct ambient temperature during the 3D printing. SGR-28 should be used when it is around 25C.
5. POST-PROCESSING
Post-processing 3D printed surgical guide models involves multiple steps, such as removing the part from the build plate, removing supports, rinsing, drying, post-curing and sanding/polishing.
5.1 Part removal
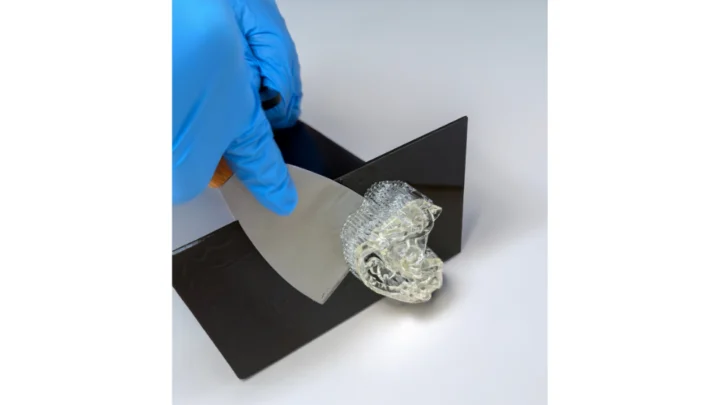
We recommend removing printed parts right after 3D printing and before cleaning, but part removal can also be done post-cleaning. In order to remove parts from the build platform, first remove the platform from the printer. Use a removal tool, such as a metal spatula, and slide it under the base of the printed part.
NOTE: Place the platform on the hard surface while removing the part. It will significantly reduce the likelihood of injury.
NOTE: Use your wrist instead of your hand muscles when removing the part. The wrist has a lot more control capabilities than the entire hand. Moreover, wrist movements have a relatively low amplitude compared to hand movements, which significantly reduces the likelihood of accidental, uncontrolled motions that could cause injury during part removal.
5.2 Remove supports
Support structures can be removed either right after 3D printing or post-curing. As post-curing could cause unwanted warpage, existing supports can help preserve the correct geometry and avoid warpage. On the other hand, support removal after post-curing could be more difficult as the material becomes harder and relatively brittle.
5.2.1 Removing supports after printing
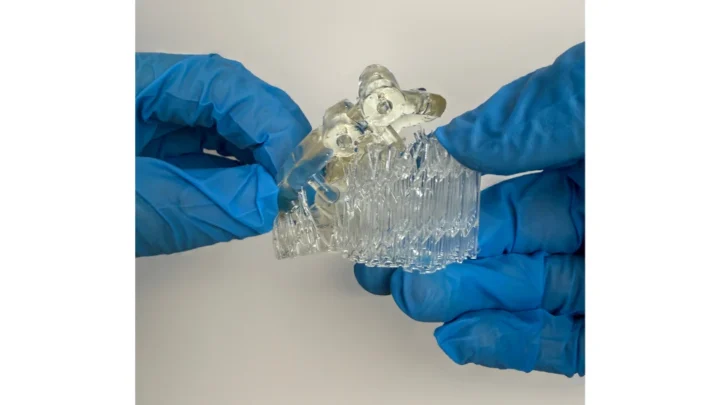
Supports can be removed using flush cutters or similar tools. Cut the supports at touchpoints attached to the denture try-in model. Material at this point is relatively soft and it is easier to remove supports.
5.2.2 Removing support after post-curing
After cleaning and post-curing supports could be removed using flush cutters or specialized equipment like hand-held disc cutters.
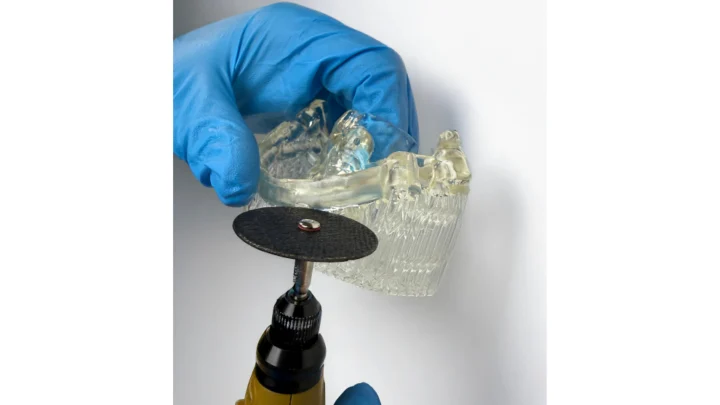
WARNING: Be aware that the material is more brittle and harder after post-curing. Make sure you wear eye protection.
WARNING: Material dust is dangerous. If you use disc cutter or sanding tools, make sure you use suitable respirators or half facepiece reusable respirator with appropriate filters.
Inspect part carefully when removing supports, especially after post-curing. If any kind of cracks or damage is detected, discard the model.
5.3 Part washing in isopropyl alcohol
5.3.1 Washing station
If you do own a washing station with magnetic stirring, put the part in to the metal gasket and fill container with fresh 99% isopropyl alcohol. Make sure that the part is fully submerged and check that during cleaning part also stays submerged.
Set the timer to 5 minutes and start cleaning. Repeat the cleaning if necessary. Avoid leaving the printed part for longer than 10 minutes in IPA which can cause cracking of the part.
NOTE: Use dedicated washing station for biocompatible materials. Do not mix dirty IPA with biocompatible and non-biocompatible materials as that could compromise biocompatibility of printed part.
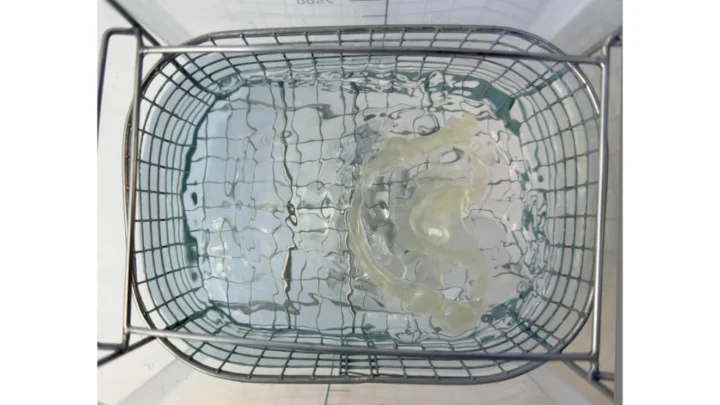
5.3.2 Ultrasonic cleaner
Put printed part in a plastic (preferably HDPE) container or a glass beaker filled with fresh 99% IPA. Make sure that the part is fully submerged in IPA. Place that container into ultrasonic bath filled with water and run the sonication from 1 minute, swirl it around and sonicate for another 1 minute. Avoid leaving the printed part for longer than 5 minutes in ultrasound cleaner which can cause cracking of the part.
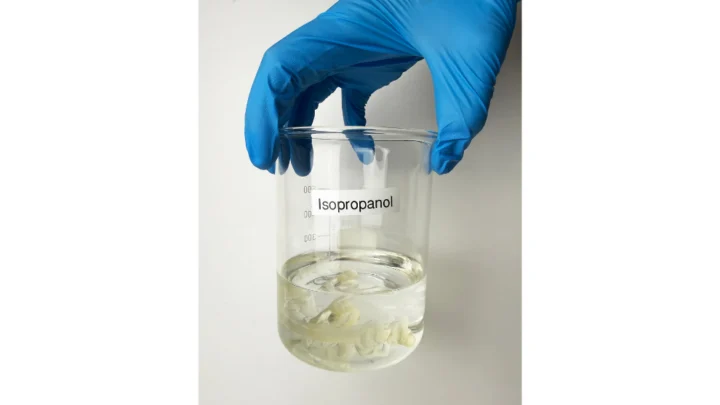
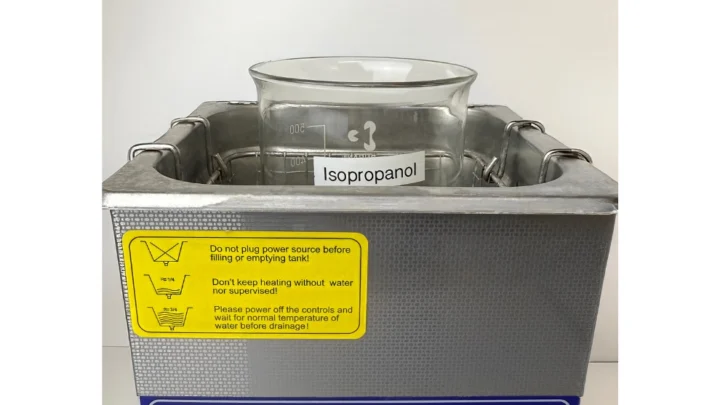
5.3.3 Regular closed containers
If you do not have automated cleaning equipment, you can clean the part manually using regular sealed plastic (preferably HDPE) containers. Put the part into the container and fill it with fresh 99% IPA, make sure that the part is fully submerged in IPA. Follow this procedure:
- Let the part rest in IPA container for 5 minutes.
- Swirl the IPA container with the part in it actively for another 1 minute.
- Leave it still but fully submerged to rest for another 5 minutes after swirling.
- Finally, swirl the bath actively again for 1 minute.
5.4 Part drying
Dry the part with either compressed air or leave it to dry naturally in a well ventilated area for at least 30 minutes. Inspect dry parts very carefully for uncured resin or other particles. You can easily identify uncured resin on a surface of a dry part when it has “wet” stains. Pay special attention to negative features like holes or intricate spots, where resin could still be trapped.
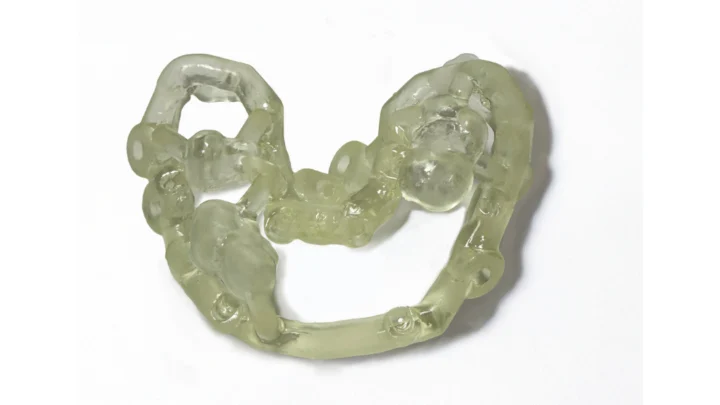
If you find “wet” stains or other particles, you can repeat cleaning cycle again. If secondary cleaning cycle is needed, we recommend changing IPA that you used to a clean one.
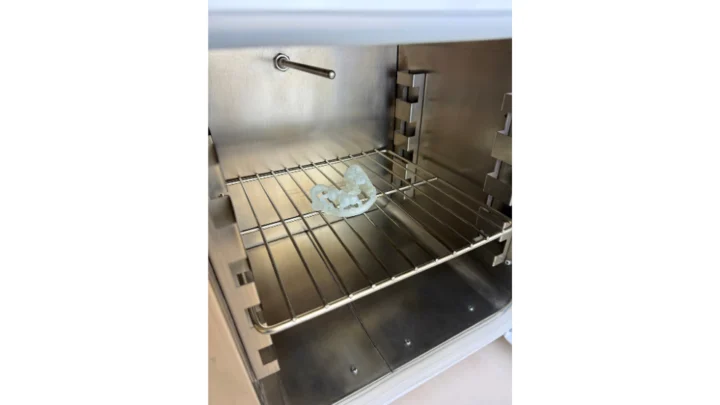
If surgical guides printed from SGR-28 are planned to be sterilized using pressurized steam, then extra drying should be done to ensure no cracking. This can be achieved by heating the printed guides at 70 °C for 5 minutes. Drying at lower temperatures is possible, however duration of the drying step should be increased. Drying at room temperature should be done for at least 24 h.
5.5 Post-curing
Post-cure part in UV chamber <405nm LEDs for 20 minutes. Make sure that all surfaces are post-cured. If your UV chamber does not provide uniform light to the entire surface of the part, after 10 minutes change the position of the part (i.e. turn it upside down) and post-cure again for another 10 minutes.
DISCLAIMER: Color is a response variable. It can vary depending on the wavelength of 3D LCD/mSLA or DLP printer that was used to build the dental model, post-curing parameters and natural effects of time.
We recommend sticking to our predefined post curing settings:
| Post-curing machine | Temperature | Atmosphere | Time |
| Asiga Cure | 25 °C | Air | 10 minutes |
| Formlabs Form Cure | 70 °C | Air | 7 minutes |
| Photopol Smart A5408S/D | 25 °C | Air | 15 minutes |
NOTE: Prepared models can change color in time due to their lightening in natural conditions.
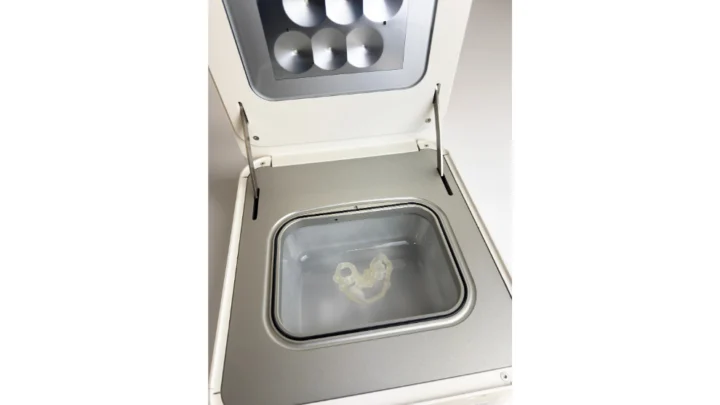
WARNING: Post-curing outside of the recommended settings can result in poor mechanical and biocompatibility properties, moreover, color features can deviate from a desired outcome. Please post-cure only in accordance with official recommendations from AmeraLabs for the best results.
5.6 Support removal
If you have not removed support right after 3D printing, please follow 5.2.2 Removing support after post-curing section for details on how to remove supports.
5.7 Sanding and polishing
After support removal left-over marks need to be sanded using typical methods such as high grit sandpaper so the maximum comfort to a patient can be ensured. In case of a need, part polishing can be done adapting usual dental polishing techniques.
WARNING: Material dust is dangerous. Make sure you use suitable respirators or a half facepiece reusable respirator with appropriate filters when sanding.
WARNING: Inspect the part carefully after polishing. If any kind of cracks or damage is detected, discard the model.
6. USE
6.1 Sterilization and disinfection
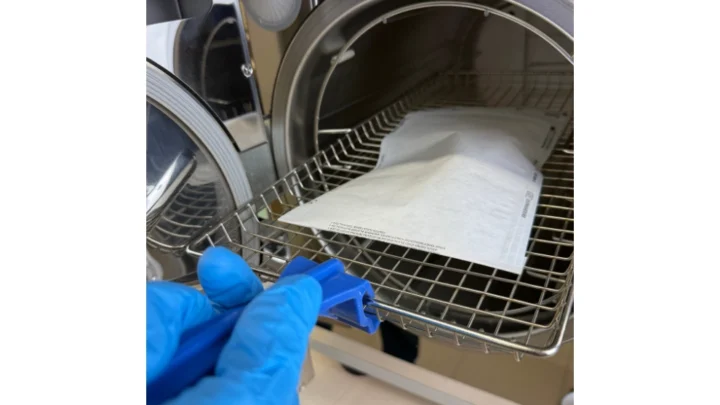
3D printed parts using SGR-28 material can be sterilized in standard steam autoclaves. This can be done either with or without sterilization pouches. Sterilize according to validated autoclave cycle below.
| Autoclave type | Temperature | Time |
| Pre-vacuum steam sterilizer | 134 °C / 270 °F | 5 minutes |
NOTE: Respect time and temperature limits as longer and hotter autoclave cycles may result in degradation of surgical guide mechanical properties and accuracy.
If cleaning and disinfection methods are required, please use your facility protocols. Verified disinfection methods are:
- Soak the finished product in clean and fresh 70% IPA for 5 minutes.
- Soak the finished product in clean and fresh 2% chlorhexidine solution for 2 minutes.
It is important not to leave the part in the disinfection solution for longer than 5 minutes due to possible negative effects. After disinfection, examine the part for damage or cracks to ensure that produced part meets performance requirements.
NOTE: Do not leave surgical guide models in alcohol solution for an extended period of time as it may lead to degradation of properties.
IMPORTANT: After disinfection or sterilization, inspect the printed part for cracks and damage to ensure the integrity of the printed part. If any kind of cracks or damage is detected, discard the model.
7. BIOCOMPATIBILITY
SGR-28 resin is non-cytotoxic, not a sensitizer, non-irritating and complies with EN ISO 10993-1.
8. ADDITIONAL DOCUMENTS
Additional documents are available upon request and on our website at https://ameralabs.com/shop/SGR-28/
- EC Declaration of Conformity
- Information For Use
- Technical Data Sheet
- Material Safety Datasheet
9. CONTACT INFORMATION
Manufacturer: MB Labsamera
Draugystės st. 14, LT-51259 Kaunas, Lithuania
support@ameralabs.com