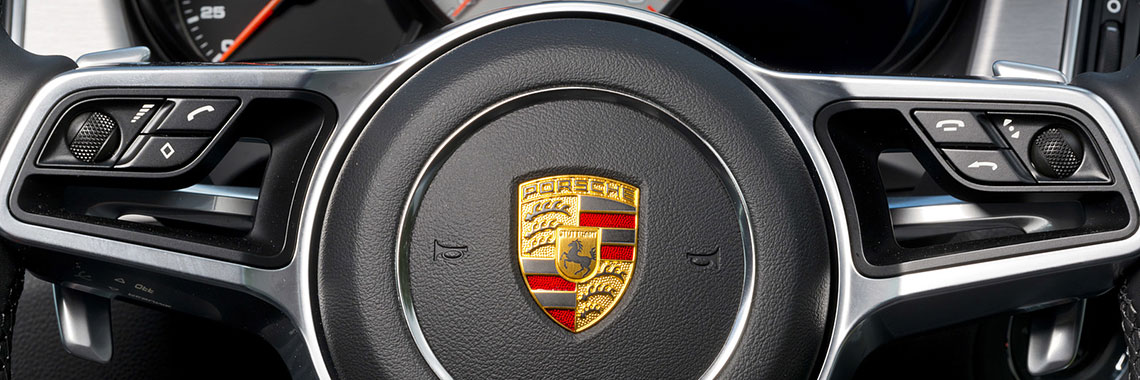
With this article we will start a series of posts with real-life SLA 3D printing cases. It will cover all steps of 3D printing process up until the final result. These articles are dedicated to new users as well as experienced ones. This case covers 3D printing of a single Porsche steering wheel button.
Why was this button 3D printed?
How could this button break? When airbag of a steering wheel explodes during car accident, that one specific button is very likely to break and it is impossible to get this button replaced. So our customer came up with an idea to make a 3D printed button.

Resin 3D printing technology is perfect for printing this button. It is quite small and has very intricate details and features that must be produced extremely precisely to fit the steering wheel. No other type of 3D printers would be able to perform as good, so SLA resin 3D printer is our choice.
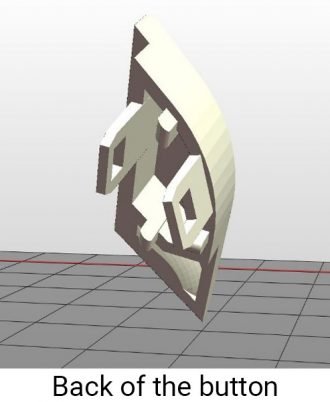
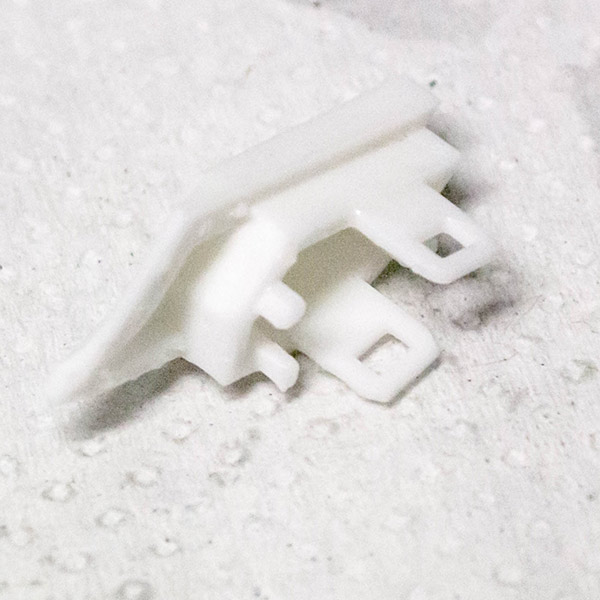
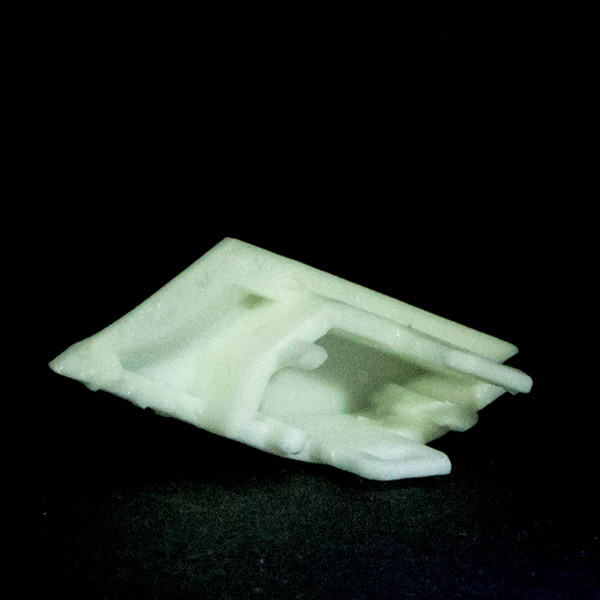
The back of this 3D printed button (functional part) is the most complex one. There is a set of fixers/retainers at the back that holds the button in place. Since we will place support on this side, we will have to pay extra attention to details to produce the best results.
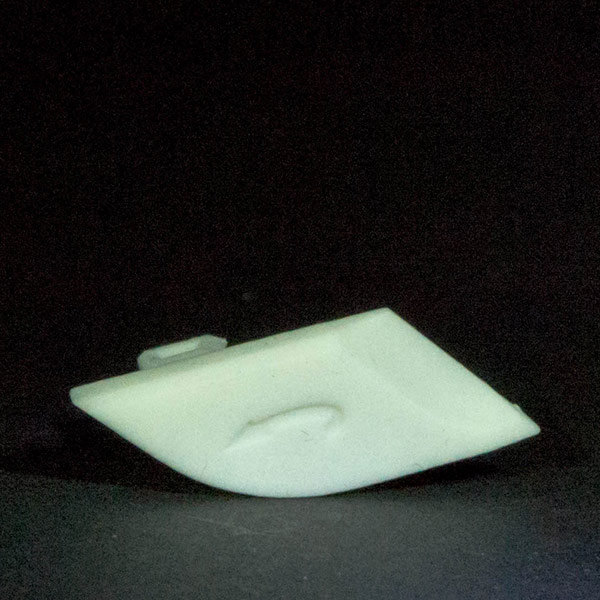
The button must be as close to original one as possible. The customer needed its front surface to be extremely smooth. We have chosen to 3D print it with 25 um layer height. We were also requested to 3D print this button in white, as it will be coated later and painted in black to make it identical to the original button.
There are some requirements for 3D printing material as well. It must withstand hot temperatures of inside of a car, 3D printed button must also keep its shape in elevated temperatures. It should not deform or deteriorate in any way. For this case, we will use custom made snow white AmeraLabs material and SLA laser-based 3D printer.
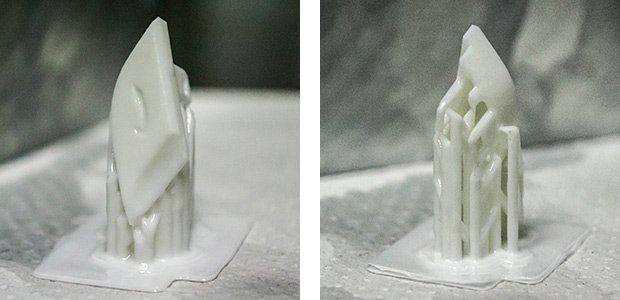
Orientation
Positioning step for this object is a lot trickier than it seems. Firstly, based on our defined requirements, we must preserve extremely smooth surface of the front side. Therefore, we have to orient this button in such a way, that smooth front side would be without supports. Secondly, it is mandatory to produce functional back-side as precisely as possible. At this moment we must plan placement of the supports on the back of the 3D printed button to properly support key functional elements. It also has to survive support removal phase after 3D printing without suffering any damage. We are pretty sure that there are many potential orientations that would work, but we will discuss the one we have used to produce perfect results.
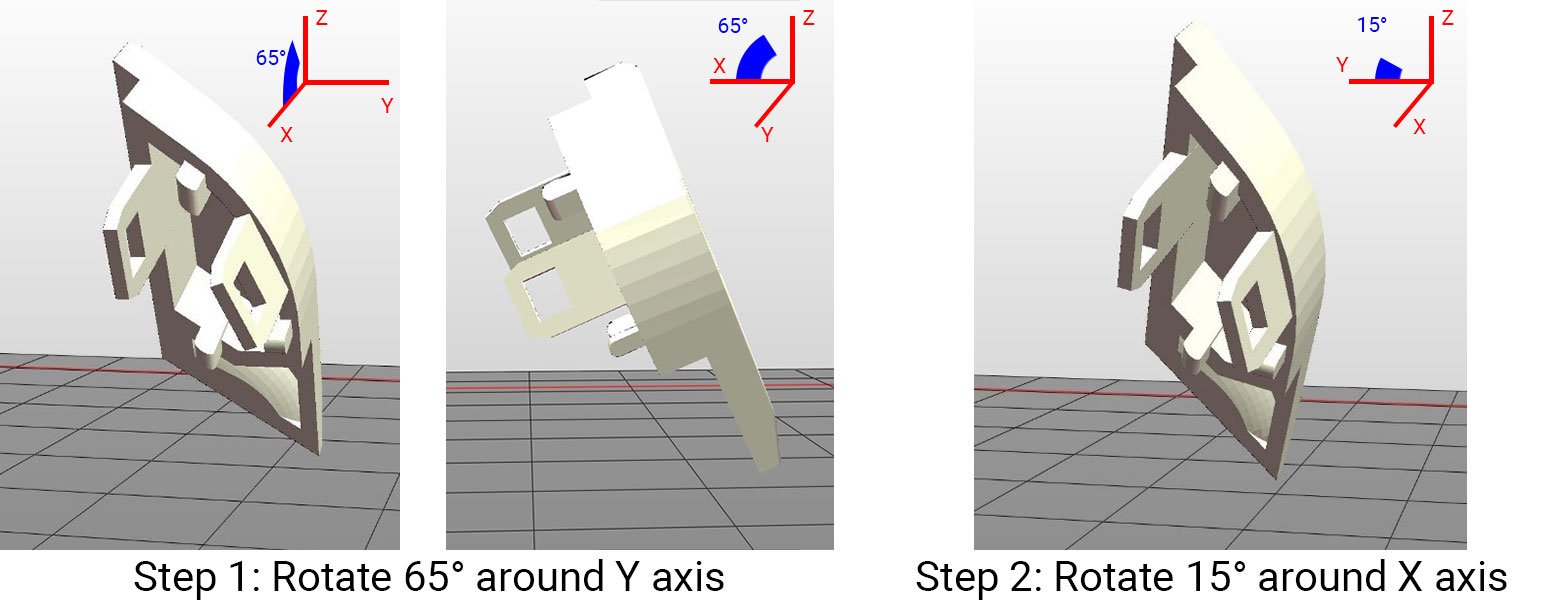
Our chosen orientation strategy sets the part at 65° angle around Y axis. Based on our analysis such angle will help avoid “hard” over-hangs and will result in quite smooth layer transitions. To avoid excessive supports at the functional back side we went for a steeper angle. Steeper angle will also help to reduce the number of support structures in general. The downside is that 3D printed button will have more layers, but as the part is quite small, we are good with that.
We also turned the part 15° around X axis. This will help to reduce the number of supports for the bottom edge of the button. With this delicate turn and reduced slope angle transition at the bottom of cross-sectional area of layers will be way smoother. You always want to have this kind of transition as smooth as possible. If you wish to read more about potential issues related to sudden changes within layers, see our previous article. See final orientation that is ready for supports below.
Supports
When placing support structures, good orientation makes your life easier. Usually, we start with automatic function and if software provides one and results are bearable we finish the work manually. We never fully rely on automatic support functions because most of the time they place supports poorly. Therefore, you always need manual intervention.
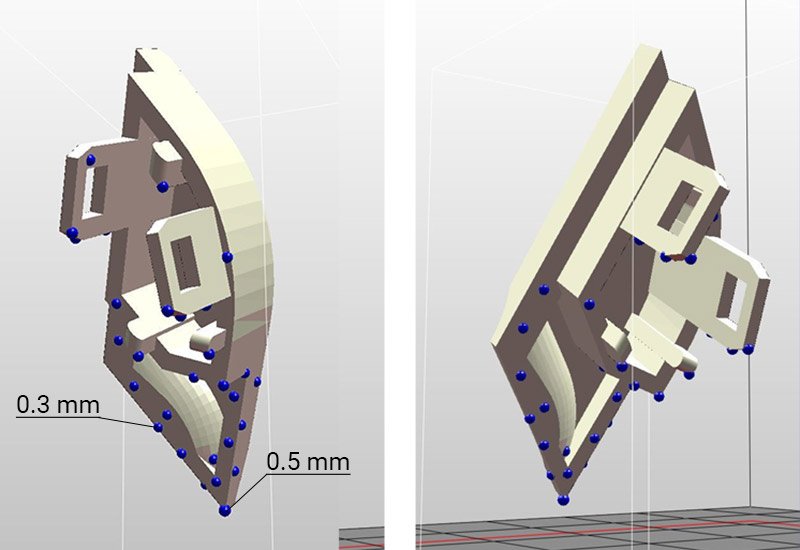
In this case, software placed too few supports and most of them were redundant. Therefore, we had to make manual adjustments. First of all, we had to support bottom point of the part. Since this point will suffer extensive stresses due to layer separation forces from FEP film or PDMS, we used one, thicker support (tip diameter 0.5 mm). We supported the rest of the part with 0.3 mm tips.
Let’s consider support structures for the rest of the part. To avoid potential deformations and support failures at the bottom, density of supports on the bottom edges is a bit higher compared to mid-sections. At the beginning of 3D printing, cross-sectional area of layers at the bottom will be increasing steadily until it reaches mid-section. Due to this reason, layer separation forces from FEP or PDMS at the beginning will also be increasing. Thus, we must make sure that there are enough supports for the bottom section to withstand this transition. Finally, we place supports for fixers/retainers and other overhangs. We do not worry a lot about inner walls ant their supports, because due to correct orientation layer transitions will produce desired geometries quite well.
Hollowing
To get good results hollowing is an important aspect of SLA/DLP 3D printing. However, in this case our 3D printed button has quite thin walls, there are no thick and risky sections within this object. Therefore, we will skip this step for this object.
Attachment layer / Raft
Based on our recommendation covered in previous article we have added attachment layer for this part. Supports for this steering wheel button have thick and even base. Due to this reason, if there was no attachment layer for this part, separation forces from FEP film or PDMS of bottom layers would put huge stress on very first layer that is attached to the build plate of the printer. The likelihood of 3D printed object falling from the build plate would be extremely high. Attachment layer will help to increase adhesion forces between the base of this button and build plate.
3D Printing
We printed this steering wheel button with laser-based SLA 3D printer. Layer height was set to 25 um. Slicer produced 1250 layers and 3D printing took around 2.5 hours.
Although, we used laser 3D printer, one can easily print this button with any kind of LED or DLP 3D printer such as Anycubic Photon, Wanhao D7, Phrozen Shuffle, Prusa SL1, etc. You just have to select the correct layer exposure times. It is also worth mentioning that resin VAT of our 3D printer is based on PDMS silicon instead of FEP film. PDMS tends to stick less to cured layers than FEP film. However, it does not change the way we prepare our model for 3D printing.
Post-processing 3D printed button
There are no special post-processing procedures for this 3D printed button. After printing, we removed it from the build plate. We cleaned the button with IPA: left it submerged for 10 minutes and then swirled around a bit. Because this button is quite small and fragile, we delicately removed supports with a pair of pliers. We did this before post-curing as we do not expect it to experience serious warpage while in UV oven. Sometimes it is good to leave supports while post-curing in UV oven to prevent severe warpage as supports would help to preserve structural integrity of the object. We post-cured 3D printed button under UV light (50W of 395nm LEDs) for ~2 hours.
It is also worth mentioning that customer will coat, paint and treat it as needed later. The original button was black with white arrow. Our customer will use its own special techniques to make this button look identical to the original one.
Final result
Below you can see fully finished 3D printed button. It satisfies all requirements.

We would like to emphasize that there are different ways to 3D print this steering wheel button: one may choose different supports strategy or orientation etc. Each of us might have unique experience and personal preferences. So, if you wish to share your own insights, just drop a comment below, we will be happy to discuss it. We are constantly learning as well.
Related Posts:
- Rapid Prototyping with 3D Printing – How’d this button get made fast? This walks you through it.
- 3D Design Parts for SLA 3D Printing – Want to design fancy parts? This makes it doable.
- Resin Mechanical Properties – Curious what resin features were the most important for this project? This breaks it down.
- Resin 3D Printing Troubleshooting: A Comprehensive Guide – Button prints failing? This gets you sorted.
- 9 Settings to Change for Faster Resin 3D Printing – Need quick prints like this? These tweaks help.
Inspired to print a replacement part for your project? Swing by our shop for resins that’ll solve your printing headaches!
