
How Much Resin is Lost During Resin 3D Printing? We Measured It

3D printing expert at AmeraLabs
If you have ever checked your slicer estimate, started a print, and later thought, “Wait… why is my resin bottle already this empty?” – you are definitely not alone.
Resin 3D printing can be incredibly rewarding. A good print coming off the build plate is one of the best parts of the workflow: sharp details, smooth surfaces, and no missing bits. What is less fun is watching your resin bottle empty faster than expected, especially when the slicer told you a very different story.
Resin is not something you want to waste, especially when you are printing regularly or pricing your work. So we ran a practical experiment to see what actually happens to it during a real print job and to measure resin loss throughout the process. We tracked the resin weight at every stage:
- before printing,
- after printing,
- after washing,
- after support removal,
- after pouring unused resin back into the bottle.
We also measured how much resin stays in the bottle depending on how long you let it drain. The results were eye-opening.
What We Mean by Resin Loss
When we talk about “resin loss”, we mean resin that does not end up in the final usable print. This includes resin used for supports, uncured material washed from the surface, residue left in the vat, and other small handling losses that add up during a typical resin printing workflow.
Not all of that loss is “bad waste”. Supports are a perfect example. They are not part of the final miniature, but they are often the reason the miniature prints successfully in the first place.
If you print miniatures, you know the temptation: reduce supports, save resin, make cleanup easier. But anyone who has had a model fail halfway through also knows the other side of that equation. Saving a few grams on supports does not help much if the print detaches, warps, loses a critical detail, or turns into a sad pancake on the FEP.
So, the goal is not to use as little resin as possible, but to understand where it goes and use enough to achieve a successful print without creating unnecessary waste.
Experiment Setup
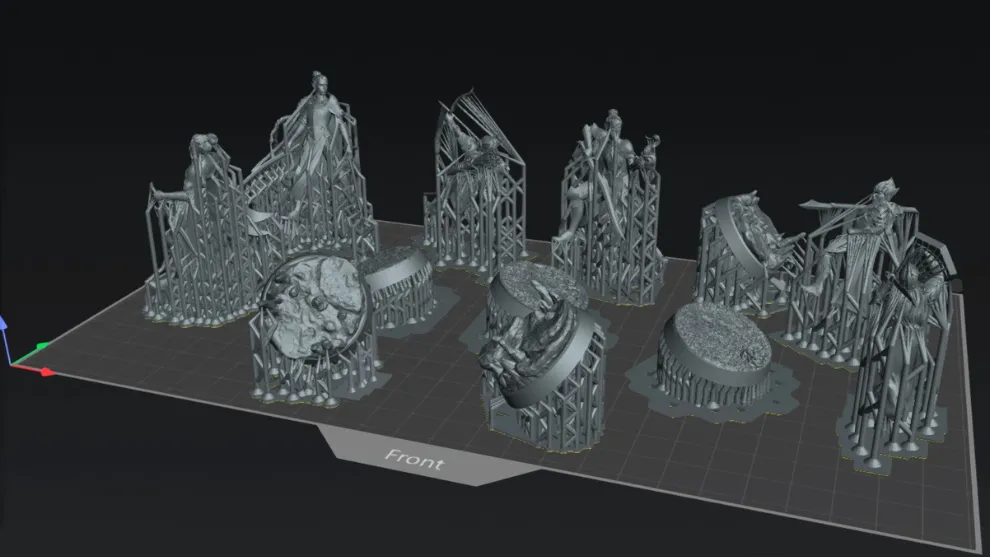
For this experiment, we printed 6 solid miniatures and 6 bases using presupported files in their original orientation. The print job included Elderwood Elves minis from The Printing Goes Ever On and The Dark Blades minis from The Shattered Realms.
| Parameter | Value |
| Printer | Uniformation GK3 Pro |
| Resin | AmeraLabs TGM-7 Grey |
| Slicer | Chitubox |
| Layer height | 50 µm |
| Layer exposure | 1.8 s |
| Model type | 6 miniatures and 6 bases |
| Model structure | Solid |
| Support settings | Presupported |
Before printing, we weighed the clean build plate, clean vat, empty resin bottle, and full resin bottle.
| Item | Weight |
| Clean build plate | 1323.19 g |
| Clean vat | 935.20 g |
| Empty resin bottle | 111.79 g |
| Full resin bottle | 1399.82 g |
| Resin in full bottle | 1288.03 g |
The Chitubox slicer estimated that the print would use 42.5 g of resin. This is the number most users would rely on when estimating print cost and material use. But we wanted to put that estimate to the test and see how much resin is actually used once the full printing workflow is taken into account.
Printing: What the Slicer Estimate Does Not Show
After pouring resin into the vat, we measured the vat with resin and the bottle after pouring.
| Item | Weight |
| Vat with resin | 1613.54 g |
| Bottle after pouring resin | 721.24 g |
The bottle lost 678.58 g, while the vat gained 678.34 g, leaving a difference of just 0.24 g. That small amount could have dripped or been wiped away during pouring and cleanup.
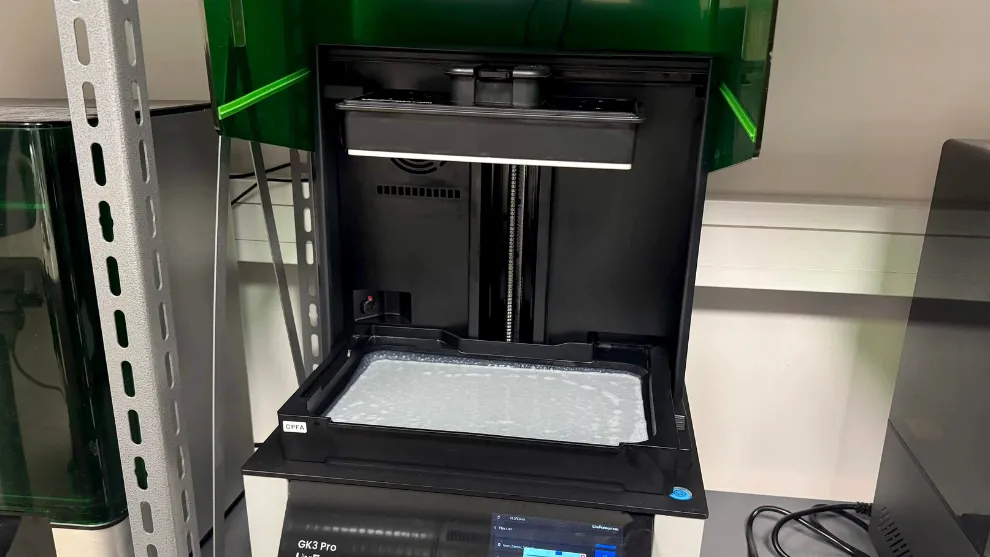
After the print finished, we measured the build plate with the prints still attached and the vat after printing.
| Item | Weight |
| Build plate + prints after print | 1396.55 g |
| Increase compared to clean build plate | 73.36 g |
| Vat after print | 1540.20 g |
| Decrease compared to vat with resin | 73.34 g |
The build plate gained 73.36 g. The vat lost 73.34 g. The numbers match almost perfectly, which is a good sign, because the measurements are reliable.
Here is where things get interesting. The slicer estimated 42.5 g, but the real measured number after printing was 73.36 g. That is already about 73% more than the slicer predicted.
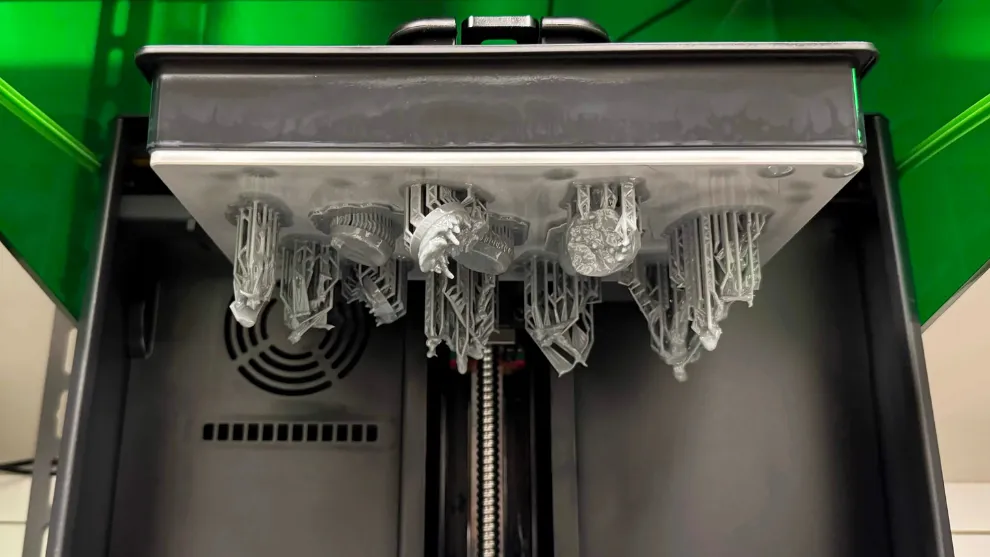
For a lot of users, this is the exact moment resin printing starts to feel unpredictable. You plan based on the slicer, but the real-world numbers don’t line up. Now you know why: the slicer calculates the resin in the model and supports, but it does not account for the wet coating of uncured resin that comes off the build plate with every print.
Washing: The Resin You Don’t See Until It’s Gone
Fresh resin prints are messy. That is just part of the process. Before washing, the prints and supports still have uncured resin coating the surface. After washing, that resin is removed from the print, but it doesn’t go back into the bottle. It becomes part of the post-processing waste.
| Stage | Weight |
| Prints + supports, dirty | 70.76 g |
| Prints + supports, washed | 60.05 g |
| Difference after washing | 10.71 g |
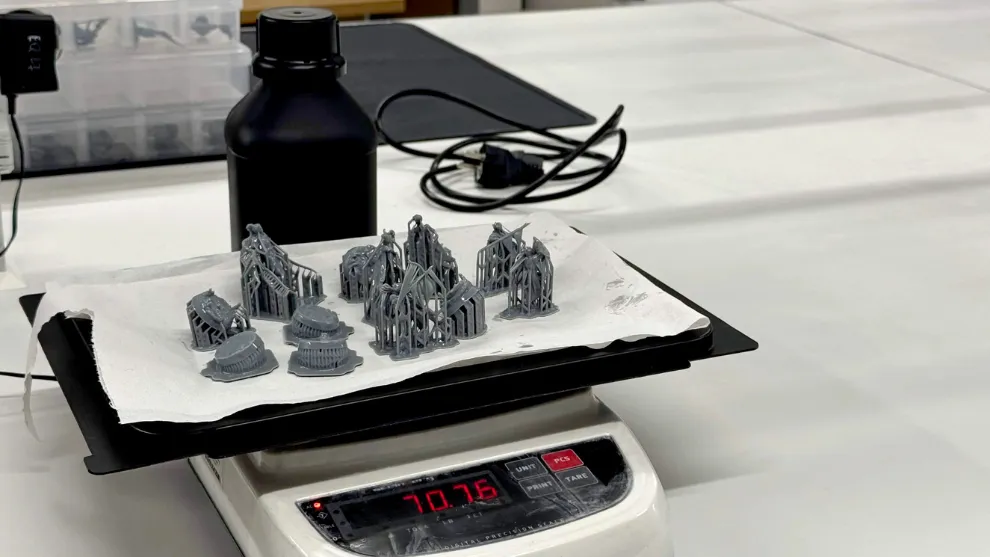
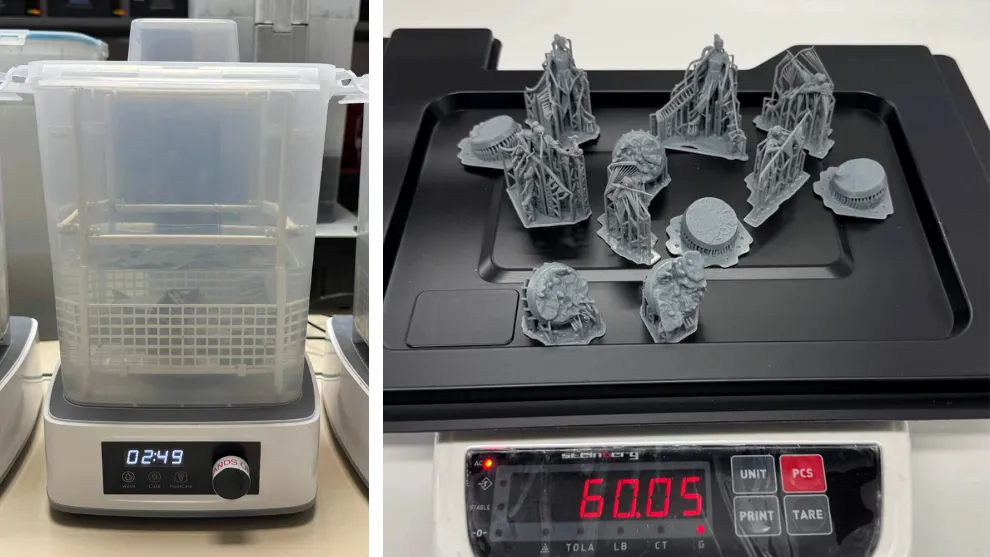
In this experiment, washing removed 10.71 g of resin from the prints and supports.
That might not sound like much for a single job, but washing loss is easy to underestimate because you never see it as one clean chunk. It spreads across the model surface, isopropyl alcohol, the container, tools, and gloves. Print regularly, especially in batches, and this is one of those small workflow losses that quietly adds up.
One simple habit helps a lot: let prints drain properly before washing. The more uncured resin drips back into the vat, the less ends up in your wash station.
Support Structures: Where the Most Resin Went
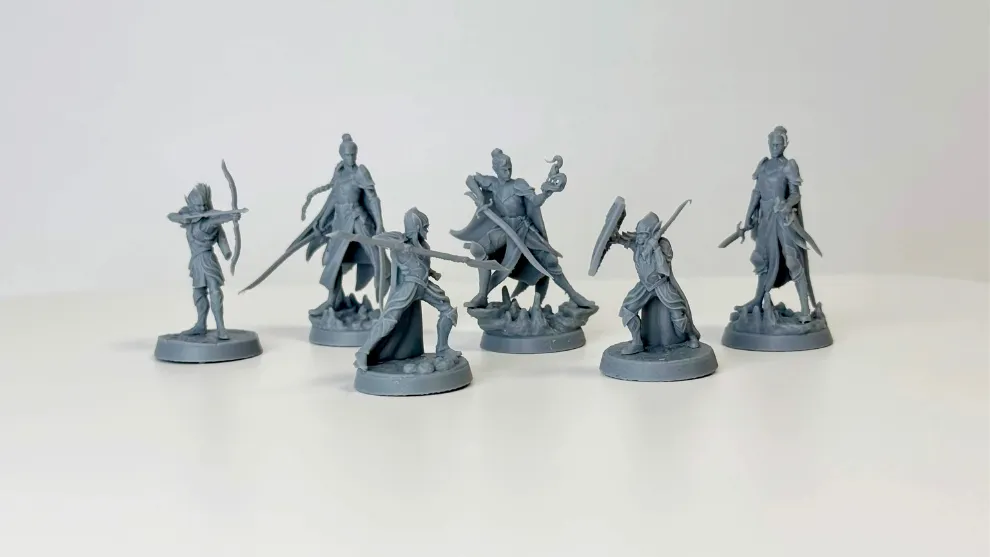
After washing, we removed the supports and weighed the final miniatures.
| Stage | Weight |
| Prints + supports, washed | 60.05 g |
| Prints after support removal | 26.18 g |
| Difference after support removal | 33.87 g |
The final miniatures weighed 26.18 g, while the supports weighed 33.87 g. In other words, the support structures used more resin than the actual models.
If you print miniatures, this probably doesn’t come as a shock. Fine details, overhangs, weapons, hands, capes, horns, tails – all of these features are what make a miniature look great, and all of them require support to print reliably.
Yes, supports can take a noticeable share of the resin. But under-supporting the model can cost you even more if the print fails. The point is to use enough supports to get a reliable print, without going overboard.
The Resin Vat: What Stays Behind Every Time
After printing, we poured the unused resin from the vat back into the bottle and measured what was left behind.
| Item | Weight |
| Resin poured into bottle | 1321.12 g |
| Difference from original full bottle weight (total resin used) | 78.7 g |
| Vat after resin was poured out | 940.75 g |
| Difference compared to clean vat | 5.5 g |
After pouring out the resin, the vat still weighed 5.5 g more than when clean.
If you keep the same resin loaded between jobs, this loss barely matters. But if you switch resins or colors frequently, those 5-6 grams add up every time you clean. The practical fix: batch your print jobs by resin type wherever possible. The fewer times you pour and clean, the less residue you leave behind.
The Bottle: How Much Stays Stuck Inside
Resin loss does not only happen during printing. Have you ever wondered how much resin is still sitting inside a bottle that looks empty enough to throw away?
We tested exactly that: how much resin remains in the bottle depending on how long you let it drain. And honestly, it surprised us more than we expected.
| Bottle condition | Bottle weight | Difference compared to clean empty bottle |
| Clean empty bottle | 111.79 g | |
| After emptying bottle normally | 156.56 g | 44.77 g |
| After draining for 2 minutes | 128.97 g | 17.18 g |
| After draining for 20 minutes | 118.60 g | 6.81 g |
A quick pour and move-on leaves 44.77 g in the bottle. Let it drain for two minutes and that drops to 17.18 g. Wait twenty minutes and you recover most of what’s left.
Let’s say your resin costs €70 per kg. With a quick pour, you are leaving just over €3 worth of resin in the bottle. Give it two minutes to drain and you save almost €2 compared to pouring and moving on. Give it twenty minutes, and most of that resin makes its way out. That may not sound like much on one bottle, but it adds up quickly if you empty bottles regularly.
Slicer Estimate vs. Measured Resin Use
Let’s put the full picture together.
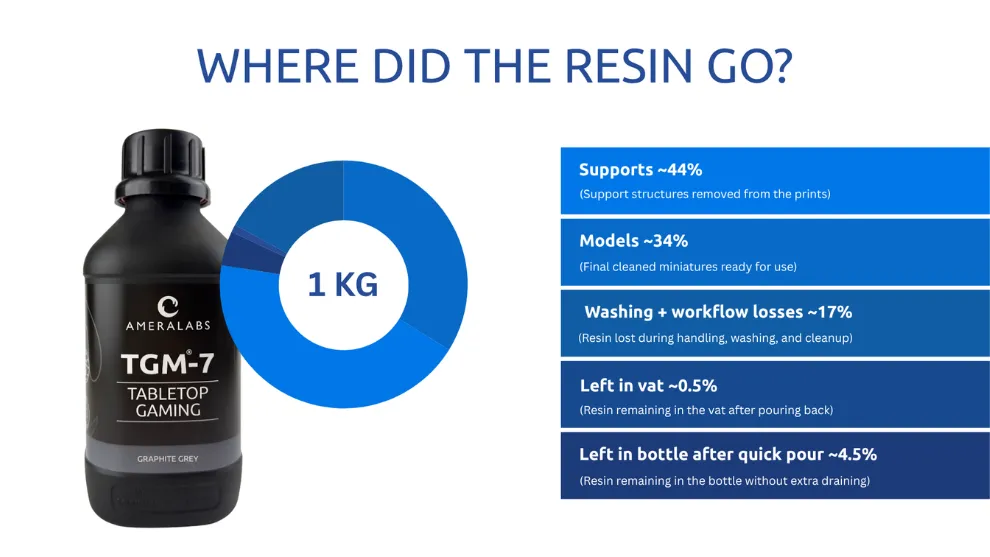
The slicer estimated 42.5 g of resin, but the measured total was 78.7 g. That is about 85% more than the slicer predicted.
This gap exists partly because the slicer is only calculating the resin in the model and supports. However, even there, the estimate was lower than what we measured: after cleaning, the model with supports weighed 60.05 g. On top of that, the slicer cannot know how much resin will stay on the print, get lost during washing, or cling to the vat. These small losses happen with every print.
We also checked the same file in Lychee Slicer. Its resin estimate was 43.28 mL in total, with 39.86 mL for the models and 3.42 mL for the supports. Since Lychee shows value in milliliters rather than grams, it is not a direct one-to-one comparison with our weight measurements. Still, it showed a similar slicer estimate range and reinforced the same point: slicer estimates are helpful, but they do not show the full picture.
How to Measure Your Own Resin Usage
The numbers from our experiment won’t match your setup exactly. But the method works for anyone. Here’s how to do it yourself.
What you need: A kitchen scale accurate to 1 g. That’s it.
Step 1: Weigh the full bottle before printing. Write it down. This is your starting point.
Step 2: Complete the print, wash, and support removal as normal.
Step 3: Weigh the bottle after pouring unused resin back in. Subtract this from the Step 1 weight. The difference is your total resin consumed across the entire workflow.
Step 4: Weigh the final prints. This tells you how much resin actually ended up in your models. Everything else went into supports, washing, and handling.
Do this across three to five jobs and you will have a reliable baseline for your specific setup.
The slicer estimate is a useful reference. Your measured baseline is the number worth trusting.
How to Reduce Resin Loss Without Hurting Print Success
Some resin loss is simply part of the process. But there are practical ways to reduce the unnecessary kind without compromising your results.
- Let prints drain before washing. After printing, give the build plate time to drip back into the vat before moving to the wash station.
- Don’t under-support just to save resin. Failed prints cost more than the supports would have. Use enough support for a reliable result.
- Batch prints with the same resin when possible. Reducing the number of pours and cleanouts reduces both vat residue and handling losses. In production workflows, this is one of the easiest wins available.
- Drain bottles properly. A quick pour can leave up to 44 g behind, while two minutes of draining cuts that by more than half. If you go through bottles regularly, that adds up faster than you’d think.
- Track your actual resin use. Weigh the bottle, vat, and printed parts at key stages to understand your real material costs.
- Choose resin for the result, not just the bottle price. Cheap resin is not much of a bargain if you have to print the same model twice. The real question is how much each successful print costs you. When you count the whole workflow, your time, and the stress of failed prints, quality resins often cost less per successful print than the budget alternatives.
Conclusion
Watching your resin bottle empty faster than expected is frustrating, especially when the slicer made the job look much more economical. But the missing resin hasn’t simply vanished. It supported delicate features, coated freshly printed parts, moved through washing and handling, and left traces on every surface it touched along the way.
Once you understand the full workflow, resin use becomes a lot easier to manage. Let prints drain. Avoid unnecessary transfers. Group jobs that use the same material. Build supports with purpose. And when accurate costs matter, measure the whole workflow rather than trusting the slicer alone.
The best result is not the one that looked cheapest on paper. It’s the one that came out right, held up through post-processing, and didn’t end up in the failed prints pile.
Ready to stop guessing and start printing with something you can actually rely on? Come browse the full range of AmeraLabs resin in our shop.
Want to go further than just resin costs? Our Miniature 3D Printing Real Cost and Profit Calculator helps you factor in all your printing expenses and figure out exactly what your prints actually cost to make.
Related posts:
- Complete resin 3D printing settings guide for beginners will be incredibly useful if you’re just starting out.
- Resin 3D Printing Troubleshooting Guide – check it out if you’re having problems with your prints.
- 9 Settings to Change for Faster Resin 3D Printing will help you achieve faster results without losing quality.
- Best Layer Height for Miniatures: 10µm–100µm Tested – find out what layer height is best for you if you’re printing miniatures.
Frequently Asked Questions
Why is my actual resin usage higher than the slicer estimate?
The slicer only calculates the resin in the model and supports. It does not include what stays on the print, gets washed away, remains in the vat, or stays behind in the bottle. In our experiment, the slicer estimated 42.5 g, while the actual resin use was 78.7 g.
How much resin do I actually need for a print?
There is no single multiplier that works for every setup. The amount depends on the model, supports, resin, and the way you handle the print afterwards. Use the slicer estimate for planning, but keep enough resin in the vat for the print to run safely. To get a more realistic number, weigh your bottle before and after several print jobs and compare the results with your slicer estimates.
Are supports a waste of resin?
Supports use resin, but that does not automatically make them waste. Their job is to keep the print from failing. In our experiment, the supports weighed more than the finished miniatures, but using too few could have meant printing the whole job again. Use enough supports for a reliable print, then optimise them where you can.
How can I reduce resin loss?
Let the finished print drain over the vat before washing, give bottles enough time to empty, and group jobs that use the same resin so you do not have to pour and clean the vat as often. These small changes help keep more resin in the printing workflow instead of leaving it on surfaces or washing it away.
How do I calculate the real resin cost per print?
Start with the amount you actually use, not only the slicer estimate. Weigh the resin bottle before and after the complete job, then multiply the difference by the resin cost per gram. Just do not obsess over resin alone. Resin loss is useful to understand, but other costs can bite harder: washing supplies, equipment, failed prints, labour, and your time all matter too. To see what your miniatures really cost to make, try our Miniature Real Cost and Profit Calculator.