
Updated on May 17, 2018
Recently we received quite a lot of questions regarding 3D printing resin use in outdoor conditions. Therefore, we decided to conduct a very simple, yet interesting experiment on environment effect on resin 3D printed parts. We believe it will help non-experienced 3D printing enthusiasts make their own decisions and answer some potential questions.
Material (resin)
This experiment was not supposed to be very scientific or formal. We simply wanted to show outdoor effect on 3D prints and their surface in the simplest way possible. Therefore, for this experiment we have chosen to evaluate our custom blend DLP 3D printing resin together with one third-party resin that is very popular in the market today.
Model and 3D printing process
We decided to print following body armor model, which is part of a bigger project. Model is around 35mm tall.
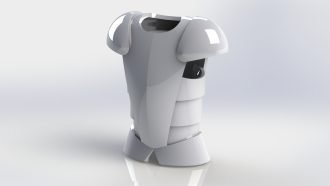
We printed three such specimens of each 3D printing resin (six specimens in total). All models share identical printing parameters, cleaning and post-curing conditions that we listed below.
- Model is hollow, with wall thickness between 1-2mm.
- We printed it on supports (3 mm height) and attachment layer (0.1 mm thickness).
- Layer height is 100 um (0.1 mm).
- Printed on custom DLP 3D printer with Acer H6518BD projector, FEP based VAT.
- Exposure time for a single layer was 1.75 seconds.
- Cleaned in IPA for 15 minutes.
- Post-cured for 1 hour.
- No coatings, no primers.
Environments
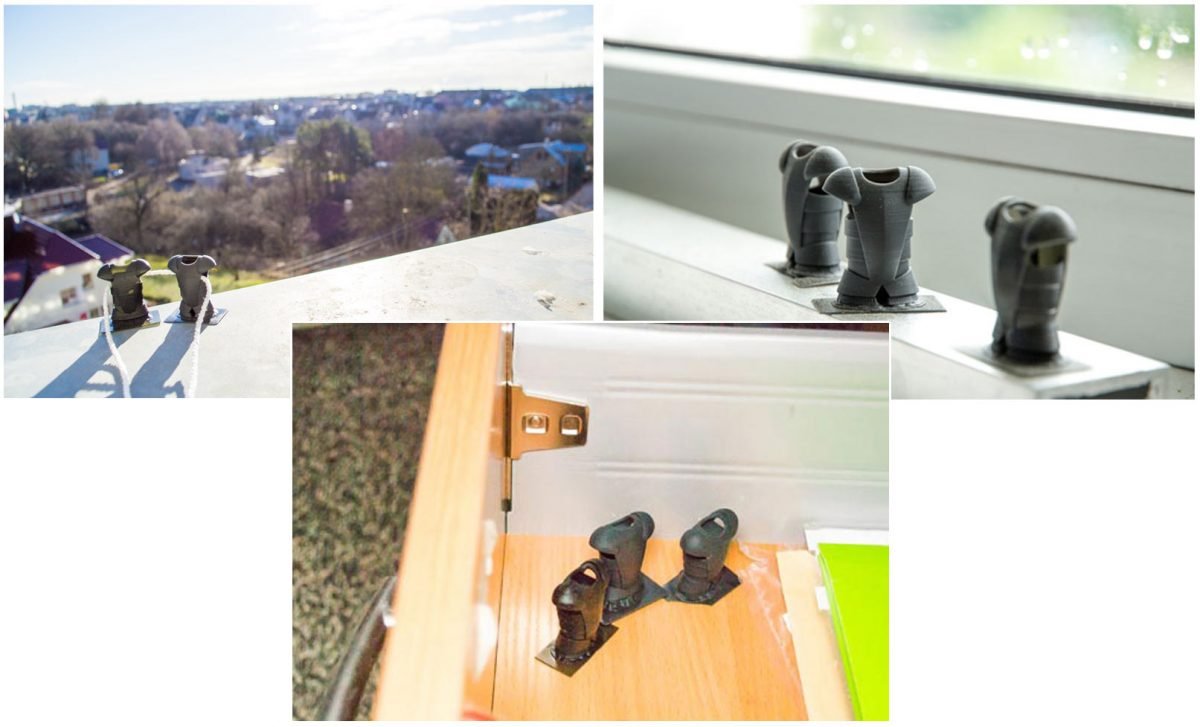
In order to evaluate ambient impact on 3D printed part, we have chosen to place these specimens in three completely different environments.
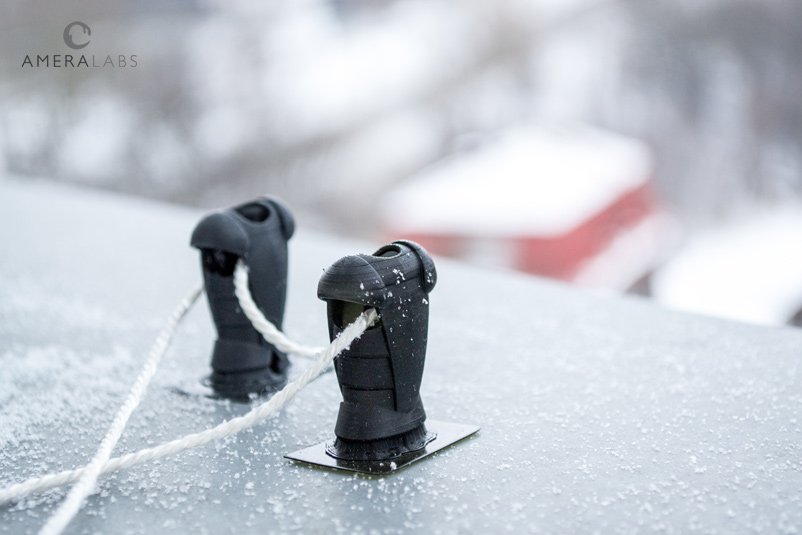
Outdoor. We placed 3D printed parts on the external windowsill. Therefore, these faced the harshest conditions of all. On a sunny day, for around 6 hours parts were exposed to a direct sunlight. Considering that experiment was started in winter, these specimens faced temperatures below zero, snow and high humidity.
Indoor. We placed specimens on the internal windowsill. These faced room temperature only. However, they have received a lot of direct sunlight. Keep in mind, that window glass filters part of UV light.
Indoor dark environment. We placed these parts in a completely dark environment and held them at room temperature.
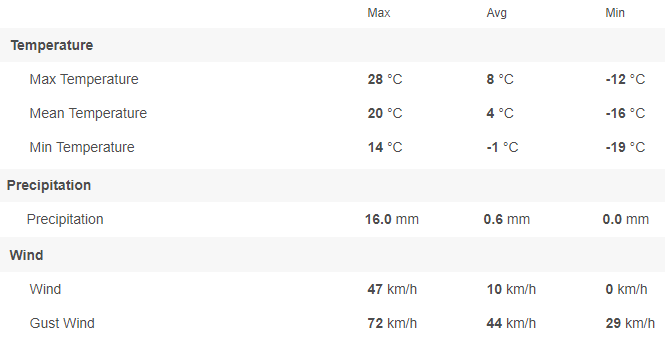
Progress of experiment and summary of conditions
As expected 3D printed parts kept outdoors faced harsh conditions. In winter time temperature dropped to -19° C at night. Snow and heavy rains were also quite common throughout the experiment. In spring temperatures reached +28° C during the day and almost negative temperatures at night. All in all, we managed to put quite high environmental stress on these parts.

We held indoor parts at constant 22-26° C room temperature. Parts that were placed on internal windowsill faced less sunny days in the winter time. However, sunny mornings were quite common in spring. Meanwhile, specimens that were placed in the dark environment were not touched and remained there throughout the entire experiment.
Findings and conclusions
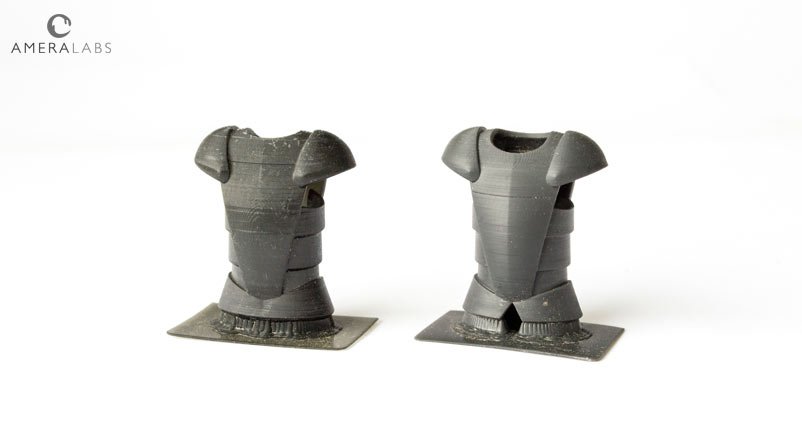
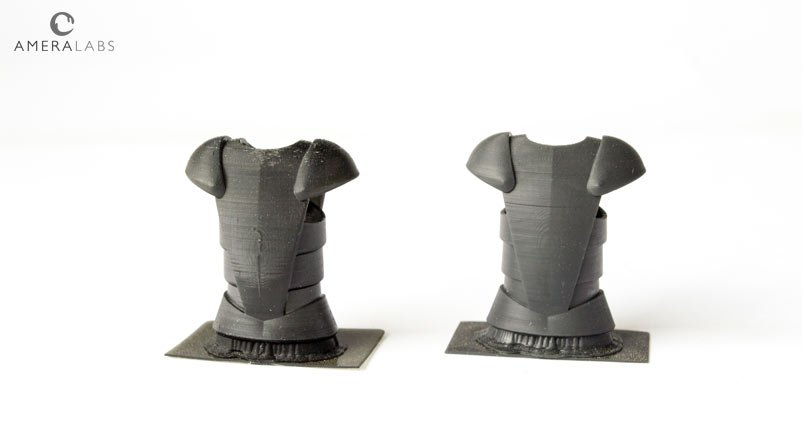
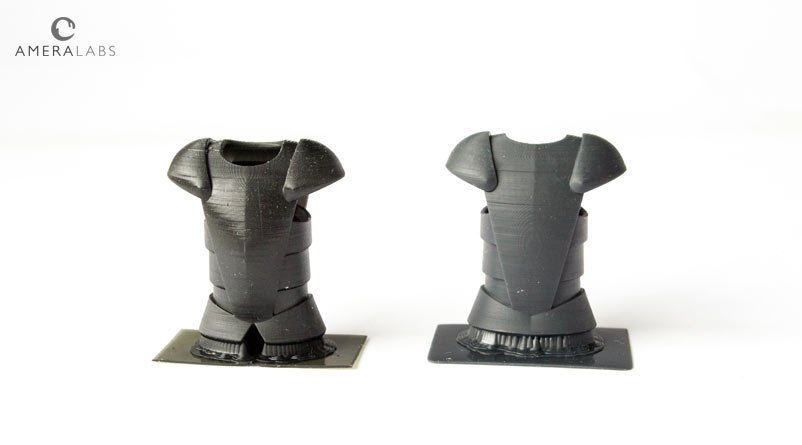
After more than three months we visually examined all parts and made brief conclusions. During this period all six 3D printed specimens did not show any structural or surface changes such as cracks, warpage, deformation or decomposition. In fact by the end of this experiment it was quite difficult to say, which resin 3D printed specimen spent all its time indoors, outdoors or in a complete darkness. Therefore, individual comparison among all specimens was completely unnecessary.
Below, we are presenting photos of each set of specimens.
Additional remarks on 3D printing for outdoor use
It is also worth mentioning some specific facets of this experiment that must be taken into consideration. We did not run any kind of mechanical testing on these 3D printed specimens. Neither we checked their brittleness after the experiment, i.e. we did not try to crush them and compare the results. These points are important as it is plausible that further polymerization of material in front of the sun could result in material being harder and more brittle. So from functional point of view further experiments might be necessary to better evaluate environment effect on resin 3D printed parts. Our goal, as stated at the beginning, was to evaluate potential impact on surface and how that affects visual appearance (which is important if you keep models outside).
It is also important to state that 3D printing technology can also have great impact on results of this experiment. For this experiment AmeraLabs used DLP based 3D printer with high-power Acer H6518BD beam projector. These light sources emit a lot of light that results in very fast and effective polymerization. On the other hand, if you use low-powered LED/LCD based 3D printers, where 3D printing resin does not cure so well during 3D printing process, it is theoretically possible that part may experience higher polymerization at the surface, which can cause higher shrinkage, potential cracks and other surface or internal inconsistencies.
Other articles from AmeraLabs
This is all for today ladies and gentlemen! Don’t forget to check our shop and other blog posts:
- Key things to know before calibrating resin 3D printer
- 10 reasons why you get unexpected horizontal lines on your 3D printed parts
- Impressive calibration part for resin 3D printers together with the guide on how to understand its features
- Attachment Layer in SLA 3D printing: what you need to know
- How to design parts for SLA 3D Printing
- 6 Key Principles of 3D Printing Supports that Work
