One of the most important features of white resin is that it has to be, and stay, white. However, due to the chemical processes happening in UV-curable resins, they tend to get yellow. And yellow 3D prints look old and cheap. In this short article, we will show how to keep AmeraLabs white TGM-7 3D printing resin truly white.
The secret to keeping resin prints white is the post-curing process of the printed parts. This article explores the colors of TGM-7 resin. Keep in mind that other white resins can behave differently. These findings might not necessarily work for different resins. But even if you don’t use TGM-7, read on – you might find some ideas to try with other materials.
How did we measure the color?
In the following paragraphs, we will show how the color changes with different post-curing setups. However, we like to do things scientifically here at AmeraLabs. So here’s some theory on how we measured the color. You can skip this paragraph if you just want to see the results.
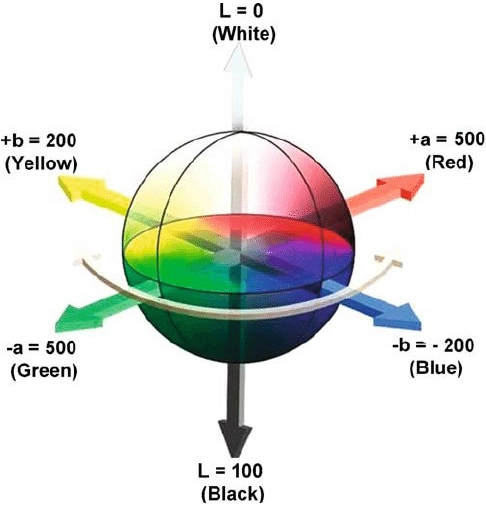
We measured the color of 3D printed models with a colorimeter in CIE L*a*b color scale. In the CIE L*a*b color scale, L represents lightness, a represents red or green values, and b denotes blueness-yellowness.

We calculated the color difference between models before and at different post-curing stages. This color difference is called Delta E. Delta E is a standard measurement created by the Commission Internationale de l’Eclairage (International Commission on Illumination).
Delta E is measured on a scale from 0 to 100, where 0 is no color difference, and 100 indicates opposite colors. In practice, the human eye does not perceive the color difference with Delta E lower than 1. Delta E of 1-2 is only perceptible through close observation. And a color difference with Delta E of 2-10 is visible at a glance.
Delta E is relatively easy to calculate. You just have to square the difference between each of the L, A, and B values, add them together, and take the square root of the sum.

Now, let’s dive into our experiment.
White resin 3D prints post-curing duration
Your necessary post-curing duration depends on the power and the wavelength of UV light in your post-curing station. However, if you leave your models under intensive UV light for too long, they will turn yellow. We have found that TGM-7 white is almost entirely white immediately after printing. Our measured color in CIE L*a*b values resulted in L=87, A= -1.09, and B=0.45. Then we tested how the color changes after curing with several different curing stations. Here are the models post-cured for different durations in an Anycubic Wash and Cure Machine 2.0. Delta E represents the color difference of each model compared to the uncured print.

We’ve found that you only need to cure for 2-5 minutes to get the surface nice and hard. If you cure your models for 5 minutes or more, they will start to turn yellow.
Post-curing UV wavelength for white resin
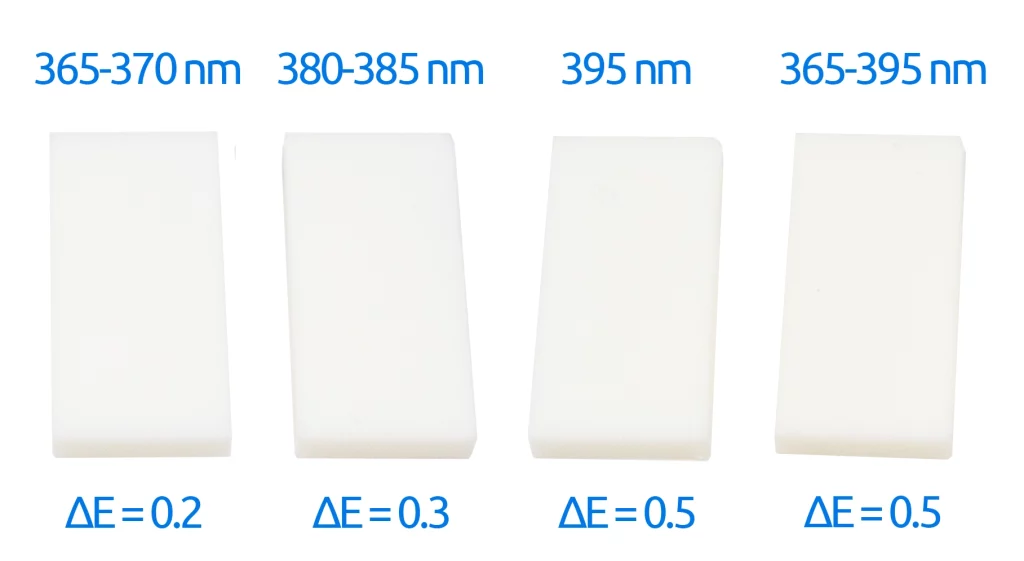
We have also tried post-curing models at different wavelengths. Here are the results of models post-cured for 2 minutes under different UV lights. You can see that models post-cured under 395 nm UV light were slightly more yellow than models post-cured under 365-370 nm UV light. So, light with a shorter wavelength produced less yellowing. However, the overall difference was not clearly noticeable to the naked eye.

Yellow will fade away from white resin 3D prints
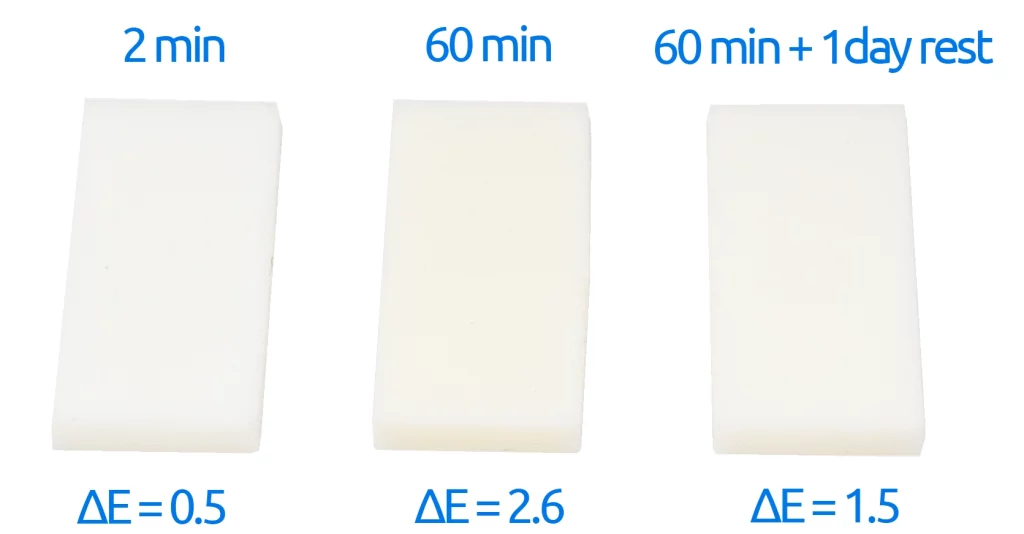
During our experiments, we noticed that models that yellowed after post-curing returned back to their original white color in a couple of days. We post-cured the first two models below for 2 and 60 minutes under a mix of 365-395 UV lights. It is clearly visible that the model got noticeably yellow after a one-hour post-cure. We post-cured the third model for one hour and then left it for one day to rest. It got noticeably whiter after one day. After several more days, the model returned to its original white color and stayed white for months after that.

Additional white printed model protection
Ambient UV light is all around us. Despite the fact that 3D printed models were fully cured, exposure to this UV light will degrade their properties over time. We are talking about both color and mechanical properties, like tensile strength and flexibility. To protect your models from such further UV damage, we recommend coating your models with paint or clear UV protective lacquer. This will increase your models’ longevity and color stability.
Related Posts
- Resin Mechanical Properties – Color is not the only resin property that matters. Delve deeper!
- Resin Safety Myths in 3D Printing – Print safe!
- Light-off Delay Blooming – Surfaces off? This trick keeps them clean.
- Experiment: Outdoor Environment Effect Resin 3D Printed Parts – Sun fading them? This tests it out.
- Resin 3D Printing Troubleshooting: A Comprehensive Guide – Experiencing other issues? This fixes them.
Hate yellow prints? Hit our shop!


