Introduction
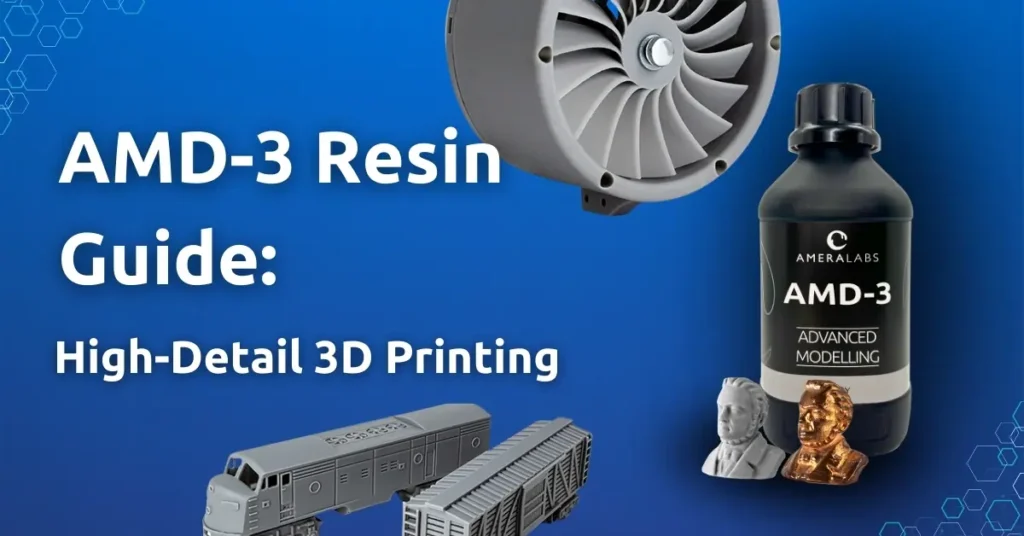
Welcome to the ultimate AMD-3 resin guide! If you’re looking to enhance your 3D printing experience with high-resolution resin that delivers ultra-detailed prints, you’ve come to the right place. This comprehensive AMD-3 resin guide covers everything you need to know about AMD-3 resin, including its features, best practices for printing, and specialized applications. Designed for both hobbyists and professionals, AMD-3 resin combines speed, accuracy, and ease of use, making it ideal for high-detail resin applications. Additionally, AMD-3 is a very stable functional resin suitable for many uses. For miniatures that need to withstand regular play, consider using TGM-7 resin for durability, while XVN-50 is suitable for functional and durable engineering prints.

TL;DR: Quick Printing Guide
- Setup: Level your build plate and ensure the room temperature is at least 22-25 °C.
- Initial Print: Start with a small calibration model to test your settings.
- Supports: Use denser, interconnected supports to enhance dimensional accuracy and reduce visible marks.
- Printing Settings: Refer to AmeraLabs printing settings for best practices.
- Cleaning: Submerge your prints in IPA for 3 cycles of 2 minutes each.
- Drying: Ensure prints are dry before post-curing. Leave on the table for 20-30 minutes or use compressed air or a hairdryer to speed up this drying process.
- Post-Curing: Cure your prints immediately after cleaning, adjusting time based on your curing station.
Key Features of AMD-3 Resin
Fast Curing
- One of the standout features of AMD-3 resin is its ability to cure quickly, even on low-powered LED/LCD 3D printers. This ultra-fast resin not only results in shorter printing times but also allows you to iterate and prototype faster, bringing your ideas to life without delay.
Low Shrinkage
- Shrinkage can be a significant issue in 3D printing, often leading to cracked or deformed models. Fortunately, AMD-3 resin is engineered to minimize this risk, ensuring your prints maintain their intended shape and precision throughout the process.
Outstanding Accuracy
- It’s essential to highlight that AMD-3 resin produces dimensionally accurate and stable prints. Its stiffness and hardness help maintain straight edges and allow even the tiniest features to be printed with clarity. By employing strategically placed supports, you can achieve smaller, less visible marks on your prints, further enhancing the quality of your high-resolution resin projects.
Low Viscosity
- The low viscosity of AMD-3 resin simplifies the cleaning process and helps preserve the features of the original model. Consequently, finer details can shine through, making it particularly beneficial for creating ultra-detailed prints.
No Pigment Settling
- Thanks to a stabilized pigment dispersion, AMD-3 resin enables long vertical 3D printing sessions without significant pigment settling. This feature ensures consistency in your prints, enhancing the overall quality.
Low Odor
- AMD-3 resin is formulated to have a low odor, making it a more pleasant option for 3D printing enthusiasts. However, it is essential to understand that “low odor” does not equate to “safe.” Even with reduced fumes, working with resin still poses potential health risks.
Opaque Colors
- Available in black or grey, AMD-3 resin is carefully pigmented to achieve an ideal opaque color. As a result, intricate details are expressed effectively, which is crucial for high-detail resin applications.
Hard and Glossy Surface
- After post-curing, the surface of printed objects becomes glossy and hard (85 Shore D). This quality provides a pleasant touch while capturing the accurate dimensions of your models.
Not Reacting with RTV Silicone
- AMD-3 resin does not react with RTV silicone, allowing prints to be used for making masters for silicone mold making. Additionally, AMD-3 prints can also be utilized to create visual makeup effects.
Technical Data Overview
- Tensile Properties:
- Modulus of Elasticity: 3.45 GPa
- Stress at Break: 65.2 MPa
- Flexural Properties:
- Modulus of Elasticity: 2.74 GPa
- Stress at Yield: 83.6 MPa
- Elongation at Break: 3.3%
- Impact Resistance: 2.73 kJ∙m-2
- Heat Deflection Temperature: 128.42 °C
- Viscosity at 25 °C: 390 mPa∙s
- Surface Hardness: 85 Shore D
For a complete overview of all technical data parameters, refer to the Material Technical Data Sheet.
AMD-3 Resin Guide: Setup and Printing
Initial Setup
- Level Your Build Plate: Ensuring a properly leveled build plate is crucial for successful prints.
- Room Temperature: Maintain a temperature between 22-25 °C for optimal performance.
- Small Test Prints: If you’re new to this resin, print something small first to familiarize yourself with the settings. A calibration part is highly recommended.

Support Structures
When printing with resins like AMD-3, it is important to use denser, interconnected supports to enhance dimensional accuracy and reduce the likelihood of supports bending.
- Support Column Thickness: 1.5-2 mm
- Support Tip Thickness: 0.2-0.6 mm

Recommended Printing Settings
For the best results, consult AmeraLabs’ 3D printing settings. Key recommendations include:
- Hollow Models: Hollowing out models can save resin and reduce weight.
- Shake Resin Well: Ensure that you mix the resin thoroughly before use.
- Lift Speeds: Begin with slower lift speeds, about 5 mm/min for bottom layers and 40-60 mm/min for normal layers.
Cleaning Guide for Your AMD-3 Prints
Cleaning your prints is essential to achieving the best results. Fortunately, AMD-3 resin has a relatively low viscosity, making this process easier. Here’s a four-step cleaning procedure if you’re using ordinary IPA baths:
- Submerge: After removing the print from the build plate, leave it submerged in IPA for 2 minutes.
- Swirl: Actively swirl the IPA bath with the printed part in it for another 2 minutes.
- Still Soak: Let it sit still but fully submerged for another 2 minutes.
- Final Swirl: Swirl the bath actively again for 2 minutes.
For a more effective cleaning process, consider using a recommended 2 or 3-stage setup, which includes dirty, medium, and clean IPA baths. Clean in each bath for a couple of minutes.

If you prefer using a Wash and Cure station, leave the printed object submerged in IPA for 6 minutes. You can repeat this step once if needed.
Caution!
While cleaning, be mindful of the time. Leaving prints submerged in IPA for too long (30-40 minutes or more) may damage the print. Additionally, when cleaning with an ultrasonic cleaner, it’s essential to remember that ultrasonic cleaners can be very aggressive and may damage the print’s surface. Clean briefly and check the results, keeping cleaning times to around 10 minutes without additional heating.
AMD-3 Resin Guide: Post-Curing Process
After cleaning, post-curing your print is vital to achieving its final properties. The post-curing time will vary based on your curing station and can range from 5 minutes to 1 hour. You should post-cure immediately after cleaning and drying your prints.
Ensure your prints are dry before post-curing. Leave them on the table for 20-30 minutes, or use compressed air or a hairdryer to quicken the drying process.
To ensure a non-sticky surface, adjust the curing time based on the specifications of your equipment until the surface becomes completely hard and glossy.
AMD-3 Resin Guide: Specialized Applications
RTV silicone Mold Making with AMD-3 Resin

AMD-3 resin is ideal for creating master prints for mold making. Here’s how it works:
- Print Your Master Model: Start by printing your model using AMD-3 resin, ensuring it captures all the details needed for your final product.
- Clean: Clean with IPA, dry for 20-30 minutes, and post-cure the model.
- Prepare your model for casting: Clean the support marks and sand the surface if needed. Silicone will capture all of the details AND defects!
- Prepare Your Mold Box: Construct a mold box that securely holds the printed master.
- Make the Mold: Use your master print to create the mold. Pour a silicone mold-making compound around the master to capture its shape and features.
- Casting: Once the mold is set, remove the master model and cast with an epoxy resin of your choice to create your final product.
Electroplating AMD-3 Resin Prints

- Print Your Model: Use AMD-3 resin to create a detailed model suitable for plating.
- Clean and Prepare: Thoroughly clean the model before electroplating to ensure a good surface finish.
- Apply Conductive Coating: Use a conductive paint or solution to prepare the model for electroplating.
- Electroplate: Immerse the model in the electroplating solution, following the manufacturer’s guidelines for time and voltage.
Thermoforming clear orthodontic appliances

- Scan the Model: Use an intraoral scanner to scan the patient’s teeth or a desktop scanner to scan a physical model.
- Prepare in CAD: Import the scan into CAD software, adjust as needed, and add a base. Ensure the model height is around 15 mm.
- Slice and Print: Use AMD-3 resin to print the model solid or hollow with a 3 mm wall thickness. Add vent holes to prevent suction.
- Clean and Dry: Clean the print with IPA for 2-3 minutes in each bath, then dry it for 20-30 minutes using compressed air or a hairdryer.
- Post-Cure: Post-cure the model under UV light to ensure it is fully cured.
- Thermoform: Use a vacuum or pressure forming machine to mold the plastic sheet over the model.
- Trim the Aligner: Cut the formed sheet using scissors or a rotary tool, and smooth any rough edges.
3D printing scale models

- Follow Design Guidelines: Ensure your model follows best practices to minimize warpage. Check out the 3D design guidelines for SLA printing.
- Print Your Master Model: Use AMD-3 resin to print your detailed model, ensuring all key features are accurately captured.
- Clean and Dry: Remove the model from the build plate immediately after printing. Clean it in IPA for 2-3 minutes per bath, then dry for 20-30 minutes using compressed air or a hairdryer.
- Post-Cure: Post-cure the model under UV light to ensure complete curing.
- Prepare for Assembly: Clean off support marks and sand the surface if necessary. Assemble the parts using Cyanoacrylate-based super glue for a strong bond.
AMD-3 Resin Guide: Safety Precautions
When working with AMD-3 resin, always wear personal protective equipment (PPE). This includes a VOC filter mask and nitrile gloves, as well as ensuring proper ventilation in your workspace. Additionally, proper disposal of any leftover resin is crucial; never pour resin down the drain, and always consult the Material Safety Data Sheet (MSDS) for specific disposal guidelines.
Conclusion
In conclusion, AMD-3 resin is a highly versatile, stable, and functional resin that excels in various applications, from creating intricate models to specialized tasks like mold making and electroplating. Its user-friendly properties make it an excellent choice for both beginners and experienced users alike. We hope this comprehensive AMD-3 resin guide provides you with the insights and knowledge to maximize your 3D printing experience.
If you have any questions or would like to share your experiences with AMD-3 resin, feel free to reach out to us! Don’t forget to check out our other resources on the AmeraLabs Blog for more tips, guides, and inspiration. Happy printing!


