DMD-31 Resin Printing Guide

Dental Model Resin for MSLA and DLP Printers
DMD-31 resin is a dental model resin for producing dimensionally accurate and stable prints. The beige and grey colors show fine details.
This guide covers everything from first calibration to daily workflow for dental labs using DMD-31 dental model resin.
TL;DR: Quick Workflow
Use this simple workflow once your resin is calibrated. For calibration, refer to further sections of this guide or visit AmeraLabs Town Calibration Part guide.
- Make sure room temperature is around 22-25 °C (71.6–77 °F).
- Level your build plate.
- Shake the resin bottle well before use.
- Use initial settings from the AmeraLabs 3D printing settings page.
- Print. Use slower lift speeds: 5 mm/min for bottom layers, 40-60 mm/min for normal layers.
- Clean in 98%+ IPA for 6-12 minutes.
- Dry the print.
- Post-cure immediately until the surface is completely non-sticky and very hard to scratch.
- Verify marginal fit on dies or implant analogs.
Equipment and Preparation
DMD-31 works with MSLA and DLP 3D printers: Anycubic, Phrozen, Elegoo, Epax, Longer, Prusa, Asiga and similar. Use FEP, NFEP, PFA, ACF, HDF or similar film-based resin trays only. Do not use PDMS-based resin trays.
Before You Start Printing
- Room temperature. Make sure your room temperature is around 22-25 °C (71.6–77 °F).
- Build plate level. Level your build plate before printing. Re-level after a print failure or when models detach from the build plate during printing. Follow the guidance of printer manufacturer.
- Printer calibration. Use the validated AmeraLabs 3D printing settings for your printer, but still print the Town Calibration Part to verify balanced calibration.
Everyday Print Workflow
For a successful print, follow these steps.
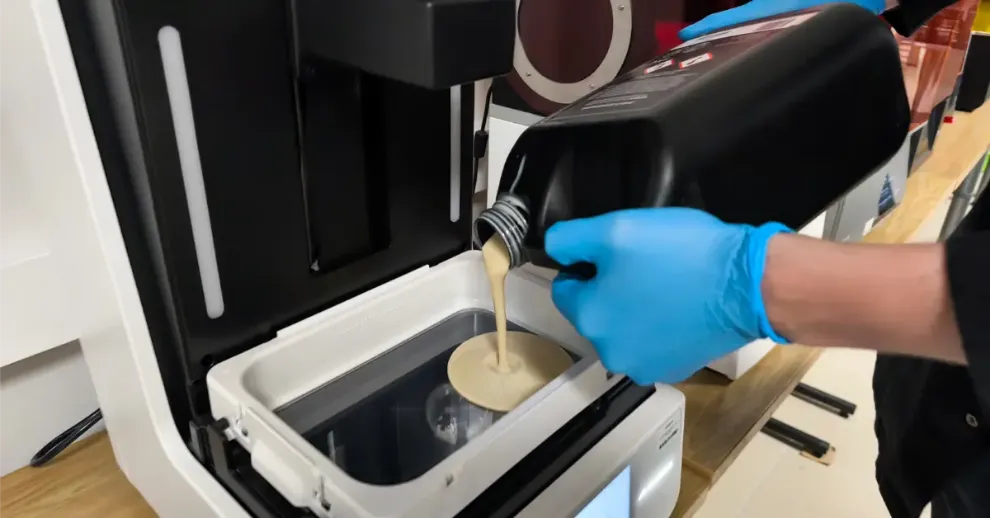
1. Shake the resin.
Agitate the bottle well before each session. If resin has been sitting in the tray from a previous run, stir it before starting.
2. Check the vat.
Inspect the resin tray. Look for cured fragments or debris left from earlier prints. Clear them with a soft silicone spatula or a paper business card. Particles left in the tray cause defects and adhesion failures.
3. Slice your file.
Apply your calibrated parameters. DMD-31 works with any slicer that handles STL imports. Dental CAD packages like Exocad and 3Shape output STL files directly. Key slicing considerations:
Hollow models to conserve resin and lower peel forces. Always include vent and drain holes.
For supported prints, set column thickness to 1.5–2 mm and tip diameter to 0.2–0.6 mm. Enable an attachment layer.
Keep all supports away from teeth, margins, and seating surfaces.
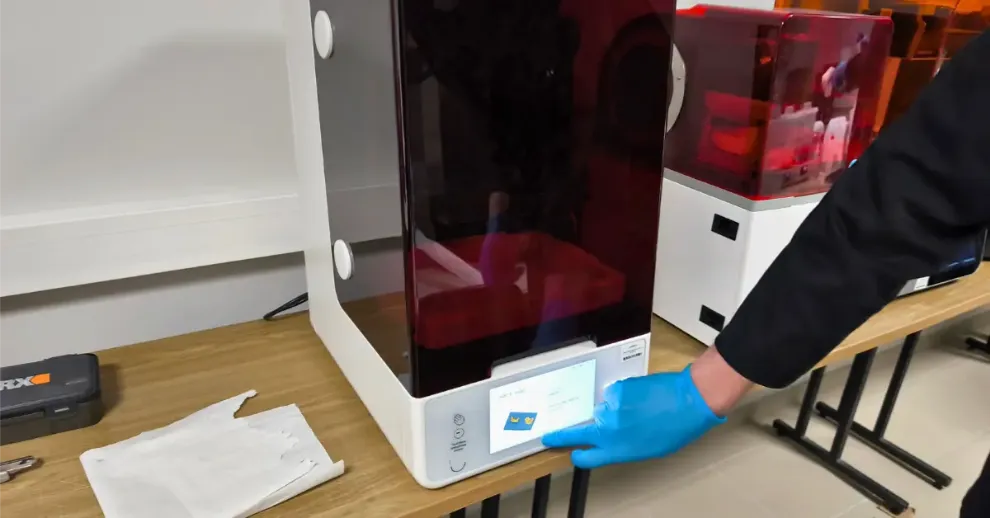
4. Print.
Run with bottom lift speed at 5 mm/min and normal lift speed at 40–60 mm/min. Once your exposure is locked in, see 9 Settings to Change for Faster Resin 3D Printing for throughput improvements.
5. Remove supports.
Supports come off more easily before curing. That said, leaving them attached through post-curing can help maintain geometry on delicate or thin-walled models. Choose based on the case.
6. Clean.
DMD-31 has a relatively low viscosity (around 670 mPa·s), which makes washing straightforward. Use only 98%+ pure IPA. Total IPA contact should not exceed 12 minutes.
- Wash and cure station: Submerge the part for 4 minutes. If residue remains, repeat for another 4 minutes with fresh IPA. This is the recommended approach.
- Manual IPA baths: Submerge for 2 minutes, then actively swirl for 2 minutes, let it rest submerged for 2 more minutes, and finish with another 2 minutes of swirling. If further cleaning is needed, run through the sequence once more using clean IPA.
- Ultrasonic: Seal the part with IPA in a container, then place that container into the ultrasonic bath filled with water. This transmits cleaning energy without exposing flammable IPA directly to the machine. Run no longer than 4 minutes with no heat. Repeat once with fresh IPA if necessary. Never activate the heating function.
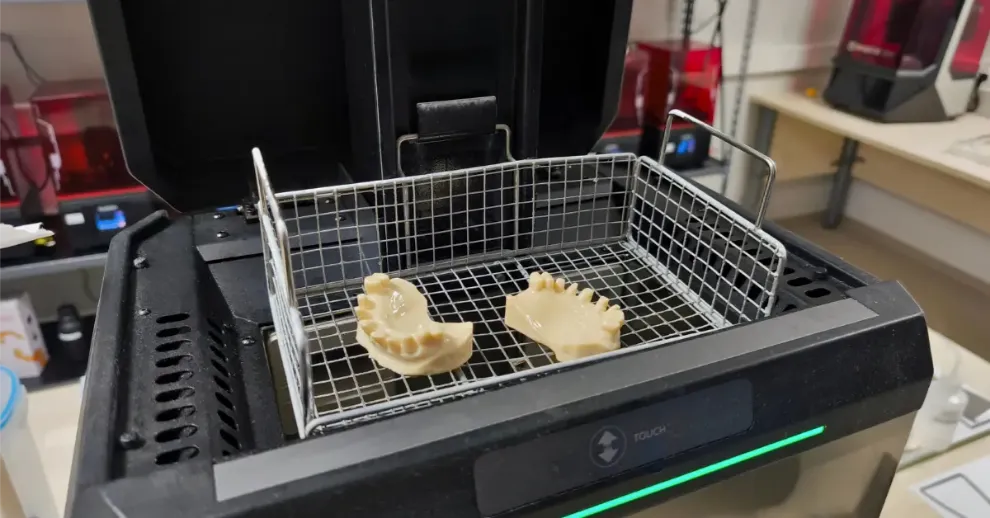
7. Dry.
Use compressed air or let parts air dry. Every surface must be fully dry before UV exposure. Any residual moisture or uncured resin will compromise the final cure.
8. Post-cure right away.
Begin curing as soon as the part is dry. Use a curing station with 365–405 nm UV wavelength. Leaving prints uncured for extended periods invites dimensional changes and warping. Cure until the surface feels completely dry to the touch and resists scratching.

Typical cure durations for a tack-free, hardened result:
- 2 minutes on Form Cure
- 3 minutes on Asiga Cure Station
- 5 minutes per side on a standard 405 nm wash & cure unit
Higher-wattage stations may require slightly less time; lower-powered units may need a bit more. Always cure at room temperature (20–25 °C) to avoid heat-induced warping.
9. Verify fit.
Seat removable dies and implant analogs to confirm marginal accuracy before proceeding with lab work.
Safety, Handling, and Storage
Before handling this resin, read the Safety Data Sheet first. Wear nitrile gloves and safety glasses at all times when handling chemical products. Provide adequate ventilation in your workspace. This resin is for professional lab use only and is not meant for intraoral use.
Store sealed bottles at room temperature away from direct sunlight. This is the condition that keeps the resin stable for repeated use.
Dispose of waste resin and empty bottles as hazardous waste. Resin bottles must never be disposed of or poured into the general waste.
For more details on common resin safety practices, see 23 Resin Safety Myths a Resin Manufacturer Wants You to Know.
Troubleshooting
Print doesn’t stick to the build platform – Increase bottom exposure time and re-level the build plate.
Layers are separating or delaminating – Increase normal exposure time and reduce lift speeds.
Model detaches from supports – Increase support density and support tip thickness.
Holes are too tight / closed – Slightly decrease exposure time.
Holes are too loose / oversized – Slightly increase exposure time.
Other issues – Recalibrate your exposure using the Town calibration model and refer to the full troubleshooting guide.
Conclusion
Follow this guide to achieve highly accurate and dimensionally stable dental models with DMD-31 resin on MSLA and DLP printers.
Download the MSDS for safety precautions and handling guidelines, use the validated printer settings, calibrate your exposure with the Town calibration model, and start printing.
If you have any questions or run into issues, feel free to contact us at support@ameralabs.com.
Related Resources
Product documents
AmeraLabs 3D Printing Settings
Other dental resins from AmeraLabs
DMD-21 Dental Model Resin (MSLA/LCD counterpart)
GVA-26 Gingiva Resin: Printing Guide
Guides
Business Resin Printing Setup Guide & Checklist
Resin Safety: Debunking Common Myths in 3D Printing