We have noticed one standard issue for most beginners of “bottom-up” style SLA 3D printing. That is when you get only support structures on the build plate after 3D printing instead of the intended object. In a previous blog post “6 Key Principles of 3D Printing Supports that Work” we have covered why support structures are needed, how to properly set them up for resin 3D printing and the key reasons behind failing of supports. This time we set out to prove our assumptions with an experiment.
In a previous article we listed 6 principles that you have to consider to make sure, that your prints wouldn’t fail while resin 3D printing supports.
- Use thicker support tips
- Select high/medium density of supports
- Choose software wisely
- Use interconnected supports
- Consider resin properties
- Use high quality FEP
We recommend reading the full article here: 6 Key Principles of 3D Printing Supports that Work.
Testing settings for failing resin supports
In order to evaluate our assumptions and see how various settings impact the final result, let’s conduct a simple experiment. This time we have chosen two different machines: Peopoly Moai resin 3D printer and Anycubic Photon resin 3D printer. We made some conclusions at the end of this article.
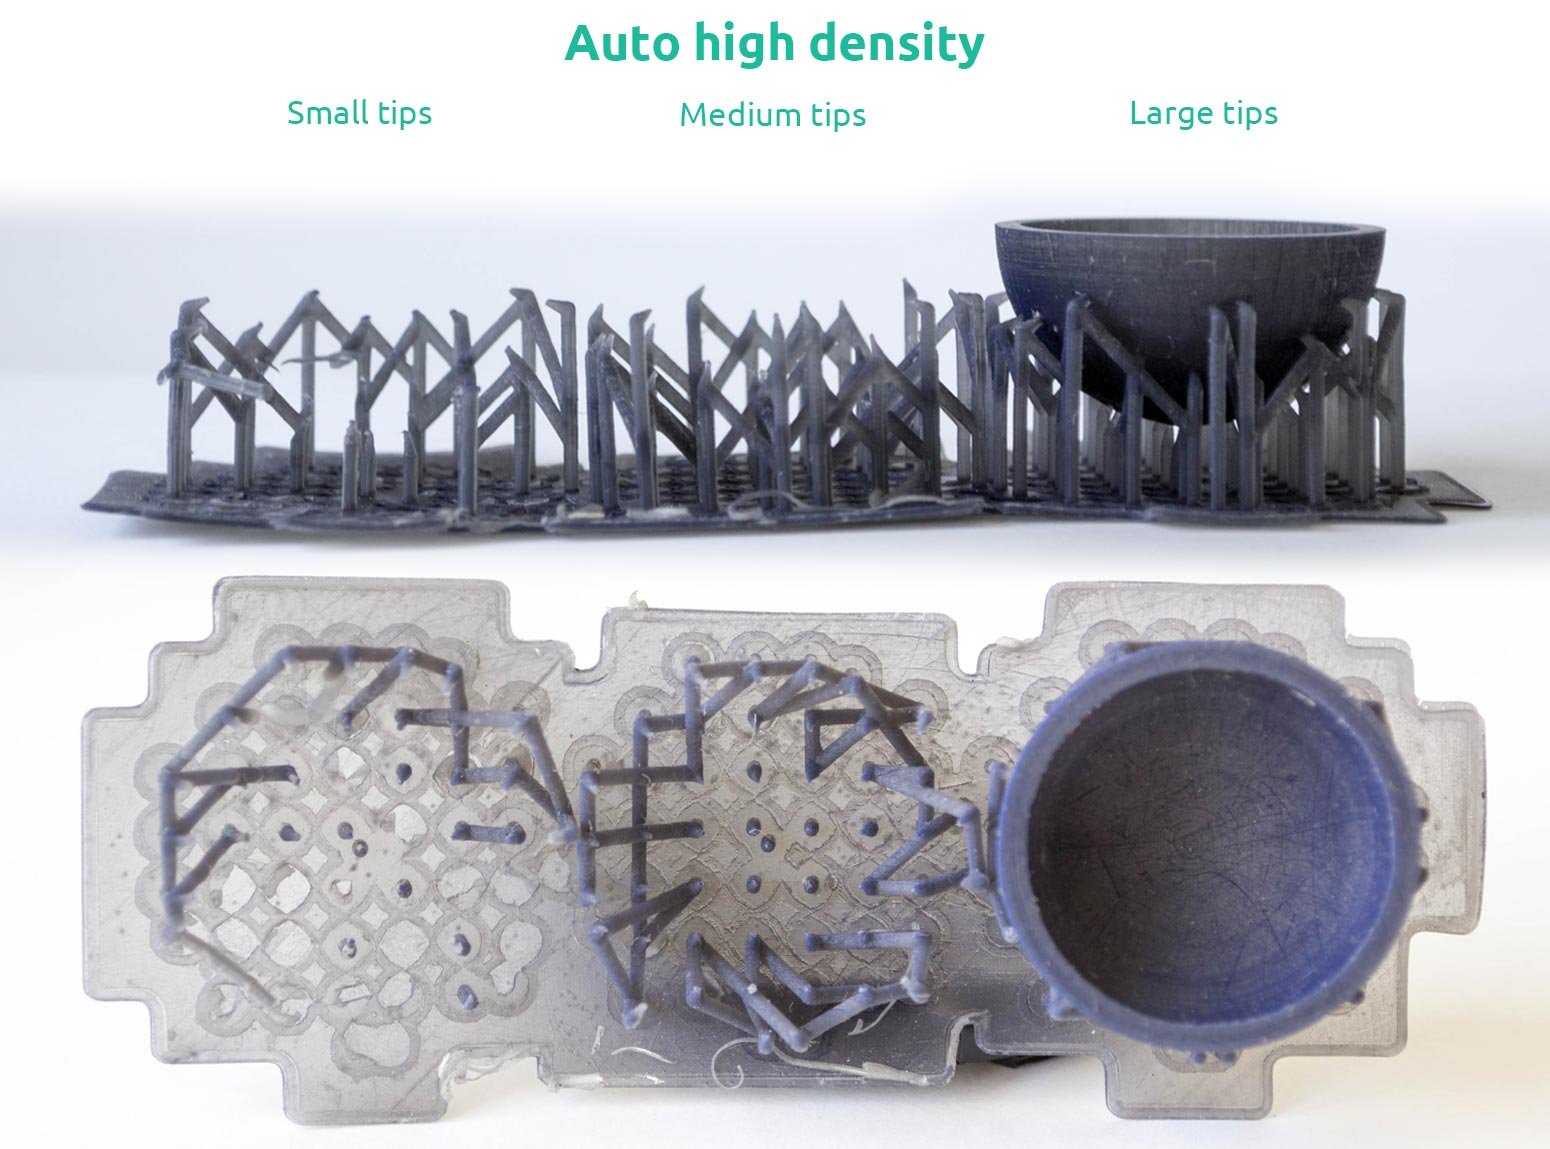
We used XYZware software to place supports and relied on automatic support generation function. See parameters below. Tip sizes are only approximations.
- Low, medium and high densities with small tips (~0.3 mm).
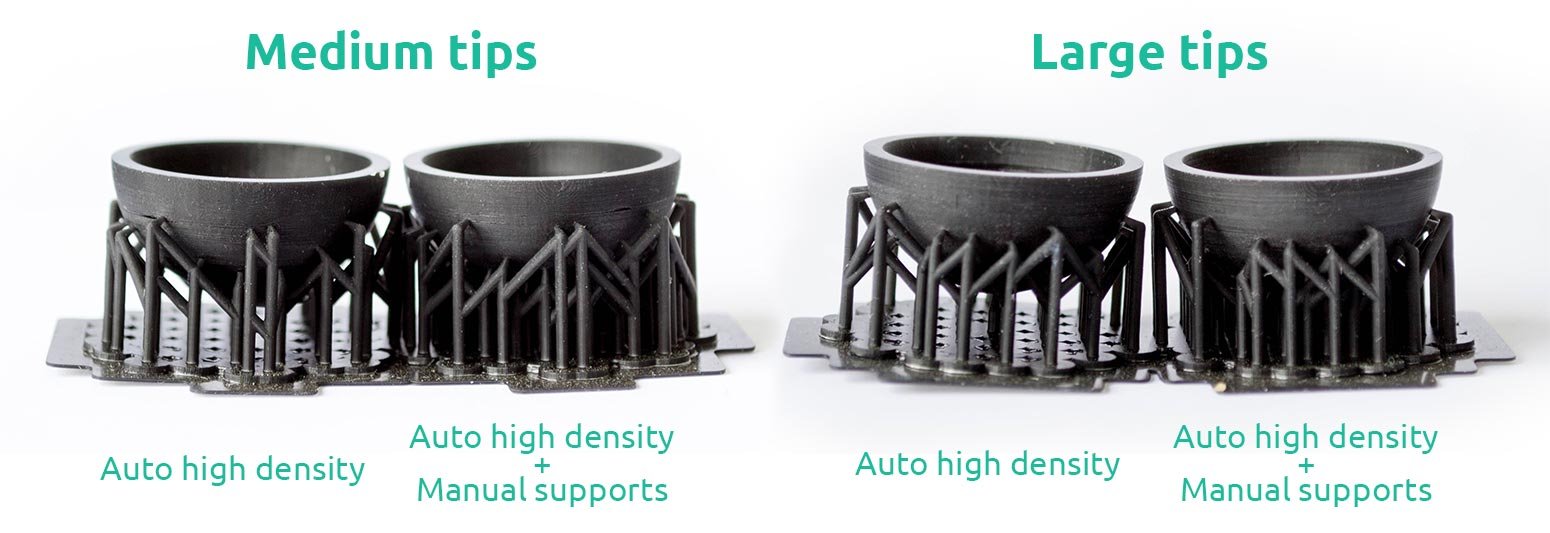
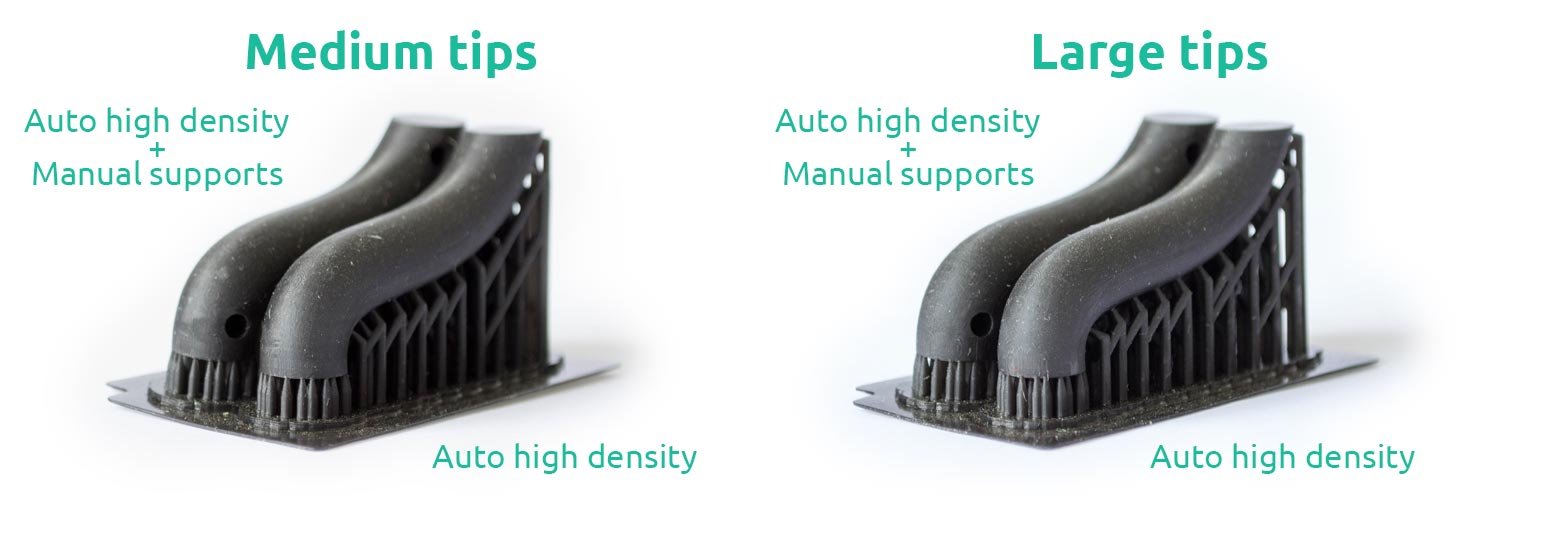
- Low, medium and high densities with medium tips (~0.4–0.5 mm).
- Low, medium and high densities with large tips (~0.5–0.6 mm).
- Additional variations, when we added manual supports to automatic suggestion.
We printed three custom models for this experiment on both machines.
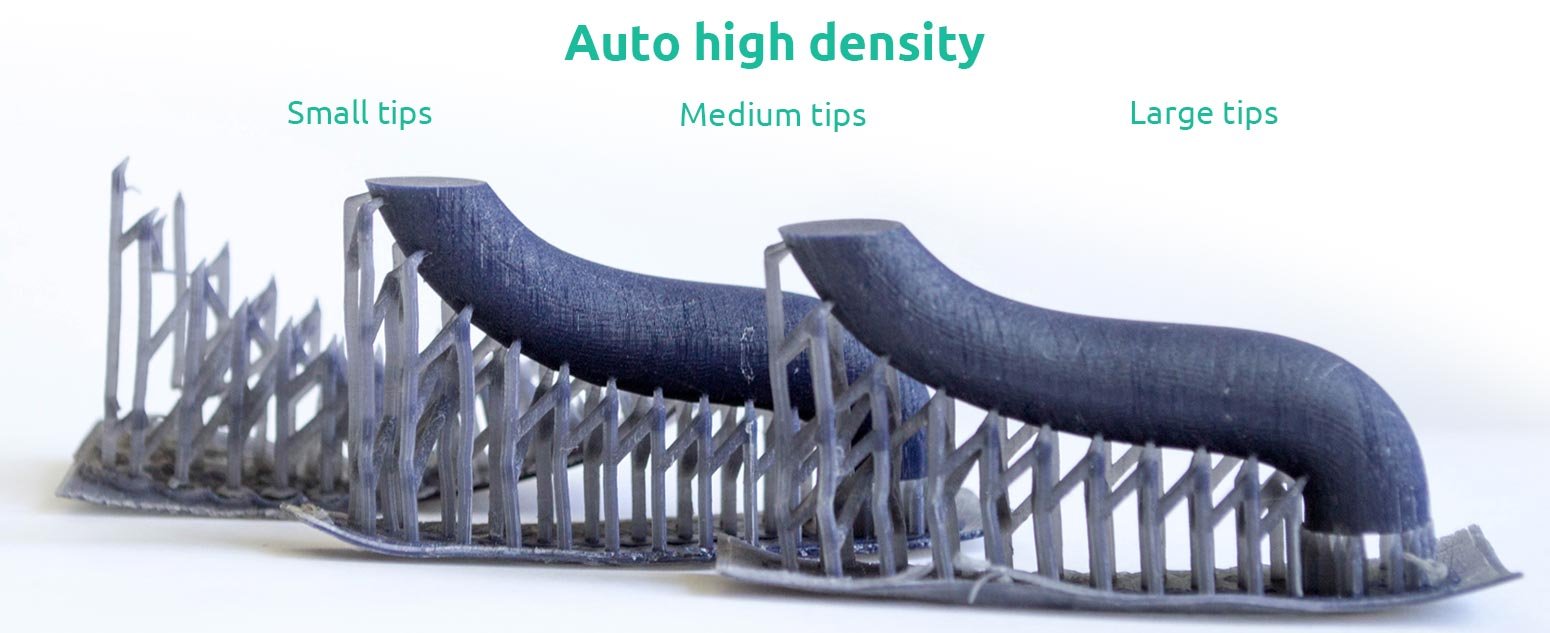
- Simple half-sphere, when layer separation forces from FEP are quite uniform.
- Twisted tube with longer chain of supports and a bit uneven load on supports.
- Our own AmeraLabs cannon that you can download from Thingiverse.
Anycubic Photon
This part was conducted with Anycubic Photon 3D printer using our AMD-3 LED UV resin with following settings.
- Bottom exposure 180 seconds.
- Layer thickness 50 μm.
- Off time 1 second.
- 3 bottom layers.
- Regular exposure 6 seconds.
- New FEP film.
Below, we present you our “Anycubic Photon” results and some comments about each of them.
Half-sphere model
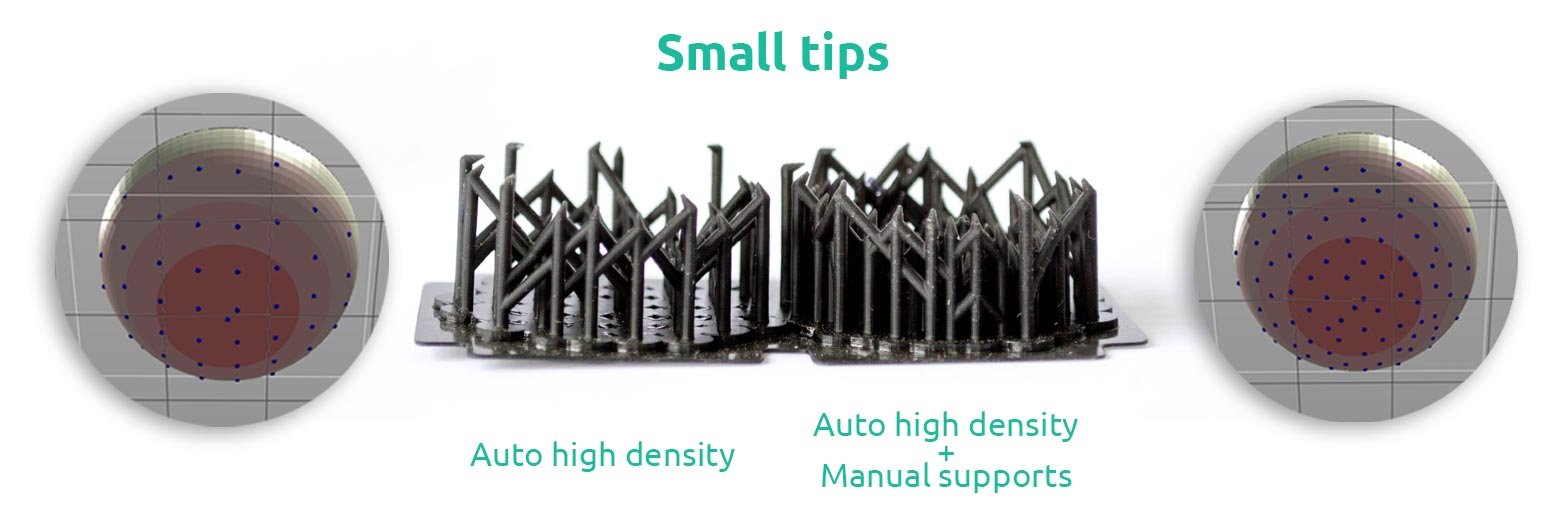
As expected, all resin supports with small tips failed miserably. For this attempt, we placed small-tipped supports at the highest density (model on the left). Then we supplemented auto generated supports with a bunch of additionally manually added supports (model on the right). Both models failed and we printed “supports only”. Layer separation forces were too high for tips of this size even with such favorable shape as sphere. Furthermore, even a bunch of intentionally added additional supports did not help to get decent result.
On the other hand, we had a bit different story with medium-tipped and large-tipped supports. We generated both at the highest density. Here you can see all auto supported models together with models with manually added additional supports. 3D printed models show that with thicker-tips additional supports were unnecessary at all. Results are acceptable.
Twisted tube
Results with this model are very similar to half-sphere. Version with small tips and high density failed completely. Remaining models with medium and large tips at highest density with additionally added supports 3D printed successfully.

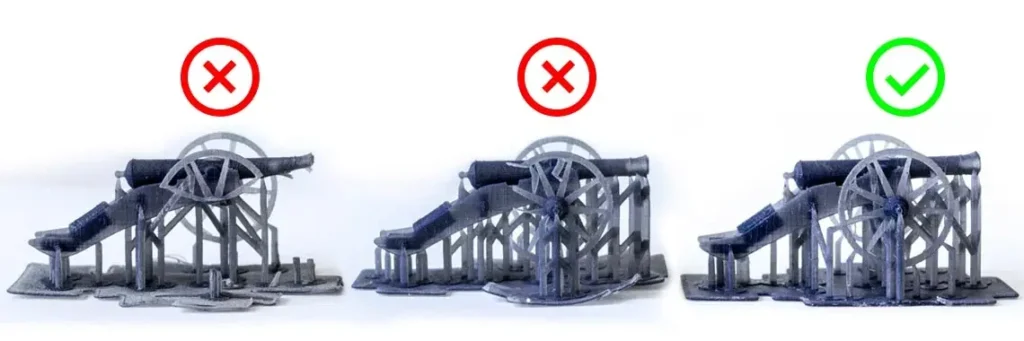
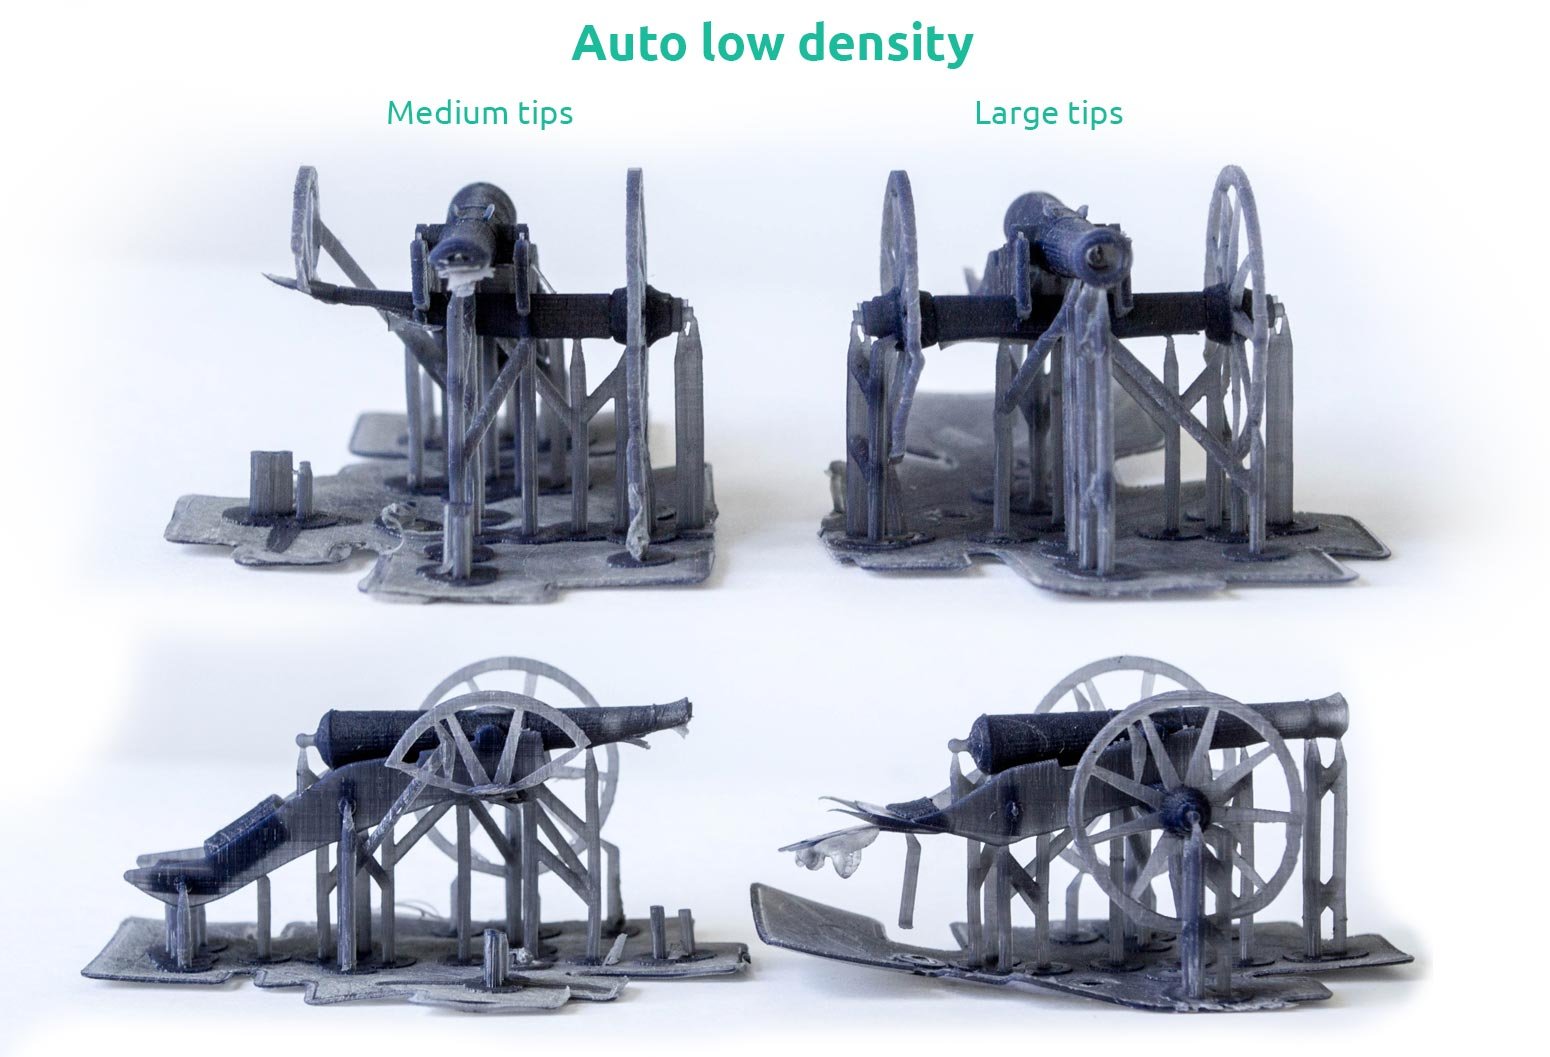
AmeraLabs cannon
You can download this free STL for resin 3D printing from Thingiverse.
Based on previous results, we decided not to print this cannon with small tips and go for medium and large size tips. This time we also auto-generated supports at various densities to evaluate performance. We added no manual or additional supports this time.
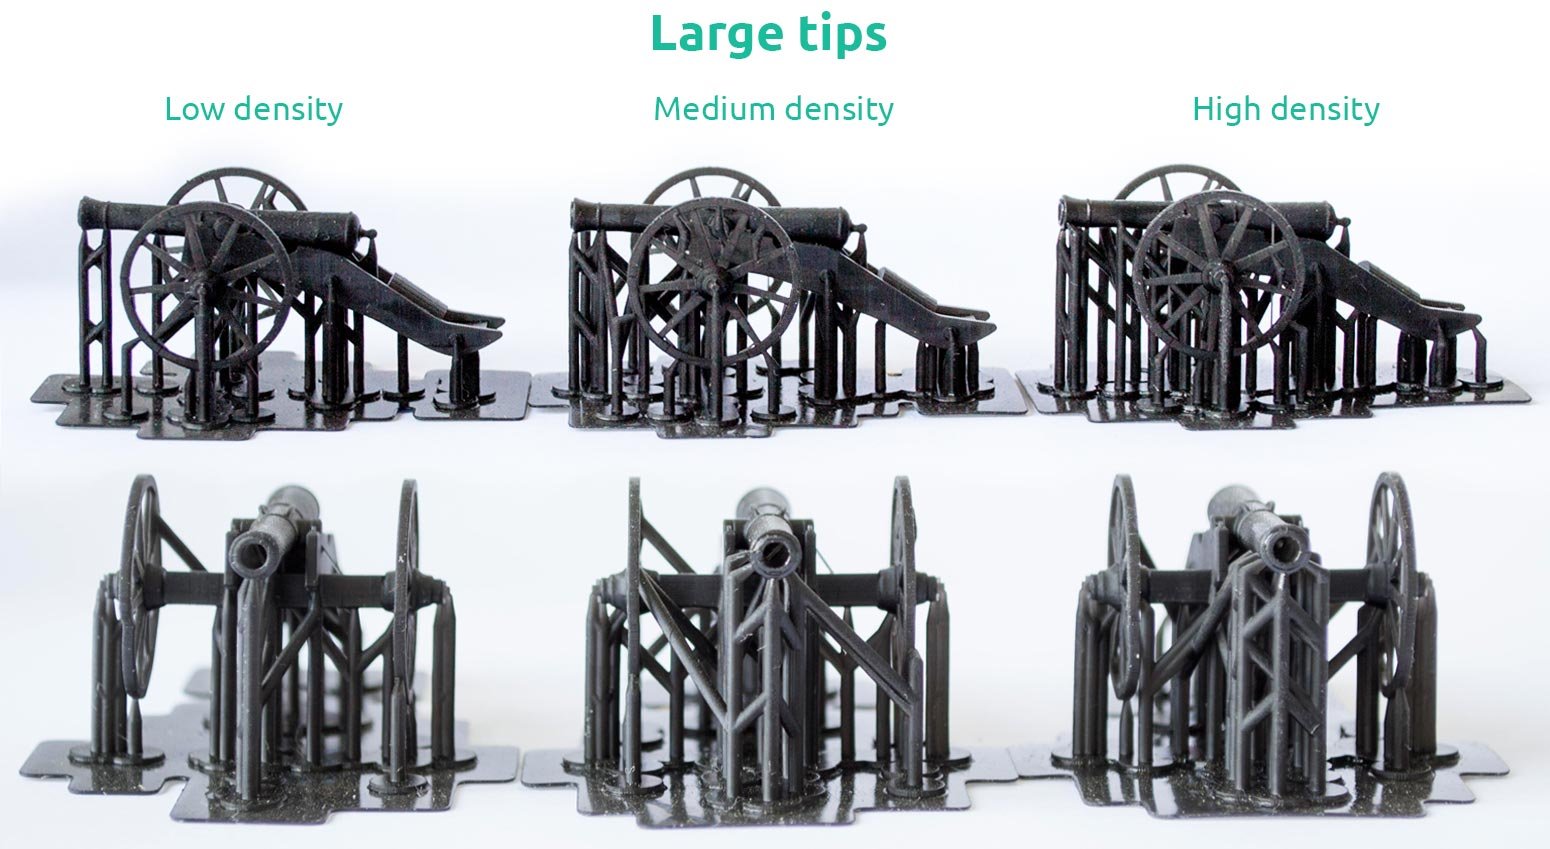
All models with large tips printed successfully, but intricate differences can be observed. Each model has a different support density. Version with highest density showed best results as less visible lines on the model surface were visible. The reason is that thicker supports were better able to withstand layer separation from FEP film. Their tips were thicker and that helped preserve correct geometries and avoid surface anomalies. However, medium density also showed good results and, in most cases, that strategy for this 3D model would also be acceptable.
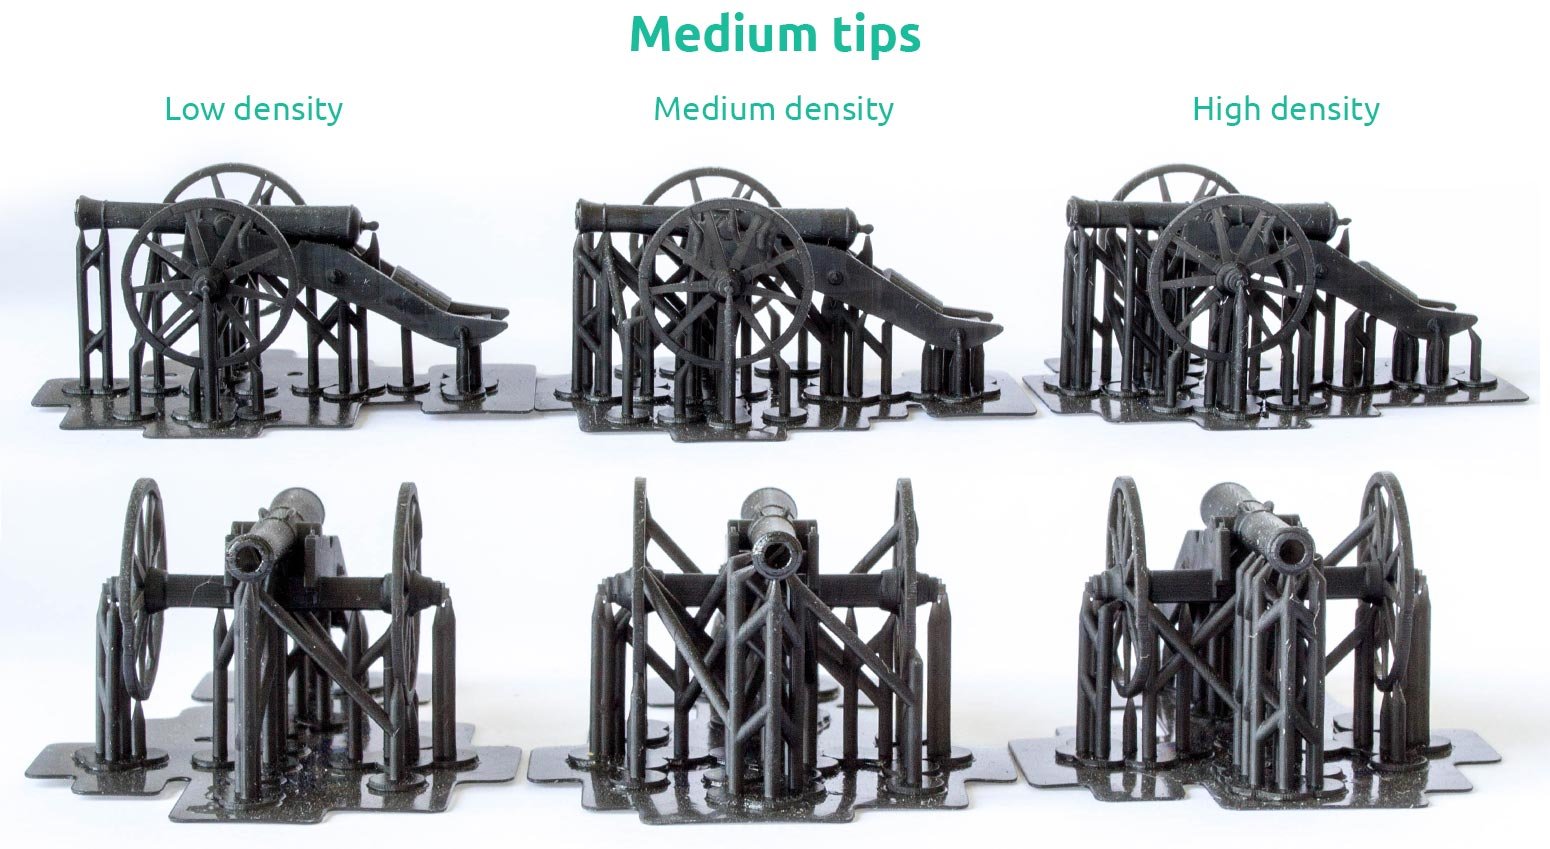
Models with medium tips also 3D printed successfully. Each model had a different support density. This time, version with highest density also showed best performance. However, it performed a bit worse than large-tipped version with highest density as wheels came out more deformed. Surface lines on medium-sized tips with highest density also were minor and results were acceptable.
Peopoly Moai
We conducted this part of the experiment with Peopoly Moai 3D printer using black Peopoly Model UV resin with following settings.
- Latest firmware with all default settings.
- Layer thickness 50 μm.
- Laser power was set to recommended value for black Peopoly Model resin .
- GCode was generated using Cura.
- PDMS based VAT is used (not FEP).
- All models were oriented along the line of VAT tilting mechanism.
Before diving into results, let’s briefly discuss main differences between Peopoly Moai and Anycubic Photon resin 3D printers. Moai uses PDMS based VAT. Usually cured layers tend to stick less to PDMS than to FEP. So sometimes intricate prints might come out better on PDMS VAT.
Moai also uses side-tilting mechanism to peel off cured layers. This often results in uneven distribution of layer separation forces. When deformation is higher, forces are also higher. So normally, part of the 3D printed object that experience more stress is the one facing tilting side, i.e. right side of the Moai VAT. Therefore, with this 3D printer it is also wise to pay thorough attention to your model XY orientation. With smart positioning/orientation one can dramatically reduce chances of supports failing when resin 3D printing. We learned that in order to get the best result the more sensitive parts of the 3D model should be further away from the tilting side.
Finally, Moai standard material is more flexible than common hard LED/LCD materials for modelling. We learned that this property usually works against us as flexible supports tend to wiggle around during printing. At low densities they are also not rigid enough to preserve their position throughout the 3D printing. In these cases medium or mostly large support tips are preferred at highest possible density. Some printed models suffered quite high shrinkage, especially at the attachment layer. Let’s see the results.
Half-sphere model
As expected, small-tipped supports at highest density failed quite miserably. However, in this case, even version with medium-sized supports at the highest auto density failed. Only version with large tips and highest density printed successfully. Origins of this failure were described above, where we talk about impact of tilting mechanism and material properties. Therefore, if you wish to print intricate details with this great machine, use hard materials, proper orientation strategies joined with wise placement of supports.
Twisted tube
Twisted-tube results came out a bit better than half-sphere. Large-tipped and medium-tipped supports at highest density performed well. However, with small-tipped supports, failure is present. Reasons are similar to the ones already mentioned above.

AmeraLabs cannon
With AmeraLabs cannon we decided to run some more experiments. So below you can see results of three 3D printing sessions.

With this attempt medium-tipped version performed a bit worse than large-tipped. One of the wheels failed, but in general, all other details were fine. On the other hand, large tipped-version came out OK. Although, some supports failed, but connections among supports fixed the situation.

Large-tipped and medium-tipped supports at medium density showed quite similar performance. Although, medium-tipped model had more failed supports that were holding the wheel, this time the wheel came out OK.
Although, both models were still present on supports, both of them suffered more issues than previous attempts with increased density. This verifies our learning with Moai (and standard material) that we need a bit more supports with more careful positioning and density consideration to get the best 3D prints.
Conclusions
We believe our experiment helped to systematize our suggested tactics and strategies how to avoid embarrassing failing of resin supports. If incorrect tip diameter is used, it is apparent that increasing density does not always solve all problems. We always suggest selecting optimal tip diameter and only then join that with correct density. We believe that opposite approach might lead to higher percentage of failures.
It is also worth mentioning that the technology of 3D printer can come into play and can have an impact on your supports strategy. Therefore, by careful experimentation, proper evaluation of factors that influence 3D printing process, you can easily make correct adjustments of your support strategies and get the best results.
Based on these findings we would love to see you learning something new and improving your SLA 3D printing techniques. We are also constant learners, so if you have some ideas or suggestions, just drop a comment below.
What’s next?
This is all for today ladies and gentlemen!
Download FREE STL of the cannon from Thingiverse.
And don’t forget to check our shop and other blog posts:
- How to design parts for SLA 3D Printing
- 10 reasons why you get unexpected horizontal lines on your 3D printed parts
- Impressive calibration part for resin 3D printers together with the guide on how to understand its features
- Attachment Layer in SLA 3D printing: what you need to know
- Case Study: ViLim Ball – therepeutic device with 3D printed housing
- How to Make Jewellery with Silicone Mold
