Introduction
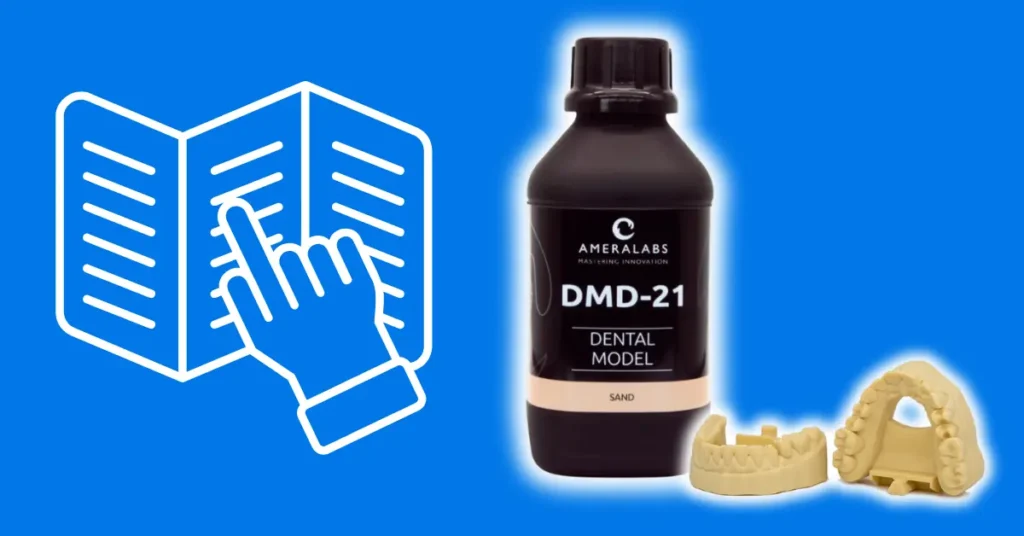
DMD-21 is a fast-curing dental model resin for MSLA and LCD printers. It prints implant-supported models, tooth-borne fixed models, crown and bridge models, removable dies, Willi Geller bases, digital wax-ups, and orthodontic models with consistent accuracy. The sand color makes fine margins and details easy to see. Low shrinkage ensures dies seat without gaps or rocking, low water absorption prevents swelling, and the hard, smooth surface after post-curing is easy to handle and trim.
TL;DR: Quick Workflow
- Make sure your room is at least 20 °C and your resin-filled vat and build platform are at 22-25 °C before printing. Check that your build plate is level.
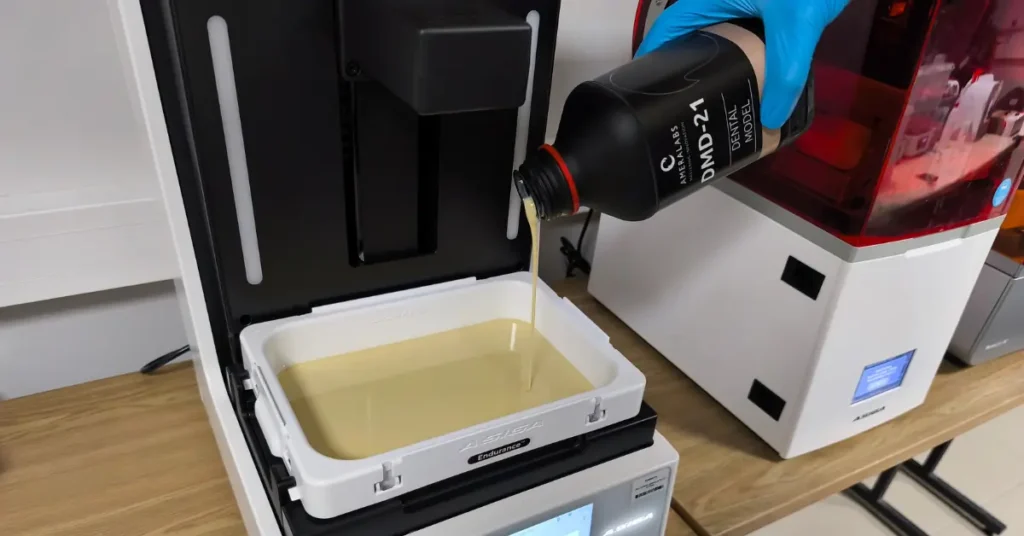
- Shake the resin bottle thoroughly before pouring. Check the vat for debris. Spin the bottle gently in a circular motion, then pour in a fine stream into the vat. If you see a lot of bubbles, wait 5 minutes for them to surface and break before starting your first print.
- Slice your file with hollowing, drain holes, and interconnected supports. Never place supports on teeth, margins, or die seating surfaces.
- Load your exposure settings from the AmeraLabs settings page. Normal exposure is the most critical parameter. Get it right before adjusting lift speeds or anything else.
- Clean in 98%+ IPA. Two cycles of 2 minutes each is sufficient for most prints.
- Dry completely before post-curing. Do not leave uncured prints overnight. Moisture affects dimensional accuracy.
- Post-cure until the surface is non-sticky and hard to scratch.
- Verify marginal fit on dies or implant analogs.
Equipment and Preparation
DMD-21 is compatible with MSLA and LCD printers using 365-420 nm UV light. Compatible brands include Anycubic, Phrozen, Elegoo, Prusa, Asiga and similar. Use FEP, NFEP, PFA, ACF, HDF or similar vat release films only. Do not use printers with PDMS-based vat liners (common in older SLA-style printers).
For a full lab setup checklist covering ventilation, safety equipment, and other requirements, see the Business Resin Printing Setup Guide.
Before You Start Printing
These are periodic checks, not steps you repeat every single session.
Room temperature. Keep your workspace at least 20 °C. The resin-filled vat and build platform must reach 22-25 °C before printing. If your workspace is colder, warm the sealed resin bottle in a container of warm water before printing and turn on your printer’s heating function if it has one.
Build plate level. A level build plate is the foundation of every successful print. Re-level after a print failure or FEP replacement, or if adhesion suddenly gets worse.
FEP condition. Inspect the FEP film regularly. A scratched, cloudy, or warped FEP degrades print quality. Replace it if in doubt. When cleaning the FEP, use a soft silicone spatula only, never sharp tools.
Resin can stay in the vat for up to 4 weeks with the printer hood closed. If leaving it longer, filter the resin back into the sealed bottle to prevent partial curing.
Optical surface. Check and clean the printer’s light source window beneath the vat before printing. Dust or resin residue on the optical surface causes uneven curing and print failures. Use a lint-free cloth and follow your printer manufacturer’s cleaning instructions.
Printer calibration. Calibrate when switching resins or when prints start coming out wrong. Printer screens degrade over time, build plates can go out of level, and temperature changes all affect results, so periodic recalibration is part of normal lab maintenance. Get starting settings from the AmeraLabs 3D printing settings page for your printer and layer height, then print the Town Calibration Part to verify.
Fine-tune normal exposure in 0.2-0.5 s steps based on results. If you see adhesion issues, also adjust bottom exposure and lift settings.
See the Complete Resin 3D Printing Settings Guide for a full breakdown of every parameter. If you’re unsure how to read the Town print result, send a photo to support@ameralabs.com and we’ll help you dial in your settings.
Everyday Print Workflow
1. Shake the resin.
Mix the bottle thoroughly before pouring. If resin was left in the vat from a previous session, mix it before printing as well. After pouring, wait a minute for any bubbles to surface and break before starting the first print. Bubbles in the first layers cause print defects.
2. Check the vat.
Before starting, inspect the vat for any cured particles or debris from a previous print. Solid particles cause surface defects and print failures. Remove debris carefully with a soft silicone spatula or a paper business card. If your printer has a vat clean function, use it before printing.
3. Slice your file.
Use your calibrated settings. DMD-21 is compatible with any slicer that accepts STL files. Dental design software such as exocad and 3Shape exports STL files directly; import those into your slicer (ChiTuBox, Lychee, PrusaSlicer, etc.) to add supports and set print parameters. Smilecloud and Blender for Dental are alternatives. Key slicing decisions:
- Layer height. Use 30–100 µm depending on the model and required accuracy. 50 µm works for most dental models. Use 30–40 µm for implant models and cases where marginal accuracy is critical. Use 100 µm for fast study models where accuracy requirements are lower.
- Orientation. Print orientation affects accuracy, surface quality, and workflow time. Printing flat is the fastest setup and produces accurate individual models, but takes up the most build plate space and increases the risk of suction cup failures. Printing on supports at a 10-15° angle gives the smoothest surface and best accuracy, but requires the most preparation and support removal time. Vertical orientation is the fastest method for batch production. For crown and bridge and implant cases where accuracy is critical, a slightly angled orientation is preferable.
- Rapid printing. Models can be printed directly flat on their base without supports, or with internal supports only. This requires tuning base layer exposure time and thickness: high enough to hold the model during printing, low enough to release it cleanly after. Use a thin raft to protect the model base and make removal easier without breaking the model.
- Solid vs hollow. Hollow models are recommended. They save resin, reduce peel forces, and reduce the risk of warping. Use a minimum wall thickness of 3 mm. Solid models are acceptable for quick study models or when slicing time is limited, but they use significantly more resin and increase peel forces on the FEP.
- Raft. Use a raft when printing on supports.
- Drain holes. Add vent holes at the bottom of the model to prevent suction cups. Without them, trapped air creates pressure that can cause layer separation or pull the print off the build plate. For removable die models, every die slot and implant analog slot needs its own drain hole as well.
- Supports. Use 1.5-2 mm support columns with 0.2-0.6 mm tips. Denser, interconnected supports give better results than auto-generated standalone columns. Always manually verify auto-generated supports before printing. Never place supports on teeth, margin lines, die slots, or seating surfaces. Support marks in these areas affect fit and cannot be corrected after printing. For full-arch models, add a stabilizer bar connecting the two ends of the arch to prevent the model from twisting during printing. Keep support contact tips at the narrow end of the 0.2–0.6 mm range on tooth surfaces near margins.
4. Print.
Exposure is the most critical setting. Get your normal exposure time right first using the calibrated starting values from the settings page, then verify with the Town print. Lift speeds: bottom 5 mm/min, normal 40–60 mm/min. For throughput improvements once settings are stable, see 9 Settings to Change for Faster Resin 3D Printing.
5. Remove supports.
Remove supports before post-curing for easier removal, or after post-curing to better preserve geometry. Do not rip supports off critical surfaces. Cut each one individually with flush cutters or a dental handpiece disc. Ripping leaves divots that affect fit. If supports are on the model base only and not on any clinical surfaces, manual removal is acceptable. Removing supports before washing makes cleaning easier and reduces IPA use.

6. Clean.
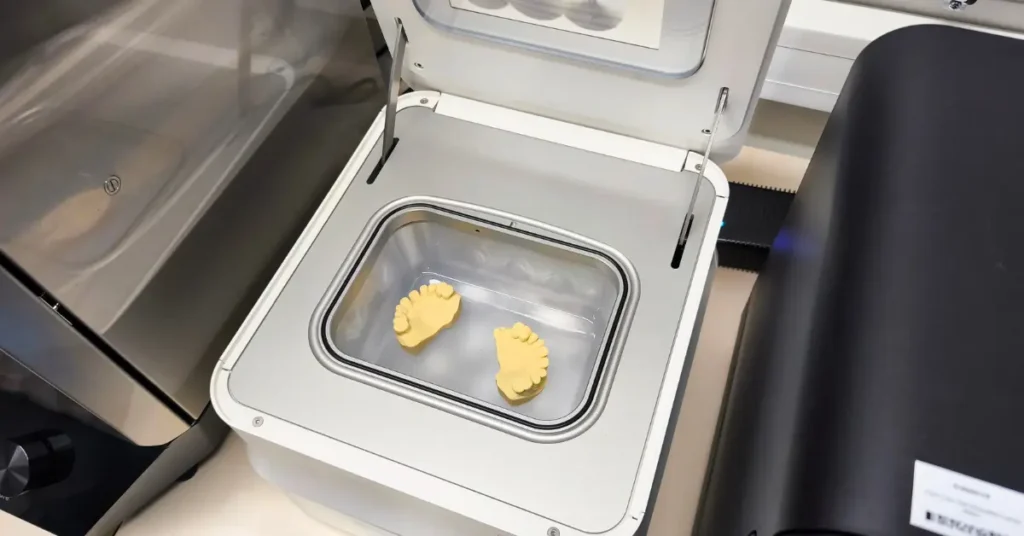
Use 98%+ pure IPA only. DMD-21’s low viscosity makes cleaning easy. Keep total IPA exposure under 12 minutes. Leaving prints soaking for longer can damage the surface. For hollowed models, make sure IPA drains fully through the vent holes before moving to the drying step. Use a dedicated IPA bath for DMD-21 and do not mix wash baths between different resins. Replace IPA regularly. If prints come out cloudy, tacky, or with resin residue after washing, the IPA is likely too contaminated and needs changing. IPA works best at room temperature (around 20 °C). Do not heat IPA directly. It is flammable.
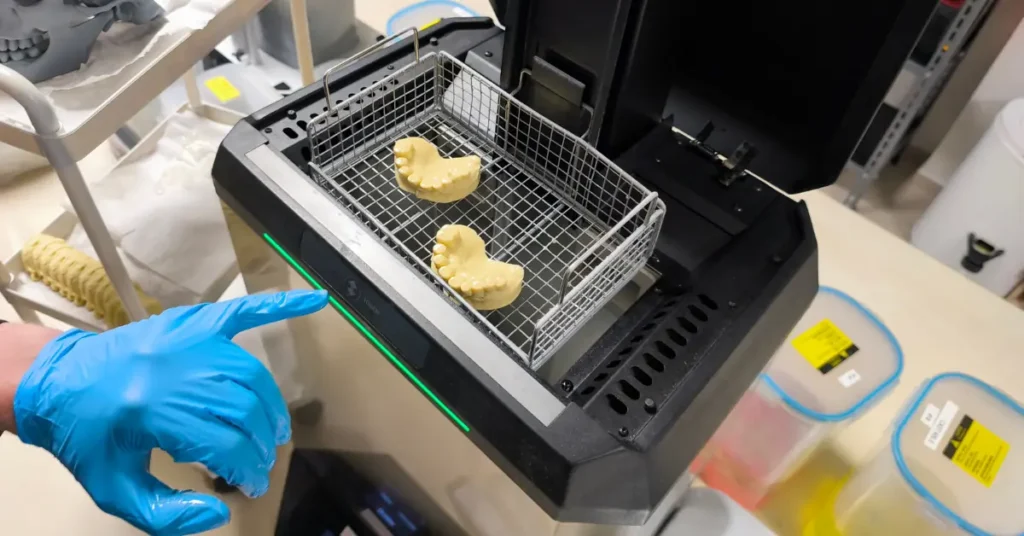
- Wash and cure station or manual IPA baths: 2 minutes active wash, 2 minutes soak. Repeat once with clean IPA. For a 3-stage manual setup (dirty / medium / clean), one cycle per stage is enough. Total time should not exceed 6 minutes of active IPA contact.
- Ultrasonic: Place the part and a small amount of IPA inside a sealed container (a zip-lock bag or jar works). Place that sealed container into the ultrasonic bath filled with water. The ultrasonic energy transmits through the water into the IPA without putting flammable liquid directly in the machine. Run for a maximum of 6 minutes without heat.
7. Dry.
Before post-curing, check the surface for any wet spots or uncured resin. If wet resin is visible, submerge in clean IPA for one minute, then re-dry. Air dry for 20–30 minutes, or speed it up with compressed air or a hairdryer. The model must be completely dry before post-curing. Do not dry under direct sunlight, UV lamps, or heat above 50 °C.
8. Post-cure immediately after drying.
Post-cure immediately after washing and thorough drying.
Recommended curing times (these achieve a tack-free, properly hardened surface on most common stations):
- 2 minutes on Form Cure
- 3 minutes on Asiga Cure Station
- 5 minutes on a standard 405 nm wash-and-cure station
Higher-power stations (60 W+) may need slightly less time; lower-power units may require a bit more. Always cure at room temperature (20–25 °C) – elevated temperatures can cause warping on dental models.
After curing, the surface is completely non-sticky and very hard to scratch. Final hardness: 79 Shore D.
For a fully tack-free surface (especially important for silicone impressions, die-hardener application, or maximum surface quality): Standard UV stations leave a thin oxygen-inhibited layer. To eliminate it completely:
- Cure under a nitrogen atmosphere or in a vacuum chamber (best methods).
- As a good alternative, submerge the model in water or a water-glycerin solution during curing. This greatly reduces surface tackiness but is not a full substitute for inert gas or vacuum curing.
Tips:
- It is usually easier to remove supports before post-curing, but you can leave them on if it helps maintain geometry on delicate models.
- If the surface is still slightly tacky after the recommended time, add 1–2 minutes and recheck. Over-curing is rarely a problem with DMD-21.
9. Verify fit.
Check marginal fit on removable dies or implant analogs.
Resin Storage and Vat Management
Store sealed bottles at room temperature away from direct sunlight. Sealed bottles have a shelf life of up to 24 months. Check the expiry date on the label before use.
If the printer will be used again soon, resin can be left in the vat for up to 4 weeks with the printer hood closed. Mix it thoroughly before the next print. For longer breaks, filter the resin back into the sealed bottle using a funnel and paint strainer to remove any partially cured particles. Many labs run with the vat permanently filled, topping it up as needed and printing continuously. Mix before each session and check for debris. If leaving the vat open for extended periods, cover it to protect the resin from dust and ambient light.
Safety, Handling, and Storage
Read the Safety Data Sheet first. Wear nitrile gloves and safety glasses at all times when handling liquid resin. Ventilate your workspace well.
For professional lab use only, not for food, drink, or intraoral contact.
Dispose of waste resin and empty bottles as hazardous waste. See Resin Safety: Debunking Common Myths in 3D Printing for more on resin safety.
Troubleshooting
Most problems trace back to exposure, leveling, cleaning, or curing. The Resin 3D Printing Troubleshooting Guide covers these in full. Common fixes:
Print won’t adhere to the build plate – Add bottom exposure time and re-level.
Layer separation or delamination – Increase normal exposure and slow down lift speeds.
Parts breaking free from supports – Use more supports and thicker tips.
Holes printing too small or closed – Reduce exposure slightly.
Holes printing oversized – Add a small increment to exposure.
For anything else, recalibrate with the Town model and consult the full troubleshooting guide.
Conclusion
DMD-21 produces accurate dental models on standard LED printers. Low shrinkage and a stable sand formulation give consistent margins and die fits. Download the TDS, get your printer settings, calibrate with Town, and start printing. Contact support@ameralabs.com if you run into issues.
Related Resources
Product documents
AmeraLabs 3D Printing Settings
Other dental resins from AmeraLabs
GVA-26 Gingiva Resin – flexible gingival masks that pair with DMD-21 models
DMD-31 DLP Dental Model Resin – the DLP counterpart to DMD-21
Guides
Business Resin Printing Setup Guide & Checklist
Resin Safety: Debunking Common Myths in 3D Printing
