Your Ultimate Guide to Flawless Miniatures + FREE STLs!
Introduction
Welcome to your ultimate guide to 3D printing miniatures! With 3D printing, you can customize every detail of your miniatures, creating stunning pieces that reflect your unique style. Plus, it’s a cost-effective and scalable alternative to purchasing commercially made models, making it an excellent choice for hobbyists and businesses alike. Let’s dive into why resin is the preferred material for miniature printing and how it can help take your projects – or your business – to the next level!
Before you delve too deep, if you’re just embarking on your resin 3D printing journey, start with The “Complete Resin 3D Printing Settings Guide for Beginners” to get acquainted with the basics. This guide is packed with advanced tips and detailed information, perfect for those already comfortable with the fundamentals.
Whether you’re just starting out as a hobbyist or running a miniature 3D printing business, this guide is designed to help you succeed. From selecting the best resin for miniatures to painting your finished models, we cover everything you need to know. Mastering the art of miniature 3D printing can significantly enhance your own collection and gaming experience – or elevate the products and services you offer to your customers.
Why Resin is the Best Choice for 3D Printed Miniatures
Resin is the ultimate material for 3D printing miniatures, offering unrivaled advantages in detail, durability, and flexibility. Whether you’re a hobbyist crafting unique models or a business owner serving demanding customers, resin provides a winning combination of quality and versatility.
Unmatched Precision for Miniature Details
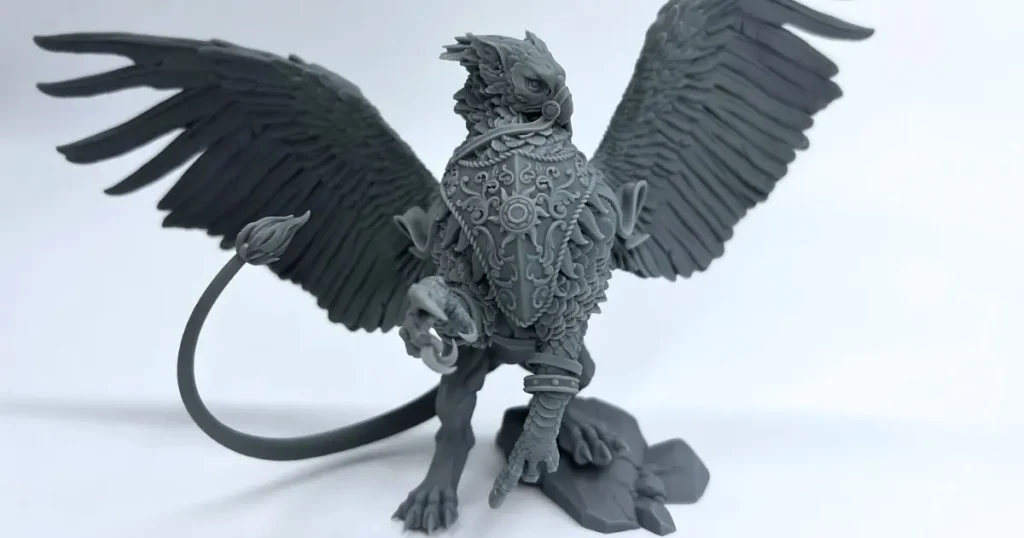
Resin printing with SLA (Stereolithography) and DLP (Digital Light Processing) technologies achieves incredible precision, capturing even the smallest details in your miniatures. With resolutions as fine as 25 microns, resin printing ensures intricate textures, facial features, and accessories are faithfully reproduced. This is vital for tabletop gaming enthusiasts and businesses producing professional-grade models.
Unlike FDM printers, which struggle with intricate designs, resin printers excel in bringing your creative vision to life. If stunning detail is your goal, resin printing is the clear choice.
Smooth Finishes That Save Time
Resin prints deliver exceptionally smooth surfaces straight off the build plate, minimizing the need for sanding or other post-processing. In contrast, FDM printers leave layer lines that require significant effort to fix. This means you can achieve polished, professional results faster.
Smooth surfaces also make painting easier, allowing for even application and vibrant finishes. Hobbyists save time, and businesses can produce high-quality products more efficiently, meeting tight deadlines and exceeding customer expectations.
Durable Models That Last
Modern resins are designed to withstand regular handling, making them ideal for miniatures used in gameplay or frequently transported. Tough and ABS-like resins provide excellent impact resistance, ensuring your models can survive drops or rough handling without breaking.
For hobbyists, this durability means fewer worries about accidents. For businesses, it translates into fewer customer complaints and a reputation for delivering resilient, reliable products.
Endless Customization Options
Resin offers unmatched versatility, with a wide range of formulations to suit every need. You can choose from vibrant opaque colors, transparent resins for magical effects, or flexible blends for dynamic, durable models. Specialty resins such as clear or tough options open the door to endless creative possibilities.
This flexibility makes resin a favorite among hobbyists who love experimenting and businesses aiming to create distinctive, eye-catching miniatures.
Cost-Effective for Businesses
While resin printers may have a higher upfront cost, they offer significant long-term savings. By producing miniatures in-house, you avoid outsourcing costs, reduce shipping expenses, and maintain control over production quality. The high precision of resin printing also reduces post-processing time, cutting labor costs and increasing efficiency.
For hobbyists turning their passion into a business, resin printing allows you to start small and grow as demand increases. You can produce professional-grade models at home, offering customers exceptional quality while maintaining affordability.
Turning Your Hobby Into a Business
Resin printing is the perfect gateway for hobbyists looking to monetize their creativity. Starting with personal projects, many enthusiasts eventually expand into selling unique designs or offering custom services. Resin’s scalability supports this growth, enabling you to meet rising demand without sacrificing quality.
With so many customization options, you can carve out a niche in the competitive miniature market. Offering high-quality, durable, and visually stunning miniatures ensures your creations stand out.
The Bottom Line
Resin printing combines unmatched detail, smooth finishes, and exceptional durability, making it the top choice for crafting 3D printed miniatures. Whether you’re creating for fun or profit, resin ensures your models are not only beautiful but also built to last. It’s the ideal material for turning your vision into reality, whether you’re a tabletop gaming enthusiast or a business owner, resin is an ideal material for 3D printing miniatures – whether you’re crafting for yourself or building a business.
Preparing Your Miniature Model for 3D Printing
Selecting the right STL files is essential for achieving high-quality results in miniature resin printing. The quality of your models directly affects the clarity of the details and the overall finish of your miniatures. Platforms like MyMiniFactory, Patreon, Thingiverse, and Cults3D offer a wide range of models designed for resin printing. Many of these creators specialize in producing files that cater to the intricacies of high-detail resin prints, ensuring your miniatures look professional and precise.
Define Your Objectives
Before downloading any STL files, it’s crucial to define your goals for the prints. Are you focused on creating characters for tabletop RPGs, unique display pieces, or wargaming miniatures? Knowing your objectives will guide you in selecting models that best align with your vision and purpose, whether you’re printing for personal enjoyment or preparing products for a business.
By carefully selecting STL files that match your goals, you ensure a smoother printing process and more satisfying results, whether you’re building a collection or growing a miniature printing business.
Prioritize Quality Models
When selecting STL files for resin printing, prioritize high-quality models specifically designed for this material. These models typically feature smaller layer heights and intricate details, ensuring they can withstand the printing process while delivering impressive results. Reputable designers, like our partners Dragon Trappers Lodge, Maxs Magnificent Minis, Crippled God Foundry, The Printing Goes Ever On, and Titan Forge Miniatures, rigorously test their models for compatibility with various resin types, enhancing print success and ensuring high-quality outcomes.
Exclusive Miniature STLs for Our Readers
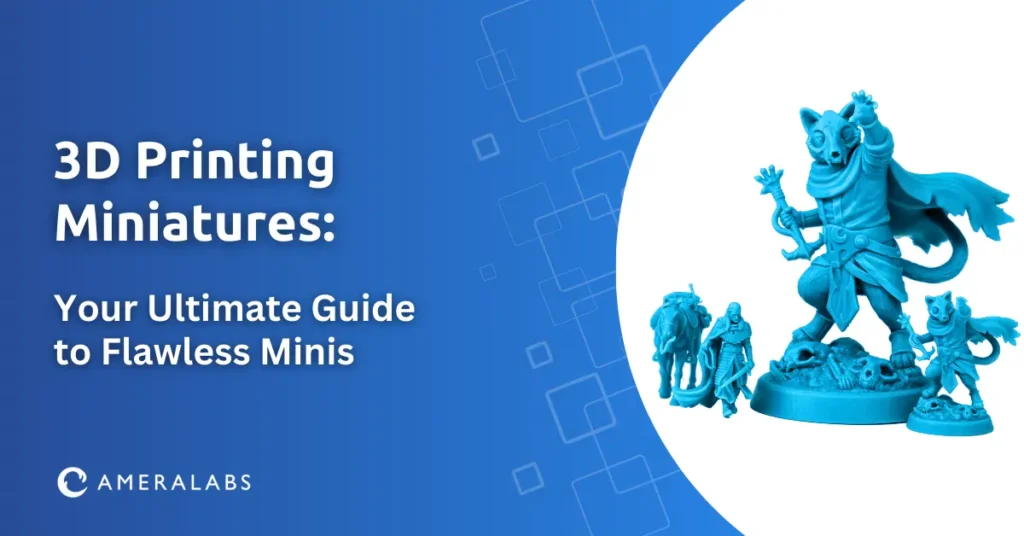
As a special thank-you to our readers, we’re thrilled to offer exclusive miniature STLs for free! These premium designs come from some of the most talented creators in the miniature community:
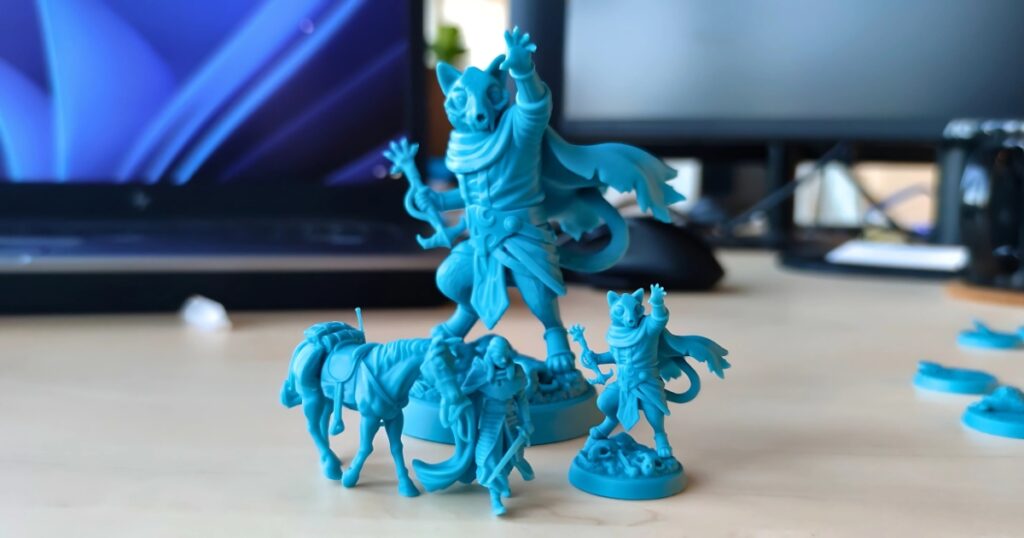
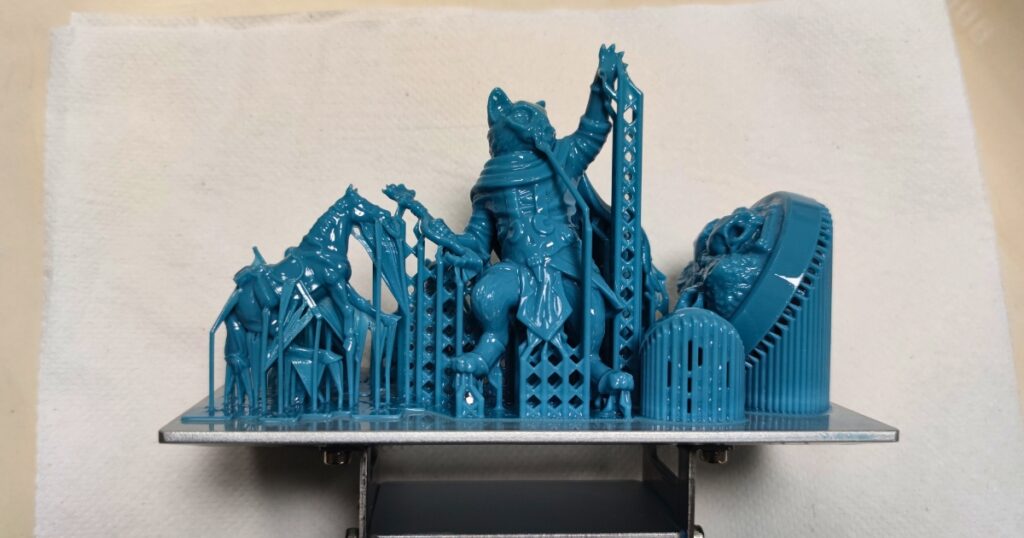
- Max’s Magnificent Minis: The adorable and detailed Nekomeowcer.
- The Printing Goes Ever On: The heroic Gerard the Monster Hunter and his horse, Salmon.

All these miniatures are pre-supported and ready to print, making them perfect for both beginners and experienced hobbyists. We’ve tested these designs using TGM-7 tabletop gaming miniature resin, and the results were nothing short of spectacular. The resin’s precision and durability brought out every intricate detail, ensuring your prints are game-ready or display-worthy right off the plate.
Beware of Low-Quality STL Files
Be cautious when purchasing STL files from sellers who haven’t tested their designs on resin printers. Some models may have design flaws such as gaps, overly thin details, or unprintable features. Always check for social proof – reviews, ratings, and active communities like Discord channels – before buying. For example, after purchasing a model, you may find it completely unsuitable for 3D printing, highlighting the importance of choosing well-tested designs.
By focusing on reputable sources and quality models, such as those provided by our trusted partners, you’ll save time and money while ensuring your prints come out looking their best.
Pre-Supported vs. Non-Supported Models
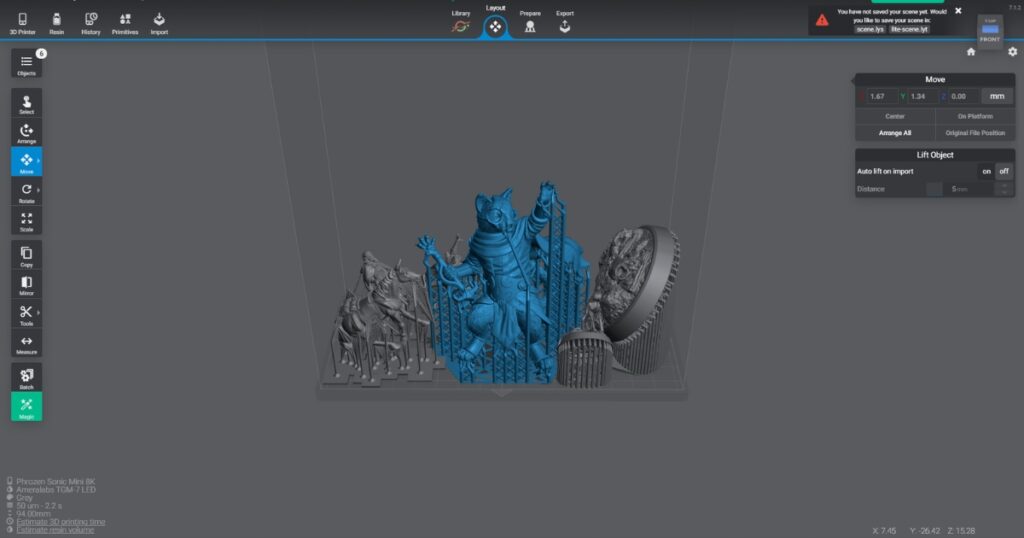
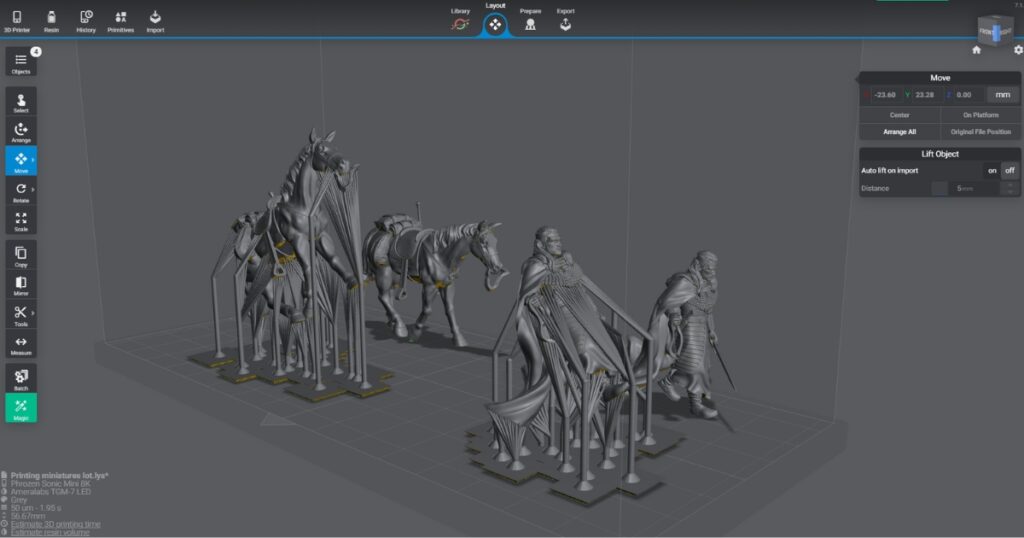
When choosing STL files, consider whether to use pre-supported or non-supported models. Pre-supported models have built-in support structures, making them user-friendly and ideal for complex designs. They often lead to higher success rates and save time during the printing process. However, these models may lack customization options and compatibility with all printers and resins.
On the other hand, non-supported models provide the flexibility to implement your own support strategies. This option is perfect for experienced users who want to fine-tune placements for optimal results. However, they might not be the best choice for beginners in miniature 3D printing.
Ultimately, choosing the right STL files involves balancing your preferences, experience level, and the specific requirements of your miniatures. By focusing on quality and weighing the pros and cons of pre-supported models, you can enhance your printing process and create remarkable resin miniatures that elevate your tabletop experience.
Choosing the Right Resin for Miniature 3D Printing
Selecting the right resin is essential for creating durable, detailed, and reliable miniatures. The intended use of your miniatures – whether for tabletop gaming, display, or gifting – should guide your choice.
Resins for Tabletop Gaming and Frequent Handling
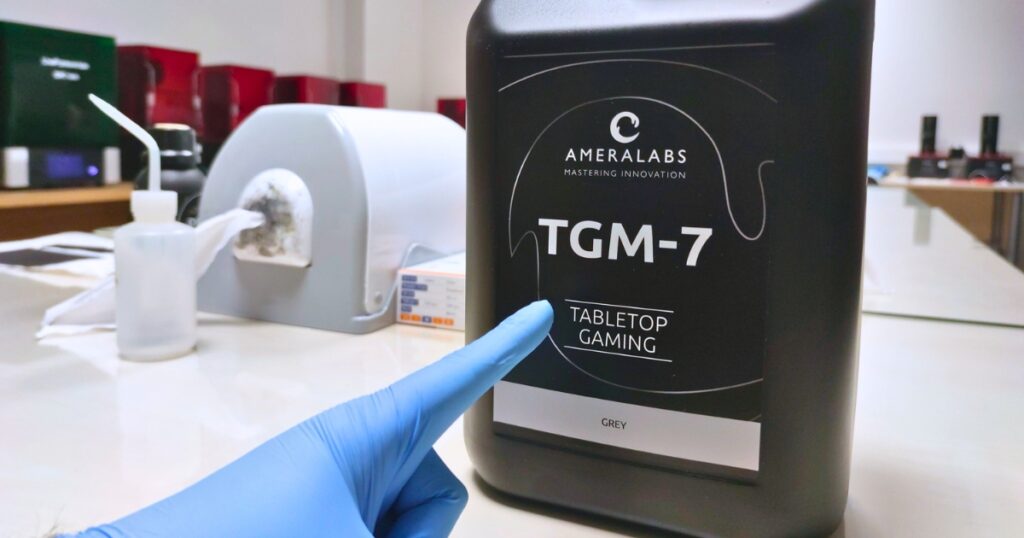
For miniatures that will be frequently handled, painted, or transported, prioritize tough or ABS-like resins designed for durability. Specialized options like TGM-7 resin excel in impact resistance, making them ideal for tabletop gaming. These resins can endure everyday handling, accidental drops, and rough treatment without shattering. While such resins may cost slightly more, the added durability is worth the investment – especially when a €1 increase per 28mm miniature can ensure its long-term survival during gameplay and transport.
Resins for Display Miniatures
For display models that emphasize intricate details and won’t be handled often, standard or less flexible resins are a better fit. Resins like AMD-3 provide exceptional precision and capture fine details beautifully. However, these resins tend to be more brittle and are less suited for miniatures exposed to regular use. The stiffness of these resins enhances detail clarity but comes at the cost of fragility, making them perfect for static displays or collectible pieces.
Avoiding Marketing Gimmicks
When choosing resins, don’t get swayed by exaggerated claims of 8K or 12K resolution. While higher resolution may sound impressive, detail quality largely depends on the resin’s formulation and printer settings, not just marketing buzzwords.
Additional Considerations
When selecting a resin, it’s important to consider the environmental and mechanical stresses your miniatures may encounter. For models that will face regular handling, transport, or exposure to varying conditions, focusing on specific mechanical properties can significantly enhance their durability and longevity:
- Tensile Strength: This measures the resin’s ability to withstand pulling forces without breaking. Miniatures with higher tensile strength are better equipped to endure stress during gameplay or assembly, reducing the risk of snapping or cracking.
- Impact Resistance: Perhaps one of the most critical properties for miniatures, impact resistance measures a resin’s ability to absorb shocks without breaking. A high-impact resin can prevent miniatures from shattering if dropped from a table during gameplay. Durable resins like TGM-7, known for their excellent balance of toughness and flexibility, provide peace of mind for those crafting and handling miniatures regularly.
- Elongation at Break: This property indicates how much a material can stretch or flex before it breaks. A higher elongation value means the resin has some flexibility, making it less prone to brittle failures during handling or minor impacts. Tough or ABS-like resins often excel in this area, making them ideal for functional miniatures.
- Low Water Absorption: For miniatures exposed to humid environments, paints, or washes, choosing a resin with low water absorption is crucial. This characteristic helps maintain the model’s dimensional stability, preventing warping, swelling, or degradation over time. This is particularly important for outdoor settings or display pieces that might encounter variable moisture levels.
Why These Properties Matter
Miniatures often undergo a lot of wear, whether during intense tabletop gaming sessions or as part of intricate paint jobs. Resins with balanced mechanical properties ensure that your miniatures not only survive these conditions but maintain their visual appeal and functionality over time. Additionally, investing in resins with these qualities can save you the frustration of seeing your creations fail under everyday use.
By considering these factors alongside the resin’s primary use – be it for gaming, display, or gifting – you can confidently produce high-quality miniatures that are as durable as they are detailed.
Investing time in selecting the right resin will yield models that are visually stunning and functionally reliable. Explore options like TGM-7 and AMD-3 to find the perfect fit for your miniature 3D printing projects. This thoughtful approach ensures your creations shine in your collection and on the tabletop!
Scaling Your Miniatures for 3D Printing: Precision Matters
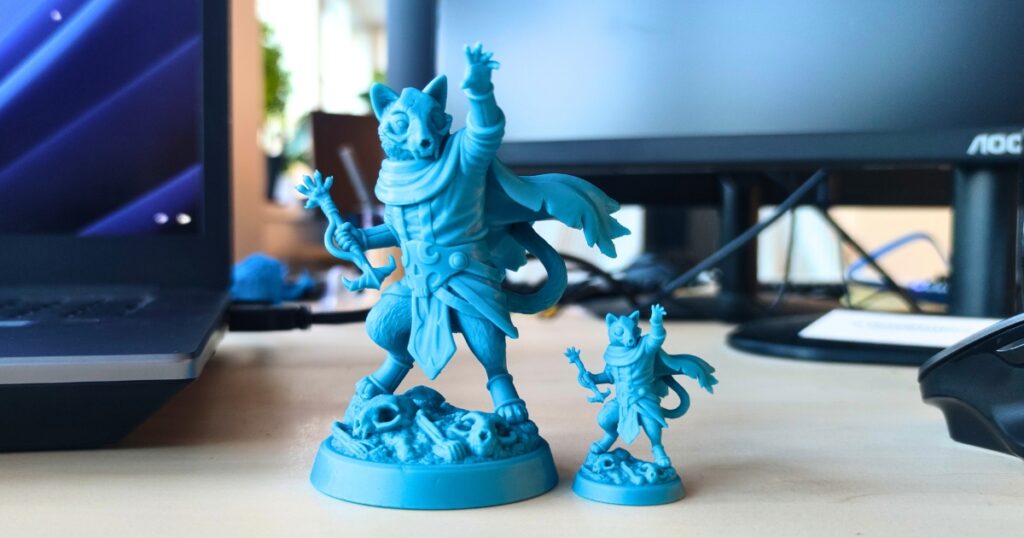
When it comes to miniature resin printing, selecting the right scale for your model can be crucial. While it’s not always necessary to scale miniatures, there are cases where adjusting the size may enhance their fit and function within your existing collection. Whether you’re crafting miniatures for wargaming or board games, ensuring the scale aligns with your current models can help maintain visual coherence on the tabletop.
Scaling Miniatures Down
Scaling down STL files can be an effective way to fit larger models onto your build plate, allowing you to create stunning resin miniatures without exceeding your printer’s capacity. While resizing offers flexibility, it’s crucial to approach this process carefully to avoid compromising the quality and success of your prints.
If you decide to scale down a model, it is absolutely necessary to rework the supports – and often the hollowing and drainage holes as well. When models are reduced significantly, pre-existing support structures can become too thin or fragile, leading to detachment during printing. This can result in failed prints, loss of intricate details, and wasted time and materials.
The only exception to this rule is if you’re scaling down by a very small margin – no more than 5%. Minor adjustments like these usually don’t affect the integrity of supports or hollowing, and prints can proceed without major modifications. However, any reduction beyond this threshold demands careful re-supporting, hollowing, and re-positioning of drainage holes to ensure a successful print.
Failing to properly prepare scaled-down models can lead to structural weaknesses and difficulties in the post-processing stage. By taking the time to rework and optimize your models for their new size, you can get high-quality prints that retain their original detail and durability.
Scaling Miniatures Up
Scaling up miniatures can be an excellent way to create visually striking centerpiece models or larger bosses for tabletop gaming. However, when resizing models to a larger scale, it’s crucial to approach the support structure thoughtfully to avoid potential issues.
While supports naturally thicken during scaling, this can lead to new challenges. Overly thick supports can leave noticeable marks on the model, make removal difficult, and risk damaging the surface detail. At the same time, scaling up increases the size of unsupported spans, or “bridges,” which can compromise the stability of the print.
To address these issues, it’s better to focus on increasing support density rather than relying on automatically thickened supports. Denser supports provide greater stability for larger models while minimizing the need for overly bulky structures. However, the scaled-up model should always be re-supported for the best outcome. This ensures optimal support placement, properly sized contact points, and balanced stability for successful prints.
Printer and Model Considerations
The decision to scale up a model should also account for the capabilities of your resin 3D printer. Smaller printers may struggle to accommodate larger models, requiring segmentation of the design or hollowing to reduce resin use. Conversely, larger printers can handle significant pieces but often demand careful adjustments to the model’s setup to ensure a flawless print.
Final Tips
Always compare the scaled dimensions to existing models in your collection to ensure consistency. Attention to scale and proportion enhances the visual coherence of your gaming setup, providing both aesthetic and practical benefits.
By carefully managing the scaling process, particularly with regard to support structures and density, you can produce breathtaking large-scale miniatures that serve as impressive highlights in your collection and gameplay. For more tips on scaling, visit our blog post, “Miniature Scale for 3D Printing“.
Hollowing Out Models: A Smart Approach for Certain Miniatures
Hollowing out models can be a smart strategy in resin printing, particularly for larger miniatures. This technique helps save resin and reduce print time, making it especially advantageous for sizable models that would consume significant material if printed solid. However, not all 3D printed miniatures need to be hollowed out; smaller or highly detailed models may retain their quality and structure better when printed solid.
Benefits of Hollowing Models for 3D Printing
For larger miniatures, hollowing can significantly reduce resin usage, making the printing process more economical. By creating hollow versions of your models, you can significantly reduce waste. This approach is particularly beneficial for larger tabletop gaming miniatures, where the overall weight and cost of materials can impact your project budget.
Preventing the Blooming Phenomenon
A major advantage of hollowing is its ability to mitigate the blooming phenomenon, which occurs when internal pressure builds up in solid prints during curing. This pressure can lead to surface imperfections. By hollowing your model and incorporating drainage holes, you allow excess resin to escape, reducing internal pressure and the risk of defects, ultimately improving print quality for your resin miniatures.
Addressing Suction Effects
When printing hollow models, it’s important to consider potential suction effects during the curing process. As resin cures, it can create a vacuum effect inside hollow areas, hindering adhesion to the build plate and potentially leading to warping. To combat this, add multiple drainage holes in strategic locations to equalize pressure and facilitate smooth resin flow during printing.
Tips for Hollowing Miniatures for 3D Printing
Hollowing models can save resin and improve print efficiency, but it requires careful planning to avoid common pitfalls that can lead to failed prints or trapped resin. Here are some essential tips to ensure successful hollowing:
- Optimal Wall Thickness
Aim for wall thicknesses of 2–3 mm when hollowing your model. This strikes a balance between maintaining structural integrity and reducing material usage. For smaller or highly intricate miniatures, consider leaving the model solid to avoid complications such as fragile walls or resin traps. - Avoid Closed Pockets
Carefully inspect your hollowed design for closed pockets – isolated hollow areas that aren’t connected to the main internal cavity. These can trap resin, leading to uncured sections inside your model, increasing weight, and risking long-term resin leakage. For small miniatures, hollowing may not be practical as it can unintentionally create such pockets. - Drainage Holes
Include at least two drainage holes to allow the resin to flow out during and after printing. Holes should be at least 3 mm in diameter for optimal drainage. Place them as close to the build plate as possible to ensure proper flow. Avoid positioning drainage holes where they will be heavily obscured by supports, as this can hinder their effectiveness. - Resin Flow and Cleanup
After printing, thoroughly rinse hollowed models to remove any residual resin inside. Properly placed drainage holes simplify this process, reducing the risk of clogs or leftover uncured resin.
Hollowing Miniatures: Summary
Hollowing is a powerful technique to save material and enhance print quality, but it requires attention to detail. Always review your design to eliminate closed pockets, strategically place drainage holes, and ensure proper wall thickness. This thoughtful preparation will help you produce flawless resin miniatures that are lightweight, durable, and ready for tabletop gaming or display.
Optimizing Layer Height, Exposure Times, and Supports for 3D Miniature Printing
When it comes to resin printing intricate tabletop miniatures, the interplay between layer height, exposure times, and support strategies can significantly impact your miniature quality. Each element plays a critical role in determining the quality, detail, and structural integrity of your prints. Striking the right balance between precision and efficiency is essential for producing miniatures that not only look stunning but also hold up well in gameplay or display.
Best Layer Height for Miniatures: Considerations
The layer height you choose is a critical factor in 3D printing miniatures. It determines how smooth your prints look and how visible the layer lines are. Using a smaller layer height – typically 20 to 50 microns – can significantly reduce these lines, creating cleaner and more professional-looking miniatures. This is especially important for detailed or display models.
Impact of Layer Height on Miniatures
The difference between prints at 100 microns and 50 microns is dramatic. At 100 microns, layer lines are much more noticeable, especially on curved surfaces. In contrast, 50 microns delivers sharper details and smoother finishes with less visible stepping. This improvement reduces the need for post-processing, such as sanding or excessive priming.
However, reducing layer height even further – to 20 microns – offers only marginal improvements. The finer lines may not be noticeable without close inspection, but printing times increase significantly. For most 3D-printed miniatures, the balance between quality and efficiency makes 50 microns a popular choice.
Key Considerations
- Layer Line Visibility: Smaller layer heights focus more on reducing layer line visibility than increasing detail.
- Purpose of the Miniature: Choose 20–30 microns for display pieces where a flawless finish is essential. For gaming pieces, 50 microns is sufficient and saves time.
- Time vs. Quality: Hobbyists printing multiple models may prefer higher layer heights for faster results. Those prioritizing exceptional finishes should invest in lower settings.
Finding the Balance
Selecting the best layer height for 3D printing miniatures depends on your goals. If you value speed, higher settings are more practical. For highly detailed, painted, or display miniatures, lower layer heights are worth the extra print time. Experimenting with different settings helps you find the perfect balance for your needs, ensuring your miniatures look their best while meeting your deadlines.
Best Exposure Times for 3D Printing Miniatures
Finding the optimal exposure time for resin printing is crucial to achieving high-quality miniatures with sharp details. Proper exposure settings strike a delicate balance: too short an exposure can lead to incomplete curing, resulting in weak layers and print failures, while excessive exposure may cause over-curing, blurring fine details and compromising the structural integrity of your miniatures.
To navigate this balance effectively, we highly recommend utilizing the AmeraLabs Town calibration part. This tool allows you to determine the ideal exposure settings tailored to your specific resin type, including flexible and durable options like TGM-7. Start by following the manufacturer’s guidelines for exposure times, then fine-tune your settings based on the outcome of calibration.
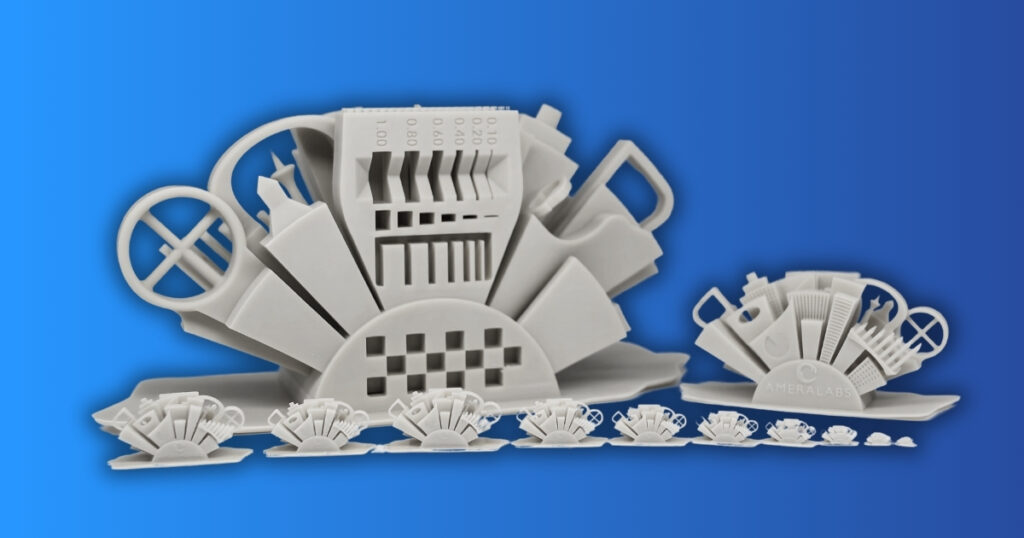
By adjusting your exposure times according to the recommendations from AmeraLabs Town, you can achieve optimal print quality. This ensures that your miniatures are not only visually stunning but also structurally sound. Fine-tuning your exposure settings can significantly enhance the success of your resin prints, leading to more precise and detailed miniatures for your tabletop games or display collections.
Optimal Model Orientation for 3D Printing: Avoiding Flat Surfaces
Correctly orienting your STL file is critical to achieving high-quality results in resin 3D printing. Proper model orientation not only reduces the risk of print failures but also preserves the intricate details that make 3D printing miniatures so appealing. Here’s a deeper dive into why orientation matters, how to optimize it, and what to watch out for during the process.
The Problem with Flat Orientations
Printing a model flat on the build plate can seem straightforward but often leads to significant challenges:
- Sharp Cross-Section Transitions: Large, flat surfaces can cause abrupt increases in cross-sectional area between layers. This sudden change generates higher separation forces during printing, increasing the likelihood of detachment from the build plate.
- Surface Imperfections: Flat orientations may leave visible layer lines or adhesion marks, particularly on the bottom-facing surfaces.
- Suction Effects: Flat surfaces create suction as resin cures between the model and the FEP film, which can damage the print or strain the printer’s mechanics.
Best Practices for Orienting Models
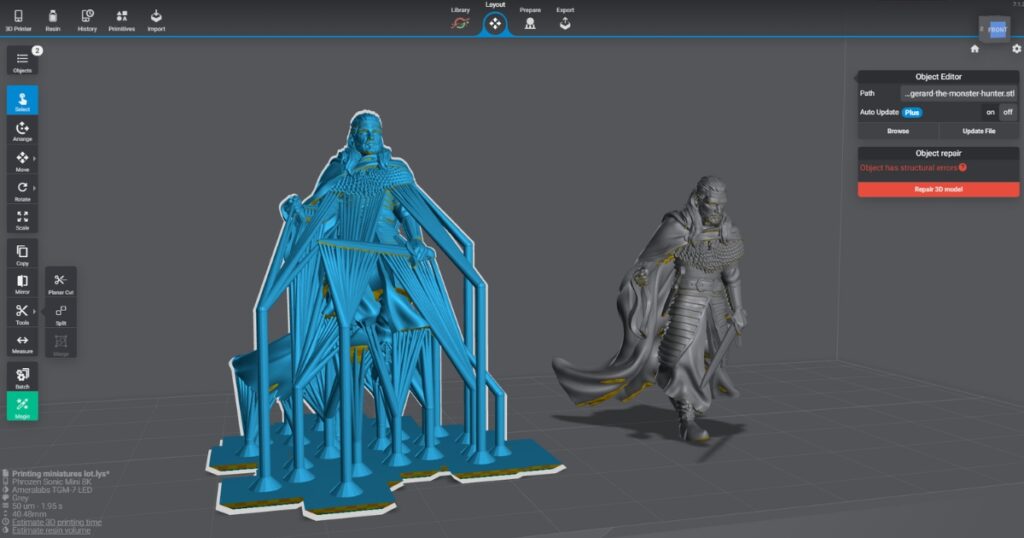
- Angle the Model:
Tilting your model slightly (30–45 degrees) during slicing can significantly improve print success. Angling reduces suction forces and promotes better resin drainage, preventing trapped resin in hollow models.- Tip: Check your slicer’s cross-section preview to avoid abrupt cross-sectional changes, even when tilting. Gradual transitions ensure even layer curing and reduce strain on the printer.
- Optimize Support Placement:
- Strategic Support Usage: Avoid placing supports on highly visible areas such as the face or decorative elements of your miniatures. Instead, place them in inconspicuous areas like the base or less detailed sections.
- Balanced Density: Use a mix of heavy supports for stability at the base and lighter supports for smaller islands and overhangs. This balance minimizes support marks while maintaining structural integrity during printing.
- Smooth Transitions:
When orienting, ensure that the model’s cross-sections evolve gradually. Abruptly increasing or decreasing the cross-section can result in stress points that lead to print failures.
Using Rafts and Drain Holes
For larger or hollow models, rafts and drain holes are indispensable:
- Rafts:
A raft provides a strong foundation for the print, improving adhesion to the build plate. This is especially helpful when printing complex or angled models, as it stabilizes the structure. - Drain Holes:
Hollowed miniatures need properly placed drain holes (at least 3 mm in diameter). These holes prevent resin from getting trapped inside, which can cause cracking or incomplete curing. Position the holes near the build plate and ensure they are not obstructed by supports.
Avoid Common Pitfalls
- Tilting Isn’t Always Better:
While tilting often reduces suction, it can sometimes increase cross-sectional areas in unintended places. Carefully evaluate how each slice transitions to avoid introducing new weak points. - Model Detail Preservation:
Pay attention to the model’s visible surfaces. Orient the miniature to minimize exposure of detailed or decorative areas to supports. - Use Slicer Tools Effectively:
Leverage tools like cross-section previews and support placement features in slicer software (e.g., Lychee, Chitubox) to identify potential problem areas.
Why Orientation Matters for 3D Printing Miniatures
Resin 3D printing miniatures requires meticulous attention to orientation because of the intricate details involved. Improper orientation can result in:
- Visible Layer Lines: These are especially noticeable on flat surfaces or steep overhangs.
- Lost Details: Poorly oriented models can obscure or damage fine details, especially when supports are removed.
- Failed Prints: Abrupt transitions, suction effects, or trapped resin often lead to incomplete or failed prints.
Key Takeaways for Optimizing Model Orientation
- Avoid flat orientations unless printing bases or simple components.
- Angle the model to reduce suction and enhance resin drainage.
- Use rafts for stability and ensure hollow models have adequate drain holes.
- Evaluate cross-sections carefully to avoid abrupt transitions.
- Strategically place supports to minimize damage to visible details.
Proper orientation is a cornerstone of successful resin 3D printing miniatures. By paying attention to these details and using slicer tools effectively, you can produce highly detailed, durable, and visually stunning miniatures that stand out in any collection or gaming setup.
Supporting Miniatures for 3D Printing
Properly supporting miniatures is critical for achieving consistent success in resin printing. Effective support placement and sizing reduce print failures and protect the intricate details of your models. Below are strategies and tips for optimizing your support setup:
Choose the Right Support Types
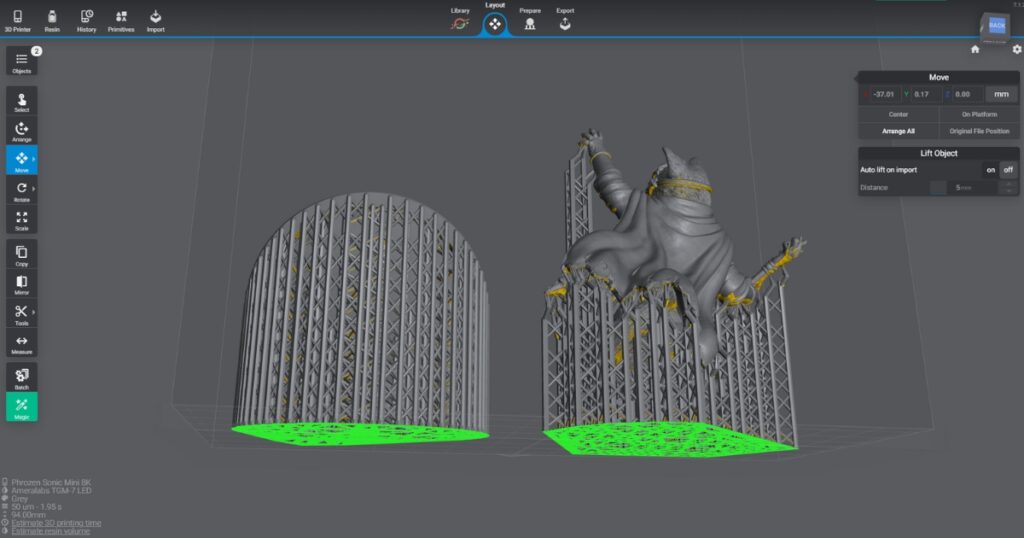
- Use anchoring supports (0.5–0.6 mm tips) at the base of your model to secure it firmly to the build plate.
- Apply medium supports (0.25–0.3 mm tips) for larger areas and stable overhangs.
- For smaller details or isolated islands, utilize small supports (0.15–0.2 mm tips).
- Match support size to island size: small supports are sufficient for tiny islands, but larger islands may need a mix of medium and small supports for stability. Heavy supports are best for stabilizing the entire model, especially for heavier prints.
Support Density and Placement
- Smaller models: A density of 60%–80% is often sufficient, focusing on areas with overhangs or fragile details.
- Larger models: Increase density to 80%–100% and use heavier supports (0.6 mm tips or larger) to handle increased separation forces.
- Certain resins, such as TGM-7, may require slightly denser support layouts to ensure consistent success during printing.
Experiment and Learn
Mastering support strategies requires time and experimentation. Adjust settings based on the specific requirements of each model. When done well, optimized supports minimize marks, simplify removal, and reduce post-processing effort.
Resources for Mastery
- 3D Printing Pro: Offers excellent tutorials on support strategies.
- Lychee and Chitubox official guides: Provide model-specific tips for optimizing your support setups.
By refining your approach to supports, you’ll create miniatures with fewer imperfections, better detail preservation, and smoother post-processing. The time invested in honing these techniques will elevate the quality of your resin printing projects, creating stunning pieces for your tabletop or display.
Setting Up Your Resin 3D Printer
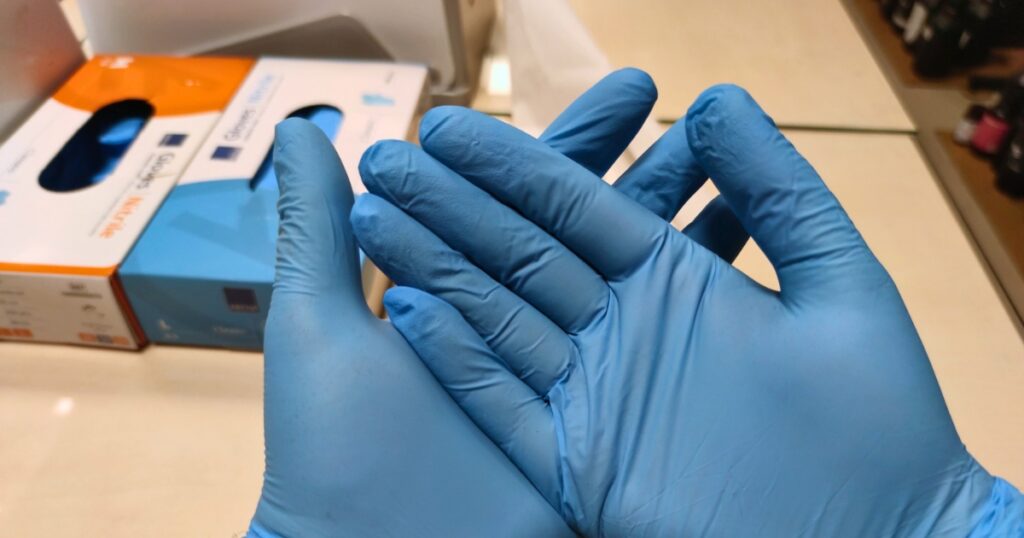
Setting up your resin 3D printer is a crucial first step towards 3D printing miniatures successfully. Begin by placing the printer on a stable, level surface. Keep it away from direct sunlight, as it can negatively impact print quality. Always wear appropriate personal protective equipment (PPE), including gloves, a respirator, and a lab coat, to ensure safe handling of the resin.
Before loading resin, check the build plate and vat for cleanliness. Remove any debris or leftover resin from previous prints.
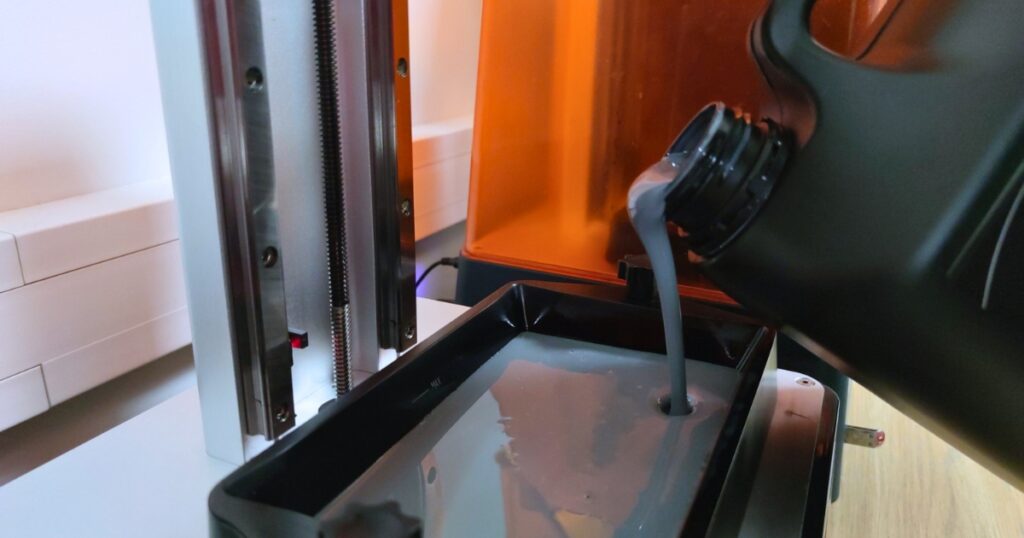
Leveling the build plate is essential for 3D printing miniatures. Follow the manufacturer’s instructions carefully to ensure proper first-layer adhesion, which is critical for success. Once leveled, shake the resin bottle thoroughly to mix it well. Then, pour the resin into the vat, filling it to the recommended level without exceeding the MAX markings.
After completing these initial steps, it’s time for calibration. We recommend using the AmeraLabs Town calibration part and its accompanying guide for a smooth calibration experience. Remember to repeat calibration each time you change resin or at least once every few months to maintain print quality.
By following these setup steps diligently, you ensure your resin 3D printer is ready for 3D printing miniatures. This preparation will help elevate your tabletop gaming experience. For more tips on creating an optimal print environment, check out our blog post, “Business Resin Printing Setup Guide & Checklist.”
3D Printing Your Miniatures
With your STL file, resin, and resin 3D printer all set up, you’re ready to start the miniature printing process. Load your selected STL file into the printer’s menu and check the estimated print time displayed on the screen. It’s crucial to maintain a room temperature of at least 23°C (73°F) for optimal quality, as cooler temperatures can increase the likelihood of print failures, impacting your tabletop gaming miniatures.
Once the printer is ready for printing, tap the print button and wait until your printer finishes printing the miniature.
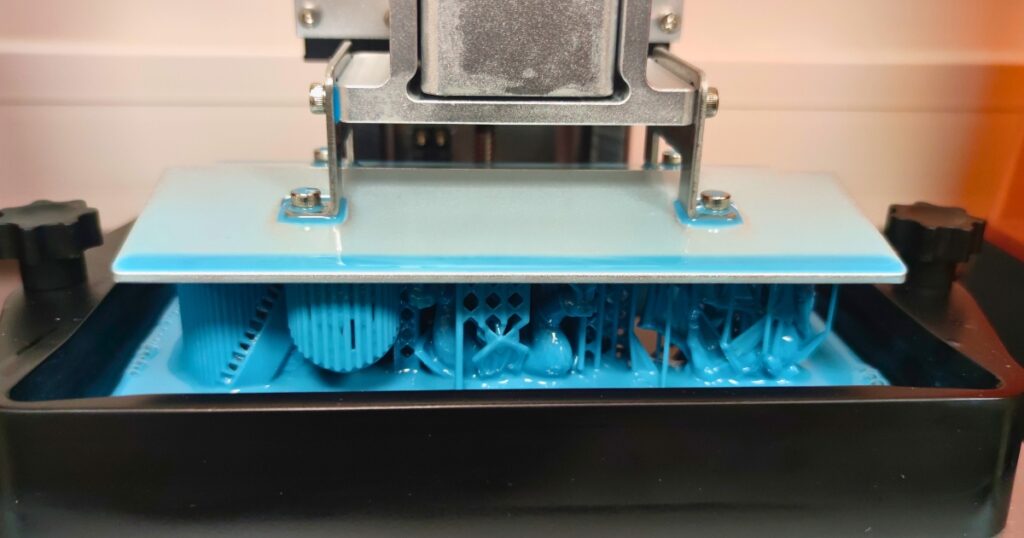
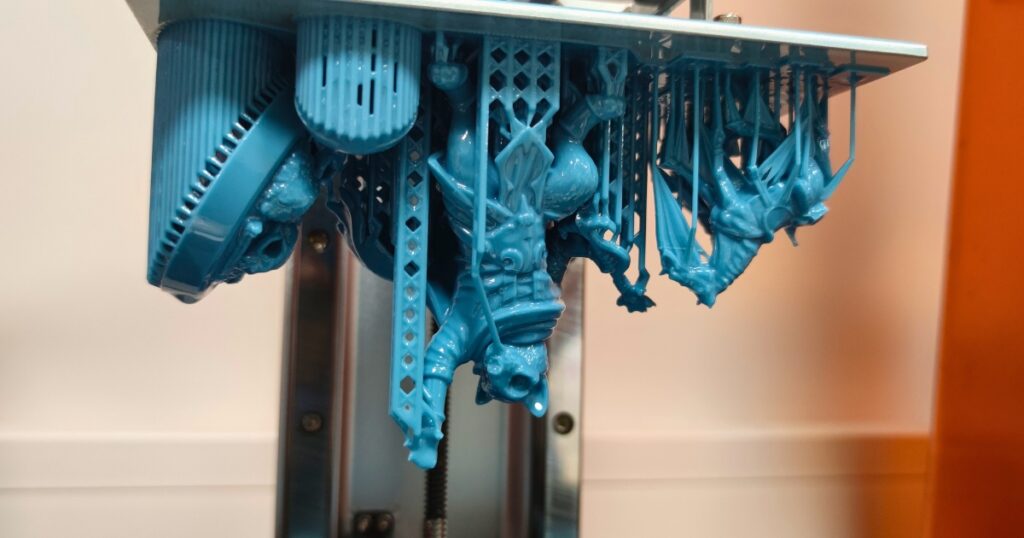
When the printing process is complete, carefully remove the build plate from the printer. Use a paint scraper to detach the model from the build plate, ensuring you do not damage any intricate details. At this stage, decide whether to remove supports before or after washing the print.
Removing supports before washing offers advantages, such as reducing contamination of isopropyl alcohol (IPA) and decreasing overall washing time. Conversely, leaving supports on during washing can protect the surface of your resin miniatures and help maintain their structural integrity. Whichever method you choose, handle the print gently, as the surface tends to be softer and more susceptible to scratching before post-curing. By following these steps, you establish a solid foundation for producing intricate and high-quality resin miniatures that will enhance your tabletop gaming experience.
Post-Processing Your 3D-Printed Miniatures
Transforming your 3D-printed resin miniatures into polished, display-ready pieces requires proper post-processing. These steps will help you achieve smoother surfaces, sharper details, and better durability, ensuring your models are ready for painting or gaming.
Cleaning Your Miniatures
Start by thoroughly cleaning your miniatures to remove any uncured resin. Use isopropyl alcohol (IPA) baths, a washing station, or an ultrasonic cleaner for the best results. Follow the resin manufacturer’s recommendations, especially for specialized options like TGM-7 resin, to avoid damage during this step.
Once washed, allow your miniatures to dry completely. A compressed air gun can speed up drying and help remove resin trapped in crevices. After drying, carefully inspect the miniatures to ensure no uncured resin remains before moving on.
Removing Supports
If you left supports on during washing, remove them now. Use pliers or a modeling knife to gently detach the supports. Work slowly to avoid damaging detailed areas, particularly on visible parts like faces or intricate accessories. Reducing the need for heavy sanding later is crucial to preserving fine details.
Post-Curing
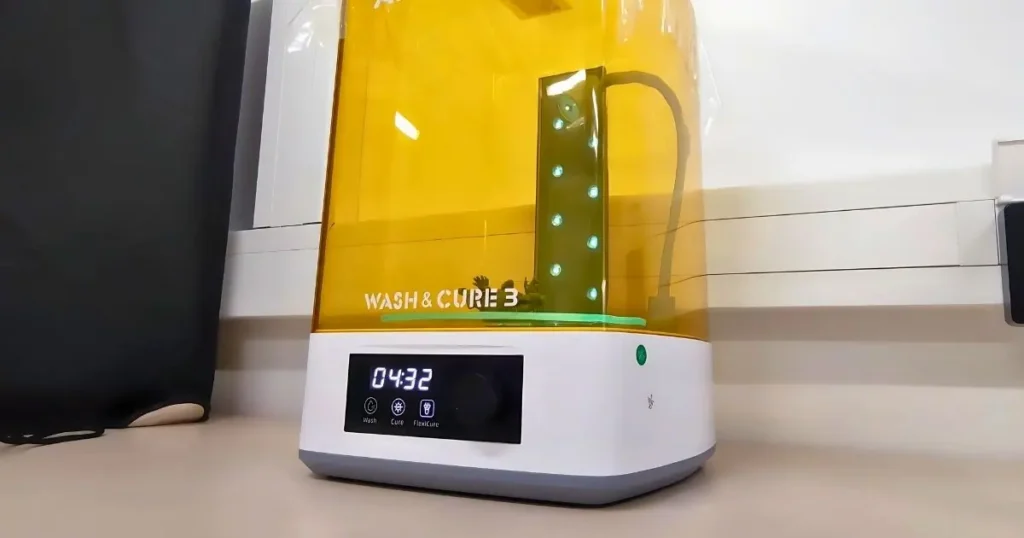
Post-curing hardens the resin and ensures the miniatures are durable and stable. Place your miniatures in a curing station or under a UV light source. Rotate or reposition the models periodically to achieve an even cure. Proper curing enhances the miniatures’ durability and prepares them for further finishing steps.
Sanding for Smooth Surfaces
After curing, examine your miniatures for imperfections, such as support marks or uneven surfaces. Begin sanding with 150–220 grit sandpaper to address rough areas. Progress to finer grits – 400–800 grit for moderate refinement and 1000–2000 grit for a polished finish. Sand carefully to preserve intricate details while achieving a flawless surface.
Priming for Durability and Paint Adhesion
Priming is the final step before painting. A thin, even coat of primer improves paint adhesion and creates a consistent base layer. High-quality primers also protect your miniatures from environmental factors like UV exposure and moisture. Apply primer sparingly to avoid obscuring fine details.
By carefully executing these steps, you’ll elevate your 3D-printed resin miniatures to a professional level. Clean, cure, sand, and prime each piece to achieve smooth finishes and enhanced durability, making them perfect for tabletop gaming or display. Taking the time to post-process properly ensures your models will stand out and last for years to come.
Painting Your 3D Printed Miniatures
Painting your 3D-printed miniatures is the stage where your creativity can truly shine. After the post-curing process, it’s important to ensure your miniatures are clean and completely dry before you begin. Priming is a crucial first step, as it helps the paint adhere better and provides a smooth, even surface for the colors to sit on. Choose a primer that’s designed specifically for resin models and apply it in thin, even coats. This ensures a solid foundation for the subsequent layers of paint.
Selecting a Color Scheme
Once your miniatures are primed, it’s time to consider your color scheme. Understanding color theory is key to creating visually striking effects. For example, complementary colors can make your miniatures really stand out on the tabletop. When applying paint, remember to use thin layers to preserve fine details and prevent the paint from becoming too thick or obscuring any of the intricate features of your models. A fine brush will be your best tool for reaching smaller, more detailed areas without accidentally spilling paint onto adjacent surfaces.
Adding Depth and Detail
After you’ve applied the base colors, the next step is to add depth and detail to your miniatures. Use techniques like shading to darken the recessed areas and create contrast and highlighting to emphasize raised surfaces. A simple wash is perfect for deepening shadows, while dry brushing can bring out the finer details by gently brushing paint over raised surfaces. These methods give your miniatures a more dynamic and realistic appearance, enhancing the visual impact.
Weathering Effects
For an added layer of realism, consider incorporating weathering effects. These can range from subtle details like dirt, rust, and grime, to more extreme effects like battle damage. Weathering techniques can bring a unique character to your miniatures, giving them a worn and lived-in look that makes them even more engaging in your collection or on the battlefield.
Sealing the Miniatures
Finally, once your miniatures are painted to your satisfaction, seal them with a protective varnish. This step is crucial for ensuring the durability of your paint job during gameplay. The varnish will protect your miniatures from wear and tear, preserving your hard work and keeping them looking great for countless tabletop adventures.
By following these painting tips, your resin miniatures will not only look stunning but also stand up to the rigors of gameplay. Don’t be afraid to experiment with different techniques and paint styles – this is where you can truly develop your unique artistic touch!
Common Issues and Troubleshooting
When 3D printing miniatures, various issues can arise during the printing and post-processing phases. Understanding these common problems allows you to troubleshoot effectively for successful resin prints.
1. Poor First Layer Adhesion
One of the most frequent issues is poor adhesion of the first layer. This problem can result in prints detaching from the build plate during the process. First, To fix this, increase bottom exposure, then ensure your build plate is level and clean. Additionally, double-check that the printer settings, including exposure time, align with the resin specifications. If prints continue to fail, consider adjusting the room temperature. Keeping it consistently above 23°C (73°F) enhances print quality and adhesion.
2. Unwanted Supports or Marks
One common challenge when 3D printing miniatures is dealing with unwanted supports or the marks they leave behind. If you find supports difficult to remove, use pliers or a model knife carefully. Be gentle to avoid damaging intricate details on your miniatures.
To make support removal easier, consider adjusting the support settings in your slicing software. Increasing the support density, while reducing the size of the support tips, can make the supports easier to remove without damaging your print. This adjustment provides more stable supports while keeping them less intrusive, ensuring a smoother post-processing experience.
For any imperfections that remain, sanding can significantly improve the surface finish. Start with lower grit sandpaper to remove rough spots, then transition to finer grit for a smoother, more polished result. Additionally, using a hot air gun or dipping the miniatures in hot water can help make support removal easier, as the resin becomes more flexible, reducing the risk of damaging the model.
3. Warping or Bending After Curing
Miniatures may sometimes warp or bend after the curing process. One of the causes of warping might be that your prints absorb uncured resin. To prevent this, do not leave minis on the build plate, and wash the prints as soon as possible. It is also important to ensure proper post-curing conditions. Use a UV cure station to provide even exposure, and remember to flip your miniatures over during the process for consistent curing. This practice helps eliminate unevenness and ensures your models maintain their intended shape.
4. Uncured Resin Residue
Finding uncured resin residue on your prints can be frustrating. Thorough washing is crucial to remove this residue effectively. Use isopropyl alcohol (IPA) or an ultrasonic cleaner, and be sure to follow the manufacturer’s recommendations for your specific resin, such as TGM-7 or AMD-3. A careful washing process can save you from potential health risks associated with uncured resin.
5. Layer Misalignment
Layer misalignment results in visible lines or uneven layers that disrupt the smooth appearance of your finished print. This common issue often arises from z-axis instability or insufficient support structures. A wobbly z-axis can cause layers to shift slightly during the printing process, while weak or improperly placed supports fail to stabilize the model, leading to misaligned layers.
To address z-axis issues, check that the z-axis screw and rods are secure and well-lubricated. Tighten any loose components, and ensure the printer is placed on a stable, level surface to minimize vibrations. If support structures are the cause, refine your slicer settings. Adding thicker supports or increasing the density of light supports can provide better stability for delicate or overhanging parts. Additionally, consider adjusting the contact size of support tips – larger tips can offer more reliable adhesion to the model without being too difficult to remove post-print.
Taking these steps not only resolves layer misalignment but also improves the overall quality of your prints. For more in-depth troubleshooting tips and advanced solutions, visit our blog post on layer misalignment in resin 3D printing.
By recognizing and addressing these common issues, you can improve your 3D printing miniatures experience. Remember, troubleshooting is a normal part of the process, so keep experimenting and refining your techniques! For more troubleshooting tips, visit our Troubleshooting Guide.
Advanced Tips for Experienced Users
For those experienced in 3D printing miniatures, exploring advanced techniques can elevate your miniature quality. Here are several tips to enhance your miniature printing process.
Custom Supports
Creating custom supports can improve your print quality. Use your slicing software to add supports tailored to your model’s shape. This method reduces the chances of unwanted marks and ensures better protection during printing. Custom supports can also be designed to minimize contact with intricate details, making post-processing easier.
Material Experimentation
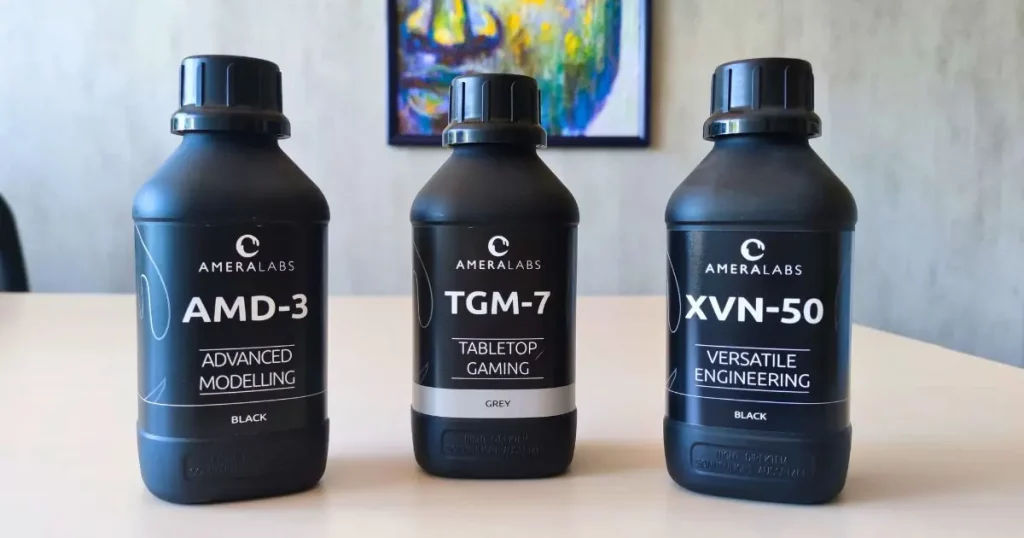
Don’t hesitate to experiment with different resins. Each type of resin offers unique properties that can affect your final prints. For instance, TGM-7 is excellent for durable miniatures that see regular play. Meanwhile, AMD-3 provides high detail and is suitable for display models & minis. Trying various resins can help you discover the best fit for your specific projects.
Community Engagement
Engaging with the 3D printing community can provide valuable insights. Participate in online forums and social media groups focused on miniature 3D printing. Sharing experiences and asking for advice can lead to new techniques and ideas. Community members often share their challenges and solutions, which can help you avoid common pitfalls.
Mastering Scale
Understanding how to master scale in your miniatures is crucial. Scaling your model correctly ensures it fits well with other miniatures in your tabletop games. Always check the dimensions of your model before printing. Use your slicing software to adjust the scale as needed. This practice guarantees consistency across your entire collection.
Optimize Slicing Settings
Lastly, fine-tune your slicing settings. Review settings like layer height, exposure times, and anti-aliasing options. These adjustments can significantly impact the quality of your prints. Regularly revisit your slicing settings, especially when switching between different types of miniatures or resin.
By applying these advanced tips, you can enhance your 3D printing miniatures experience. Keep pushing the boundaries of what you can create!
3D Printing Miniatures: Conclusion
In conclusion, 3D printing miniatures opens up a world of creativity and customization for tabletop gaming enthusiasts. With the right techniques, you can produce detailed, high-quality models that enhance your gaming experience. Start by selecting your STL files wisely and preparing your printer carefully.
Don’t forget to experiment with different resins to find what works best for your specific needs. Post-processing is crucial for achieving a polished final product, so take your time cleaning, curing, and painting your miniatures. Additionally, troubleshooting common issues will help you avoid frustration and ensure successful prints.
As you gain more experience, apply advanced tips like custom supports and material experimentation. Engaging with the community can also provide insights and inspiration.
We encourage you to share your results and experiences with others. Whether you are a beginner or an experienced user, your contributions help build a vibrant community. Feel free to experiment, learn, and enjoy the journey of 3D printing miniatures!
Frequently Asked Questions
Q: What is the best resin for 3D printing miniatures?
A: The best resin for 3D printing miniatures, such as AmeraLabs TGM-7, balances durability and detail. TGM-7 offers flexibility to prevent breakage during gaming, a non-sticky surface for easy painting, and high resolution for intricate details like scales or armor. It’s ideal for tabletop minis, with a hardness of 75-85 Shore D and tensile strength of 35-40 MPa. For display models, consider AmeraLabs AMD-3 for its precision and fast curing. Always match resin to your printer’s UV wavelength (365–420 nm for TGM-7).
Q: How do I choose the right layer height for 3D printing miniatures?
A: Layer height affects detail and print time. For miniatures, 20–50 µm is optimal for sharp details without excessive print times. For example, 20 µm captures very fine features like dragon scales, while 50 µm suits models with decent quality. Test heights using AmeraLabs Town to find the sweet spot for your printer and resin, like the Elegoo Mars 4 DLP with TGM-7. Lower heights (10 µm) enhance detail but increase print time significantly. For more insights, delve into our blog post “Best Layer Height for Miniatures: 10µm–100µm Tested”.
Q: How do I calibrate my resin 3D printer for miniatures?
A: Calibrate your printer using the AmeraLabs Town calibration part, a free STL file designed for resin printers. Print it to test exposure settings, resin viscosity, and detail accuracy. Check for clean gaps between structures and slots (0.1–1.0 mm) to ensure proper curing. Adjust exposure if slots are closed or overly wide. Repeat calibration every few months or when switching resins to maintain quality for tabletop minis.
Q: What temperature should I maintain for resin 3D printing?
A: Maintain a room temperature of at least 23°C (73°F) for optimal resin 3D printing. Cooler temperatures below 20°C can cause print failures due to increased resin viscosity, leading to issues like layer misalignment or incomplete curing. Pre-warm resin bottles before pouring to ensure consistent flow, especially for detailed miniatures. A heated chamber, like on the Uniformation GK3 Ultra, can help stabilize temperatures.
Q: How do I prevent print failures when 3D printing miniatures?
A: To avoid print failures, ensure proper printer calibration with AmeraLabs Town, use custom supports tailored to your model’s shape, and maintain a clean workspace to prevent resin contamination. Check FEP film tension and clean the resin vat regularly. For larger models, hollow them to reduce resin use and suction forces. If only supports print, increase exposure time or adjust lift height (7–10 mm for most printers). Consult our guide for troubleshooting.
Q: Can I use 3D-printed miniatures for Warhammer or D&D games?
A: Yes, 3D-printed miniatures are perfect for Warhammer, D&D, and other tabletop games, but ensure they’re “game-neutral” to avoid copyright issues. Use original STL files from platforms like MyMiniFactory (MyMiniFactory) or create proxies like “Void Paladin” instead of “Grey Knight.” Check tournament rules, as some, like Games Workshop’s, may require official miniatures. To learn how you can use your 3D printing skills to boost your Warhammer hobby, consult our “3D Printing for Warhammer” blog post.
Q: How do I scale miniatures correctly for 3D printing?
A: Scaling depends on your printer’s build volume and desired miniature size (e.g., 28mm for wargaming). Use slicing software like Chitubox to adjust scale, ensuring consistency with existing models in your collection. For larger models, segment designs or hollow them to save resin. Always verify scaled dimensions and add custom supports for stability. Refer to AmeraLabs’ “Miniature Scale for 3D Printing” guide for detailed conversions.
Q: What safety measures should I follow when 3D printing miniatures?
A: Wear nitrile gloves, a respirator with VOC filters, and a lab coat when handling uncured resin, as it’s toxic in liquid or semi-cured states. Work in a well-ventilated area and avoid skin contact. Clean prints thoroughly before handling, and post-cure them immediately to eliminate stickiness. Store resin away from sunlight and dispose of waste per local regulations. Check AmeraLabs’ “Business Resin Printing Setup Guide” for more safety tips.
Q: Where can I find free STL files for 3D printing miniatures?
A: Free STL files for miniatures are available from creators like Maxs Magnificent Minis, The Printing Goes Ever On or Dragon Trappers Lodge. Platforms like MyMiniFactory and Cults3D offer high-quality, game-neutral designs. Always ensure STL files are from reputable sources to avoid mesh errors.
Q: How do I post-process 3D-printed miniatures for painting?
A: After printing, clean miniatures with isopropyl alcohol to remove uncured resin, then post-cure them in a UV station for 5–60 minutes until non-sticky. Remove supports before or after curing, depending on model geometry, using flush cutters for clean cuts. Sand support marks with fine-grit sandpaper and apply a spray primer to enhance paint adhesion. TGM-7’s opaque surface is ideal for painting without extra prep.
Related Posts
- 3D Printing for Warhammer – Curious how to customize gaming minis? This has some handy tricks.
- Miniature Scale for 3D Printing – Messing up mini sizes? This helps you get them spot on.
- Resin 3D Printing Troubleshooting: A Comprehensive Guide – Sick of print fails? This fixes the usual headaches.
- Scaling Miniature Production with 3D Printing – Want to make more minis as a side gig or full-time business? This shows you how to step it up.
- 3D Design Parts SLA 3D Printing – Need unique minis? This makes designing them simple.
Making minis? Drop by our shop for resins that’ll sort out your printing woes!
